In this tutorial, you will create a very simple job so that you get an idea of what jobs are about.
Although you will now learn how to create a job, for this tutorial you first have to create a transformation.
- Open Spoon.
- Create a new transformation.
- Drag a Generate rows step to the canvas and double-click it.
- Add a
Stringvalue namedmessage, with the valueHello, World!. - Click on OK.
- Add a Text file output step and create a hop from the Generate rows step to this new step.
- Double-click the step.
- Type
${LABSOUTPUT}/chapter10/helloas filename. - In the Fields tab, add the only field in the stream—message.
- Click on OK.
- Inside the folder where you save your work, create a folder named
transformations. - Save the transformation with the name
hello_world_file.ktrin the folder you just created. The following is your final transformation: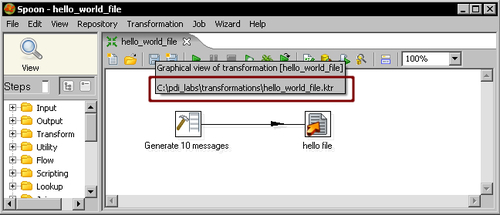
Now you are ready to create the main job.
- Select File | New | Job or press Ctrl+Alt+N. A new job is created.
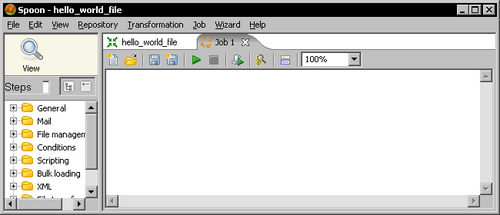
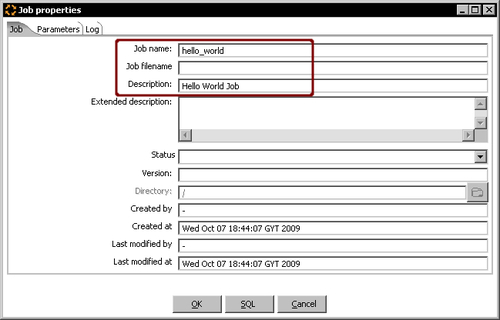
- Press Ctrl+J. The Job properties window appears.
- Give a name and description to the job.
- Save the job in the folder where you created the
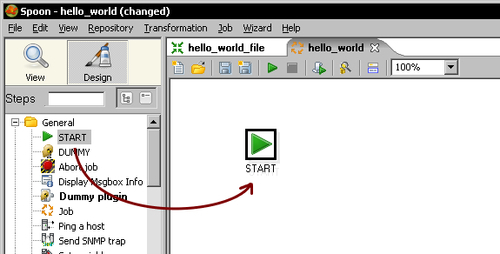
transformationsfolder, with the namehello_world.kjb. - To the left of the screen, there is a tree with job entries. Expand the General category of job entries, select the START entry, and drag it to the work area.
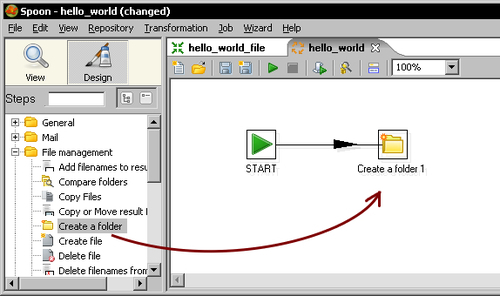
- Expand the File management category, select the Create a folder entry, and drag it to the canvas.
- Select both entries. With the mouse cursor over the second entry, right-click and select New hop. A new hop is created.
Tip
Just like in a transformation, you have several ways to create hops. For more detail, please refer to the Time for action - creating a Hello Word transformation section in Chapter 1 where hops were introduced or to Appendix D, Spoon Shortcuts.
- Double-click the Create a folder...icon.
- In the textbox next to the Folder name option, type
${LABSOUTPUT}/chapter10and click on OK. From the General category, drag a transformation job entry to the canvas. - Create a hop from the Create a folder entry to the transformation entry.
- Double-click the transformation job entry.
- Position the cursor in the Transformation filename textbox, press Ctrl+Space, and select
${Internal.Job.Filename.Directory}.Note
This variable is the counterpart to the variable
{Internal.Transformation.Filename.Directory}you already know.{Internal.Job.Filename.Directory}evaluates the directory where the job resides.
- Click on the icon to the right of the textbox. The following dialog window shows up:
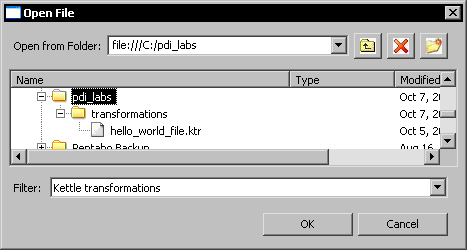
- As you can see, the
{Internal.Job.Filename.Directory}variable provides a convenient starting place for looking up the transformation file. Select thehello_world_file.ktrtransformation and click OK. - Now the Transformation filename has the full path to the transformation. Replace the full job path back to
${Internal.Job.Filename.Directory}so that the final text for the Transformation filename field is as shown in the following screenshot: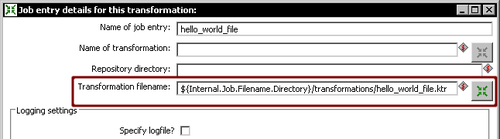
- Click on OK.
- Press Ctrl+S to save the job.
- Press F9 to run the job. The following window shows up:
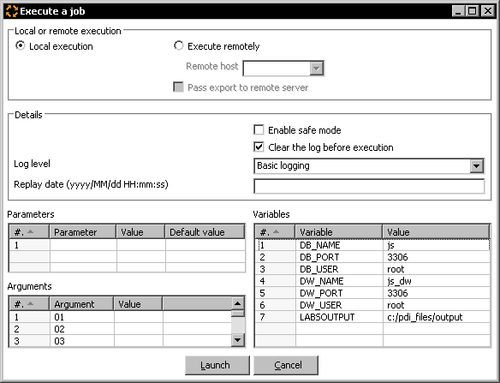
- Click on Launch.
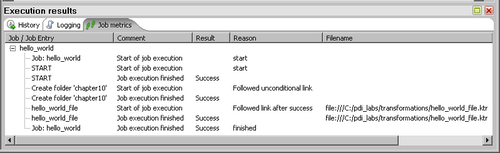
- At the bottom of the screen, you'll see the Execution results. The Job metrics screen looks as follows:
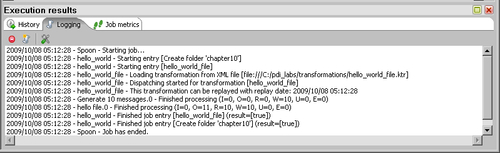
- Select the Logging tab. It looks like this:
- Explore the folder pointed to by your
${LABSOUTPUT}variable—for example,c:/pdi_files/output. You should see a new folder namedchapter10. - Inside the
chapter10folder, you should see a file namedhello.txt. - Explore the file. It should have the following content:
Message
Hello, World!
Hello, World!
Hello, World!
Hello, World!
First of all, you created a transformation that generated a simple file with the message Hello, World!. The file was configured to be created in a folder named chapter10.
After that, you created a PDI Job. The job was built to create a folder named chapter10 and then to execute the hello_world transformation.
When you ran the job, the chapter10 folder was created, and inside it, a file with the Hello, World! message was generated.
A Job is a PDI entity designed for the execution of processes. In the tutorial, you ran a simple process that created a folder and then generated a file in that folder. A more complex example could be the one that truncates all the tables in a database and loads data in all the tables from a set of text files. Other examples involve sending e-mails, transferring files, and executing shell scripts.
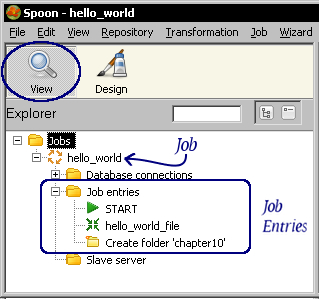
The unit of execution inside a job is called a job entry. In Spoon you can see the entries grouped into categories according to the purpose of the entries. In the tutorial, you used job entries from two of those categories: General and File management.
Most of the job entries in the File management category have a self-explanatory name such as Create a folder, and their use is quite intuitive. Feel free to experiment with them!
As to the General category, it contains many of the most used entries. Among them is the START job entry that you used. A job must start with a START job entry.
Note
Don't forget to start your sequence of job entries with a START. A job can have any mix of job entries and hops, as long as they start with this special kind of job entry.
A Hop is a graphical representation that links two job entries. The direction of the hop defines the order of execution of the job entries it links. Besides, the execution of the destination job entry does not begin until the job entry that precedes it has finished. Look, for example, at the job in the tutorial. There is an entry that creates a folder, followed by an entry that executes a transformation. First of all, the job creates the folder. Once the folder has been created, the execution of the transformation begins. This allows the transformation to assume that the folder exists. So, it safely creates a file in that folder.
A hop connects only two job entries. However, a job entry may be reached by more than one hop. Also, more than one hop may leave a job entry.
A job, like a transformation, is neither a program nor an executable file. It is simply plain XML. The job contains metadata that tells the Kettle engine which processes to run and the order of execution of those processes. Therefore, it is said that a job is flow-control oriented.
As you just saw, with Spoon you not only create, preview, and run transformations, but you also create and run jobs.
You are already familiar with this graphical tool, so you don't need too much explanation about the basic work areas. So, let's do a brief review.
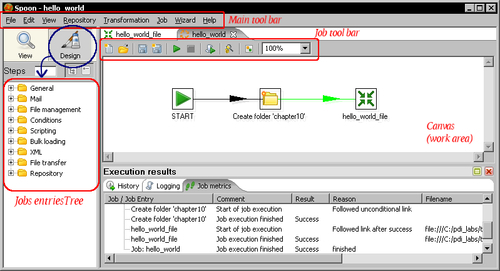
The following table describes the main differences you will notice while designing a job compared to designing a transformation:
|
Area |
Description |
|---|---|
|
Design tree |
You don’t see a list of steps but a list of job entries (despite on top of the list you see the word Steps). |
|
Job menu |
You no longer see some options that only have sense while working with datasets. One of them is the Preview button. |
|
Job metrics tab (Execution results window) |
Instead of a Step Metrics, you have this tab. Here you can see metrics for each job entry. |
If you click the View icon in the upper-left corner of the screen, the tree will change to show the structure of the job currently being edited.
The transformation job entry allows you to call a transformation from a job.
There are several situations where you may need to use a transformation job entry.
In the tutorial, you had a transformation that generated a file in a given folder. You called the transformation from a job that created that folder in advance. In this case, the job and the transformation performed complementary tasks.
Sometimes the job just keeps your work organized. Consider the transformations that loaded the dimension tables for the js database. As you will usually run them together, you can embed them into a single job as shown in this figure:
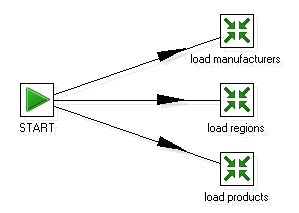
The only task done by this job is to keep the transformations together. Although the picture implies the entries are run simultaneoulsy, that is not the case.
Note
Job entries typically execute sequentially, this being one of the central differences between jobs and transformations.
When you link two entries with a hop, you force an order of execution. On the contrary, when you create a job as shown in this preceding figure, you needn't give an order and the entries still run in sequence, one entry after another depending on the creation sequence.
Tip
Launching job entries in parallel
As the transformations that load dimensions are not dependent on each other, as an option, you can ask the START entry to launch them simultaneously. For doing that, right-click the START entry and select Launch next entries in parallel. Once selected, the arrows to the next job entries will be shown in dashed lines. This option is available in any entry, not just in the START entry.
The jobs explained earlier are just two examples of how and when you use a transformation job entry. Note that many transformations perform their tasks by themselves. In that case you are not forced to embed them into jobs. It makes no sense to have a job with just a START entry, followed by a transformation job entry. You can still execute those transformations alone, as you used to do until now.
- A job is:
a. A big transformation that groups smaller transformations
b. An ordered group of task definitions
c. An unordered group of task definitions
- For each of the following sentences select True or False. A job allows you to:
a. Send e-mails
b. Compare folders
c. Run transformations
d. Truncate database tables
e. Transfer files with FTP