
62 Part 2: Start Sewing
Sewing Corners
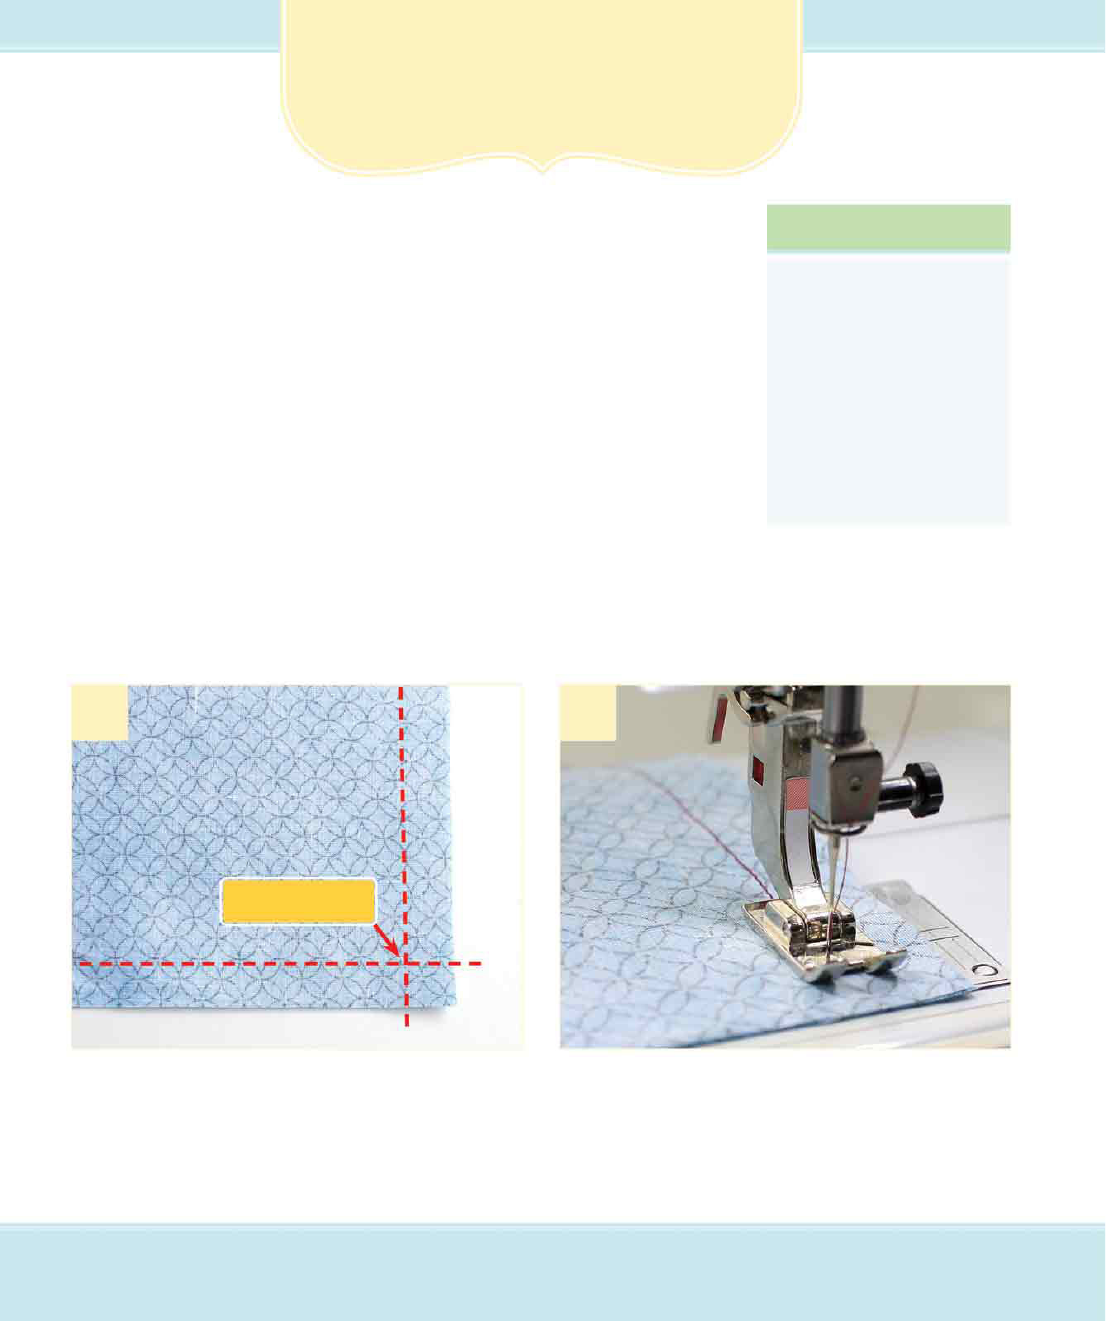
Mark the seam allowance (
5
⁄
8
-inch [1.5 cm]) on
the fabric. Measure from both sides to create the
intersecting turning point.
Sew a straight seam until you reach the corner
mark. Stop sewing with the needle in the down
position.
Sewing a clean, crisp corner can be a bit tricky, but
with the right technique, it is easy to master!
Pivoting is the key to a great point on an outside
corner as well as a nice-looking inside corner. You will
see these types of corners used most on square
necklines, pillows, or purses.
What You Need
• Standard foot attachment
• Sharp scissors
• Marking tool (like a pencil)
• Straight pins
• Point turner or pencil
• Iron
Outside Corner
This shows an outside corner cut at a 90-degree angle. The fabric is sewn with the right sides together.
1 2
Turning point
hhCH5_Sewing.indd 62 5/23/13 3:37 PM

63Chapter 5: Corners and Curves
This is how your straight-stitched seam with a piv-
oted corner should look—very crisp. By pivoting,
you create a continuous seam without the bulk of
backstitching.
Now you need to trim the corner. First cut off the
point, then angle in toward the corner to reduce
bulk.
Raise the presser foot. Keep the needle down and
poking through the fabric.
With the needle down, turn the fabric so the other
side edge lines up with the seam guideline. Lower
the foot and continue sewing.
3
4
5 6
Be careful not to cut through
the stitching!
hhCH5_Sewing.indd 63 5/23/13 3:37 PM

64 Part 2: Start Sewing
Grade the seam on both edges (this is sometimes
referred to as “layering” the seam). Trim the top layer
of fabric to
1
⁄
8
inch (.3 cm) and the bottom to
1
⁄
4
inch (.6 cm).
Press the seam open as close to the point as you
can. Use your fingers to press open the point.
7
8
Turn the fabric right side out. Use a point turner or
a pencil to carefully push out the corner to a point.
Press the corner flat. Notice the finished corner
has a clean, sharp point.
9 10
Grading the seam removes excess
fabric and reduces bulk.
hhCH5_Sewing.indd 64 5/23/13 3:37 PM

65Chapter 5: Corners and Curves
1
2
To sew an inside corner, straight stitch up to the
point where the lines intersect; this is where you
will pivot the corner.
To pivot, first be sure the needle is down in the
fabric. Raise the foot and turn the fabric. Line up
the seam allowance, lower the foot, and continue
sewing.
3
Trim and grade the seams. Using small, very sharp
scissors, clip into the corner as close to the stitch-
ing as possible.
Inside Corner
This is how you create an inward corner cut into two pieces of fabric. The fabric is sewn with the right
sides together.
Mark the seam lines
with intersecting
lines so you know
where to pivot.
4
Press the seams open and turn right side out.
Press again to create a crisp corner.
Be careful not to cut through
the stitching!
If the fabric is pulling at corner, go back
and clip a bit closer to the stitching.
hhCH5_Sewing.indd 65 5/23/13 3:37 PM
..................Content has been hidden....................
You can't read the all page of ebook, please click here login for view all page.