
Using Bias Tape
Binding Edges
Bias tape is used in lots of home-decorating projects. It
gets its name because of how it’s made—the fabric is cut
on the bias, or diagonally across the grain. This gives the
trim a bit of stretch, which is helpful for curving around
corners smoothly. Bias tape can be used on its own or to
make piping, giving raw edges a nice, finished look.
What You Need
• Zigzag (or standard)
foot attachment
• Bias tape
• Iron
• Straight pins
• Measuring tape
1 2
76 Part 2: Start Sewing
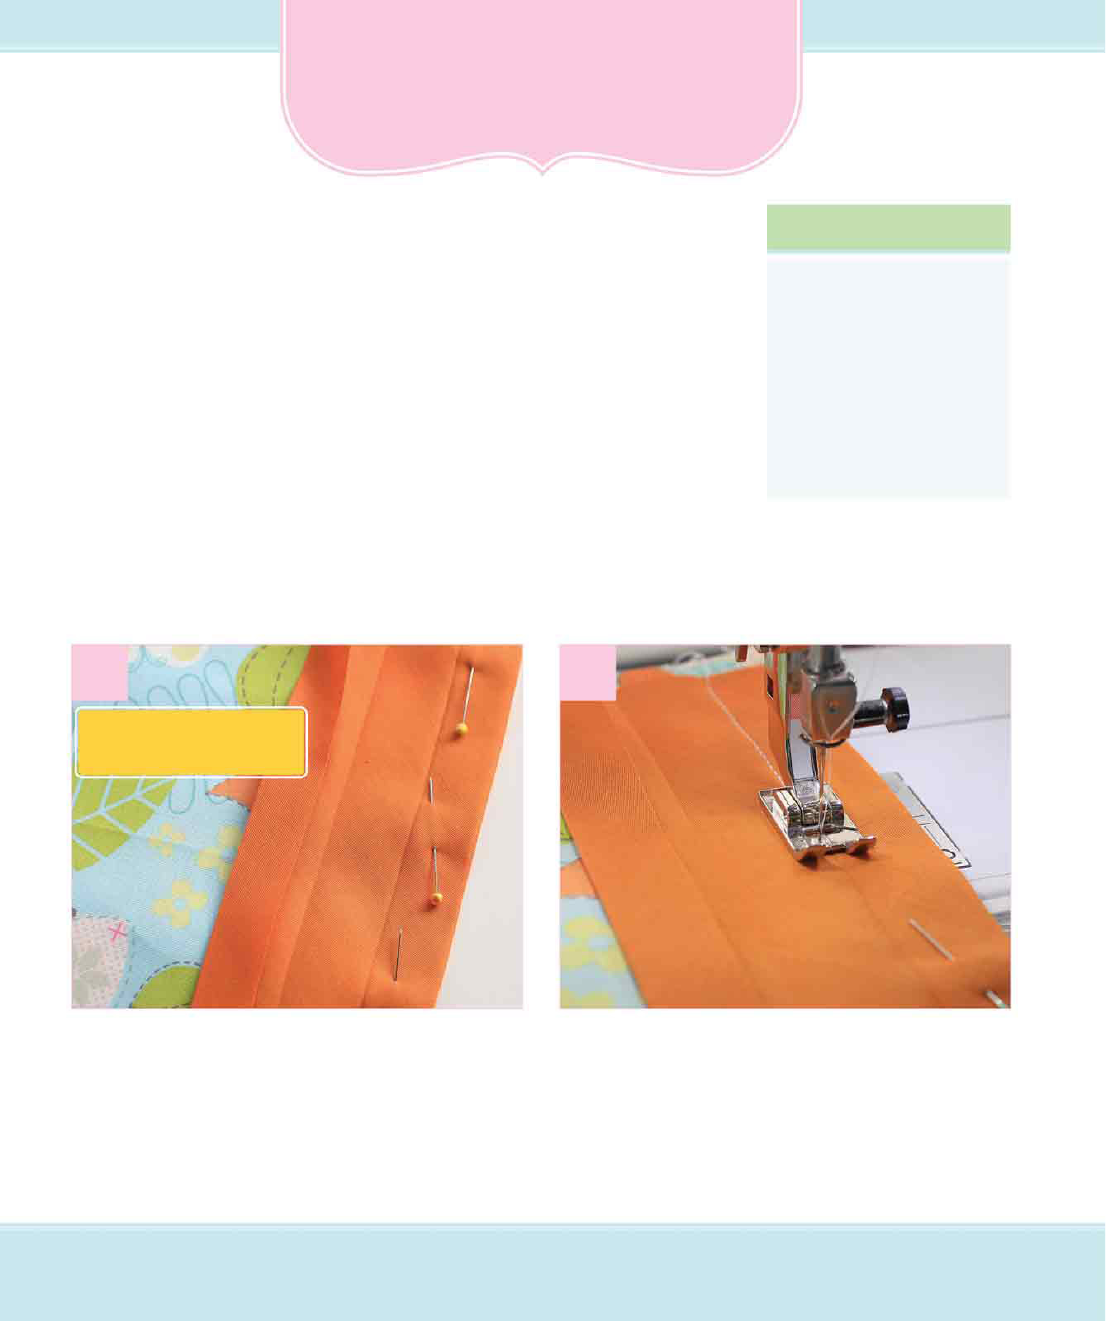
Open the bias tape. Unfold one side all the way,
and press it flat. Place the bias tape on the fabric
with the right sides together, making sure to line
up the raw edges. Pin along the seam allowance.
Straight stitch right along the creased fold line,
removing the pins as you sew.
Extra-wide double-fold bias
tape is used here.
iiCH6_Sewing.indd 76 5/23/13 3:37 PM

On the right side of the fabric, straight stitch in the
seam where the bias tape joins the fabric. Be sure
the part that’s folded underneath is caught in the
stitching.
When you’re finished, you will barely see the
stitching on the right side. However, notice how
it’s visible on the backside.
3
4
5 6
The straight stitching line is on the first fold. The
center fold is just to the left. The part that will fold
over to the backside is to the far left.
Fold the bias tape over so the center fold lines up
with the raw edge of the fabric. Fold the other half
to the underside.
77Chapter 6: Trims and Finishes
This is called stitch
in the ditch.
Stitching on the first fold
Center fold
Backside fold
Center fold
iiCH6_Sewing.indd 77 5/23/13 3:37 PM

Straight stitch just along the top edge of the bias
tape. You can sew an additional parallel line if
desired, or sew with a twin needle to create evenly
spaced rows.
The outside view of the hem shows a single
stitching line. The inside view shows a carefully
stitched line just at the top edge of the bias tape.
1
2
3 4
Use a narrow piece of bias tape to finish a hem.
Sew it to the right side of the hem line, as in steps
1 through 4 of Binding Edges.
Fold the hem up with the bias tape folded over
the raw edge to create an even hem. Pin in place.
Sewing a Bias Tape Hem
78 Part 2: Start Sewing
iiCH6_Sewing.indd 78 5/23/13 3:37 PM

Mitering a Corner
1
2
It’s best to miter the corner of a bias tape–trimmed
edge. To do this, measure
1
⁄
4
inch (.6 cm) from
the edge and mark with a pin. Sew just up to this
point.
Fold the bias tape over the sewn part, creating a 45
degree angle from the corner, to keep it lined up.
Fold the bias tape back over to line up with the
raw edges on the other side. The folded edge
should line up with the adjacent edge. Pin just
past the folded fabric underneath.
Turn the bias tape over to fold over the edges and
the corner. The backside will have a mitered fold
as well.
3 4
79Chapter 6: Trims and Finishes
iiCH6_Sewing.indd 79 5/23/13 3:37 PM
..................Content has been hidden....................
You can't read the all page of ebook, please click here login for view all page.