

Interested in the idea of quilting, but
feel a bit intimidated at the same
time? Make a pot holder! It’s a great
way to practice basic quilting skills
while designing a pretty and functional
accessory for your kitchen. You can
even piece together scrap fabrics to
create a unique patchwork-style design
for the top or bottom layer.
What You Need
• Knowledge of straight seams, quilting, and hand
stitching
• Level of difficulty: Beginner/easy
• Two pieces 9-inch (23 cm) square cotton fabric
• Batting
• 2
1
/2
x
38-inch (5.75
x
96.5 cm) binding fabric
• Straight pins
• Safety pins
• Iron
• 5-inch (12.75 cm) piece ribbon for loop
• Sewing machine
• Walking foot (optional)
152 Part 3: More Techniques
Practice Project:
Pot Holder
nnCH10_Sewing.indd 152 5/23/13 3:39 PM

Gather your pieces. The batting may need up
to three layers, depending on the thickness you
desire. I created the top piece for this by piecing
together strips of fabric before cutting out.
Layer the three square pieces. Pin them using
safety pins or straight pins, making sure to cover
most of the area to prevent the pieces from
sliding.
1
2
3 4
Following the lines of the fabric, quilt along the
seam lines, or mirror them by sewing along the
line but
1
/4 inch away. Sew around all four edges
aswell.
Fold the ribbon in half lengthwise, and sew to the
top corner of the backside of the pot holder.
Backing
Batting
Top
Binding
153Chapter 10: Decorative Techniques
This seam will be covered by
the binding.
The fabric and batting pieces are
9
x
9 inches (23
x
23 cm)
nnCH10_Sewing.indd 153 5/23/13 3:39 PM
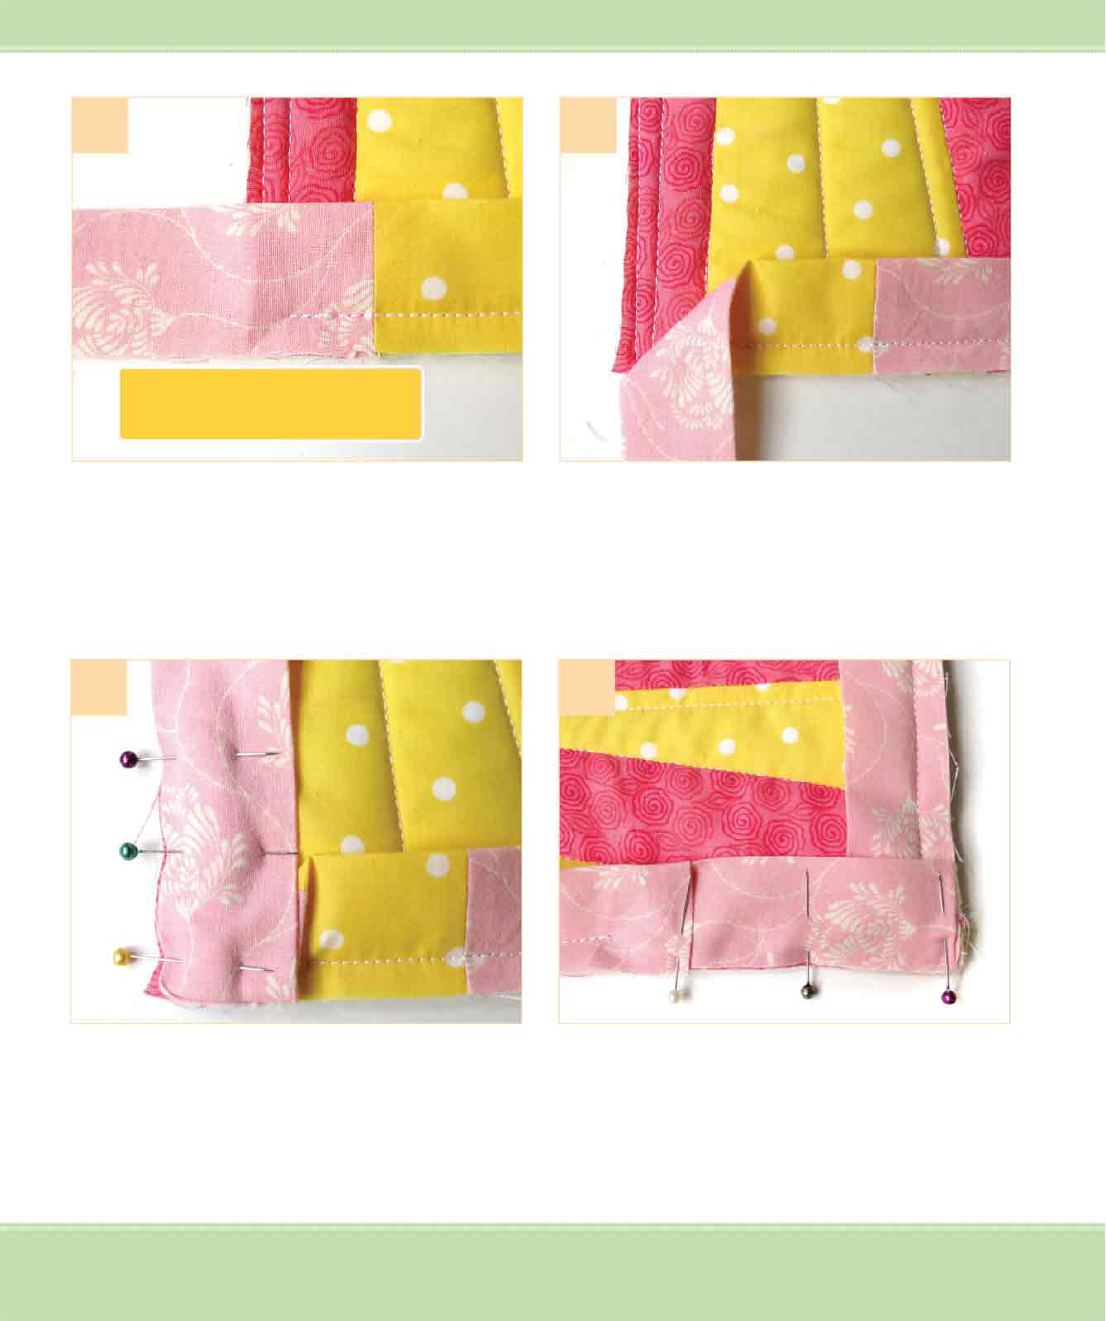
Fold the binding fabric in half lengthwise, right
sides out, and press. With the raw edges lined
up, start by placing the binding along one of the
sides, and stitch along the edge.
Fold the binding fabric down to create a diagonal
fold pointing in from the corner. Press the fold
flat.
5 6
7 8
Fold the binding back up to overlap the diagonal
fold. Pin, and sew along the side. Repeat for all
four corners.
When the binding reaches the starting point, trim
any excess length, turn the edge under, and layer
over the other raw end. Pin in place, and continue
straight stitching the seam.
Begin the binding along the side—don’t
start at the corner!
154 Part 3: More Techniques
nnCH10_Sewing.indd 154 5/23/13 3:39 PM

Fold the binding over the raw edge of the pot
holder. Hand stitch using a whipstitch to sew
down the binding to the backside of the pot
holder. (You also have the option of doing a top-
stitch on your machine.)
9
155Chapter 10: Decorative Techniques
nnCH10_Sewing.indd 155 5/23/13 3:39 PM

ooCH11_Sewing.indd 156 5/23/13 3:39 PM
..................Content has been hidden....................
You can't read the all page of ebook, please click here login for view all page.