

Practice Project:
Zipper Clutch
What You Need
• Knowledge of straight seams, inserting a
zipper, using a buttonhole foot, and sewing
on a button
• Level of difficulty: Intermediate
• Cotton fabric in two colors
(Fat quarters would work great!)
• 7-inch (17.75 cm) zipper (I used one with
large metal teeth.)
• Sewing machine, zipper foot, and
buttonhole foot
• Thread
• Scissors
• Straight pins
• Measuring tape
• Iron
• Decorative button
This cute little lined wristlet with an
exposed zipper is the perfect wallet
or makeup bag for when you’re on
the go. Just add your phone, some
cash, your makeup essentials, and
the necessary ID and credit cards,
zip it up, and you’re off!
120 Part 3: More Techniques
LLCH8_Sewing.indd 120 5/23/13 3:38 PM

For the purse and lining, cut one 7
1
⁄
2
×5
1
⁄
2
-inch (19×14 cm) rectangle and one 7
1
⁄
2
×3-inch (19×7.5 cm)
rectangle. For the strap, cut one 2
1
⁄
2
×15-inch (6.25×38 cm) strip.
Start with the larger rectangle. Place the zipper
right side up on top of the right side of the lining
fabric. Lay the purse fabric right side down on
top of the zipper, and pin through all three layers.
Straight stitch about
1
⁄
4
inch (.6 cm) away from
the zipper teeth.
Line up the long edge of the smaller rectangle
with the other side of the zipper. The right side
of the lining piece should go under the zipper,
and the right side of the purse fabric should face
the right side of the zipper. Pin and stitch
1
⁄
4
inch
(.6cm) away from the zipper teeth.
1
2 3
Purse Fabric
7½ inches (19 cm)
Lining Fabric
7½ inches (19 cm)
Strap
2½×15 inches
(6.25×38 cm)
5½ inches
(14 cm)
3 inches
(7.5 cm)
121Chapter 8: Fasteners
The 7½-inch (19 cm)
edge is the top edge.
Lining
Smaller rectangle
This is sewn to opposite
side of the zipper.
5½ inches
(14 cm)
3 inches
(7.5 cm)
LLCH8_Sewing.indd 121 5/23/13 3:38 PM
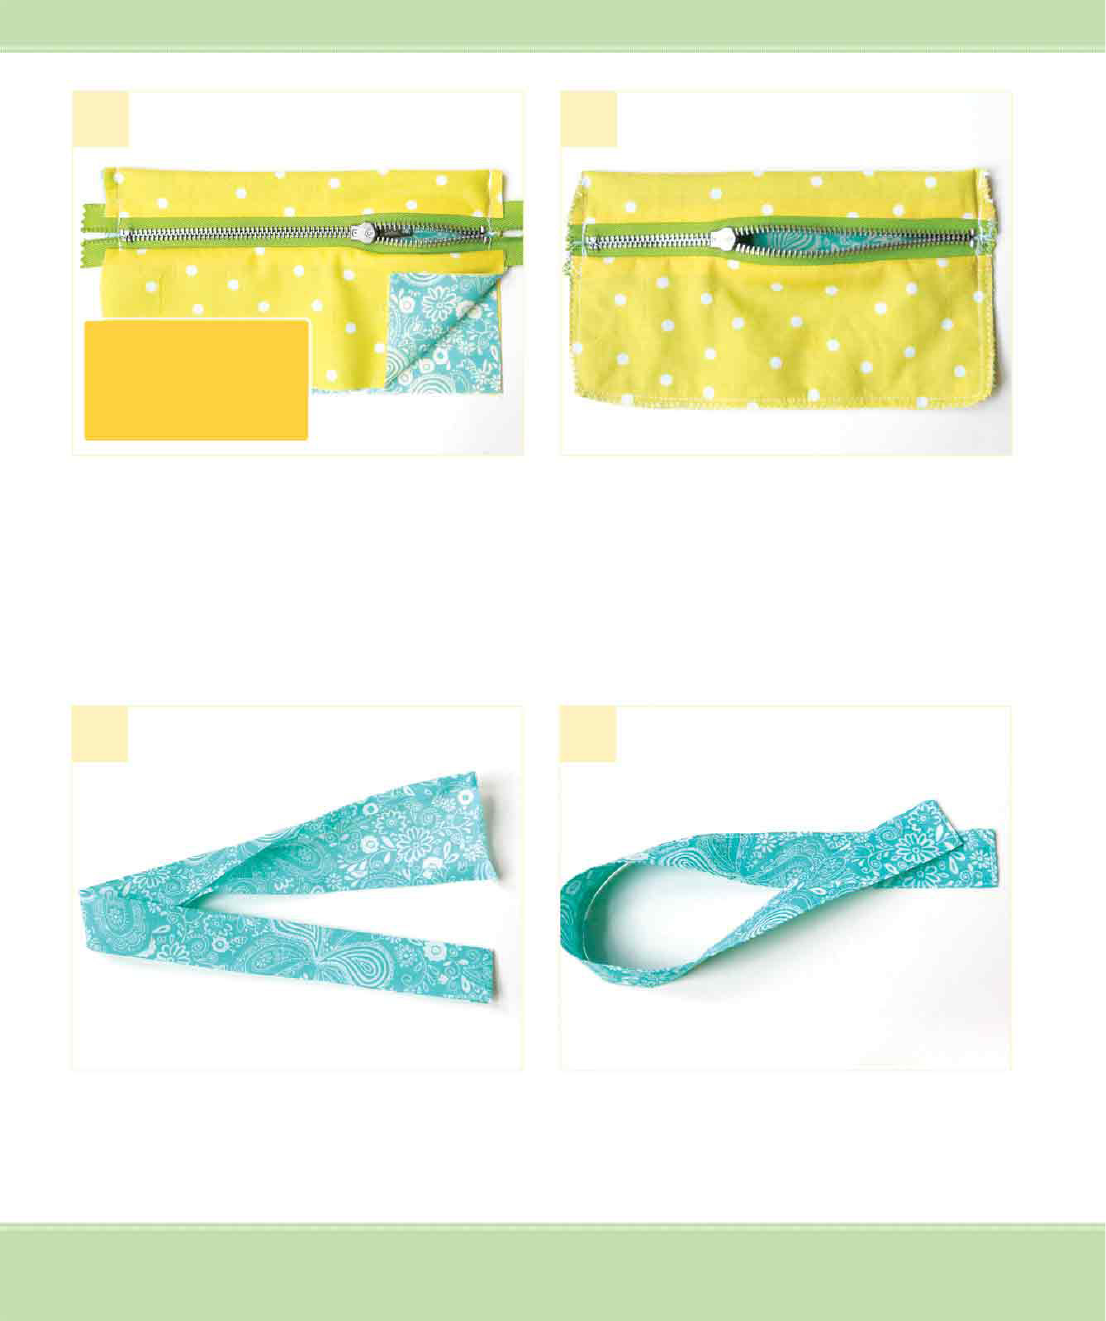
Fold the fabric open so the purse fabric is face
up. Fold the purse in half so the bottom edges
line up. The lining fabric should be on the outside.
This will create a fold at the top of the purse; the
zipper will be about an inch (2.5 cm) down from
the top edge.
Straight stitch around the sides and the bottom
edge. Trim the seams, including zipper ends, to
1
⁄
4
inch (.6 cm); trim in at an angle at the top corner.
Zigzag to finish the seam edge. Turn the purse
right side out.
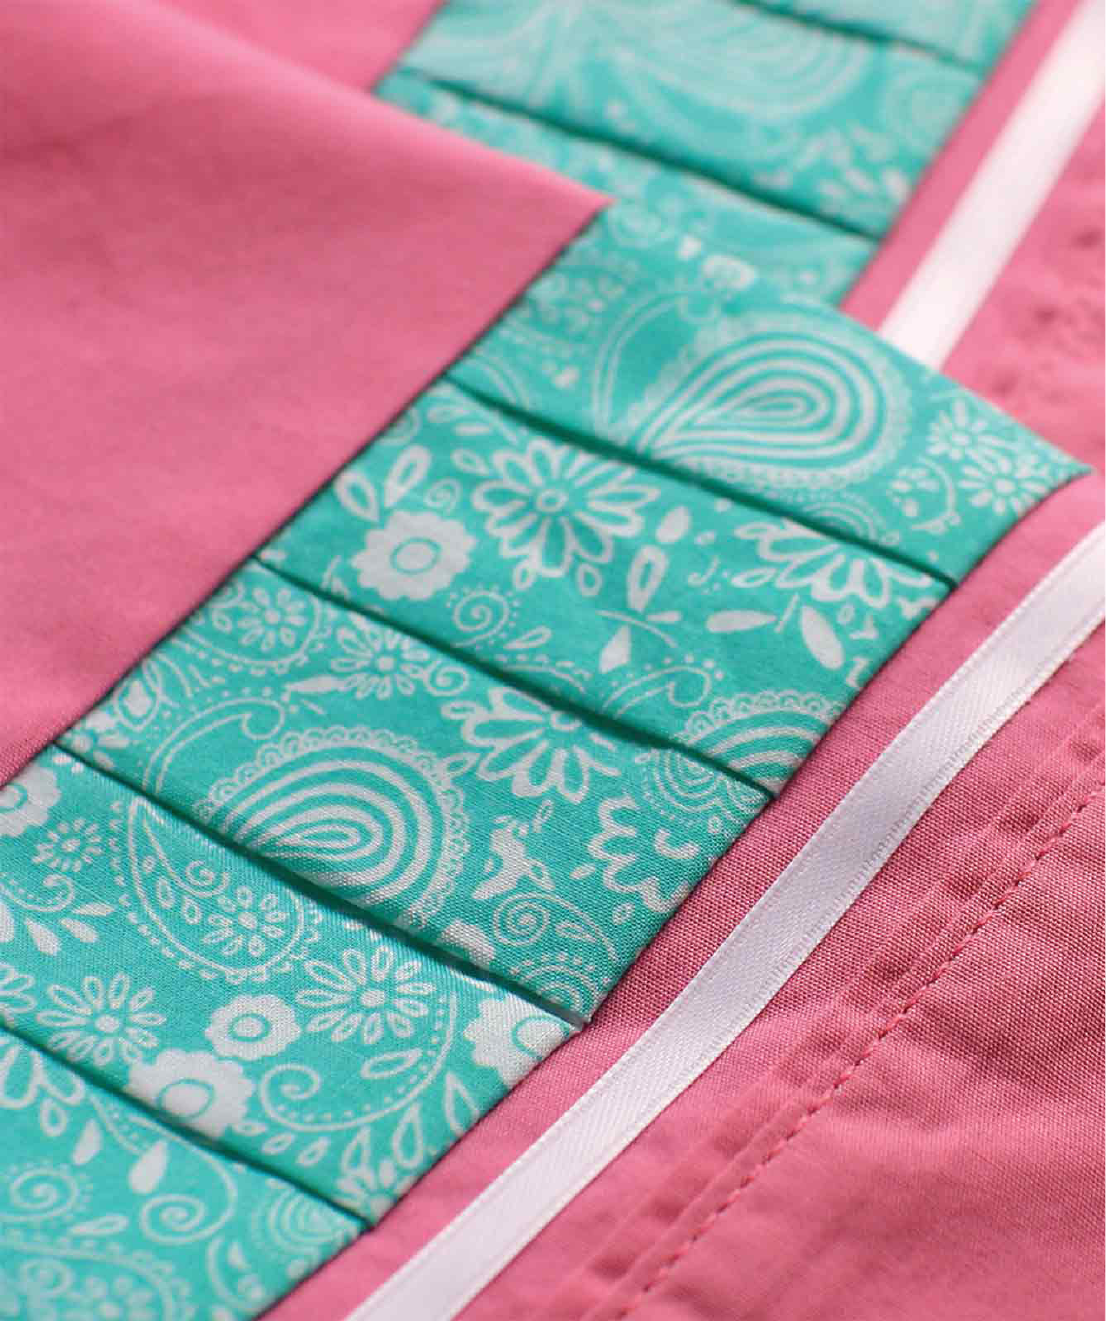
Press all the edges of the strap under
1
⁄
4
inch
(.6cm). Press the strip in half lengthwise.
Topstitch around all the edges, making sure the
edges are folded to the inside.
4 5
6 7
122 Part 3: More Techniques
Important: keep the
zipper unzipped about
halfway so you can turn
the bag right side out!
LLCH8_Sewing.indd 122 5/23/13 3:38 PM

Sew on a button to the top-right corner. (I used
a
3
⁄
4
-inch-diameter [2 cm] shank button.) This is
how the strap connects to the bag.
Use your buttonhole foot to create two
buttonholes—one at each end of the strap—to fit
the button you’ve selected.
Open the buttonholes up, and slide over the
button to create your handle.
8
9
10
123Chapter 8: Fasteners
LLCH8_Sewing.indd 123 5/23/13 3:38 PM
mmCH9_Sewing.indd 124 5/23/13 3:38 PM
..................Content has been hidden....................
You can't read the all page of ebook, please click here login for view all page.