
168 Part 3: More Techniques
Making a Waistband
If you can sew a straight seam, you can easily
make a waistband and wow your friends with your
creative talent!
Interfacing is used to give body and shape to the
waistband and keep it from getting all crinkled up
when the garment is worn. You can use several
types of interfacing when making a waistband;
for this example, I used a lightweight nonwoven
fusible interfacing.
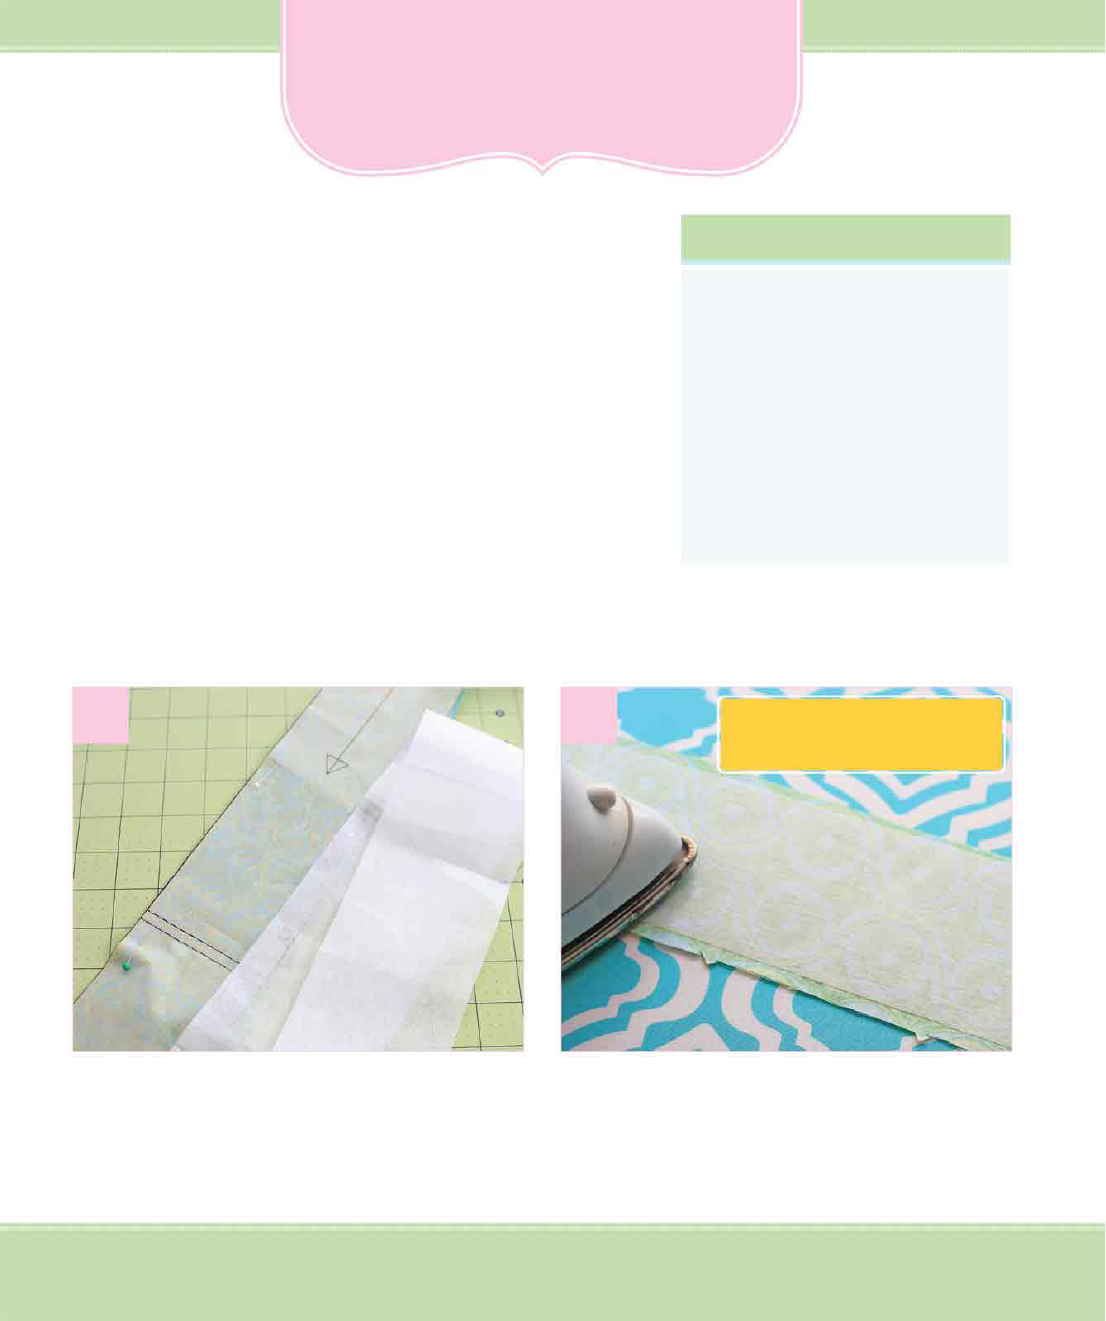
Following the pattern directions, cut your waist-
band out of both fabric and interfacing. Cut the
interfacing slightly smaller than the fabric.
Set the interfacing glue side down on the wrong
side of the waistband fabric. Press quickly with an
iron to heat up the glue and make it stick.
1
2
What You Need
• Standard foot attachment
• Measuring tape
• Fabric marking tool
• Iron
• Straight pins
• Scissors
• Fusible interfacing
Don’t overheat the glue on the
interfacing or it won’t stick.
ooCH11_Sewing.indd 168 5/23/13 3:39 PM

Press the unnotched edge under
3
⁄
8
inch (1 cm).
This will make it easy to sew the final step.
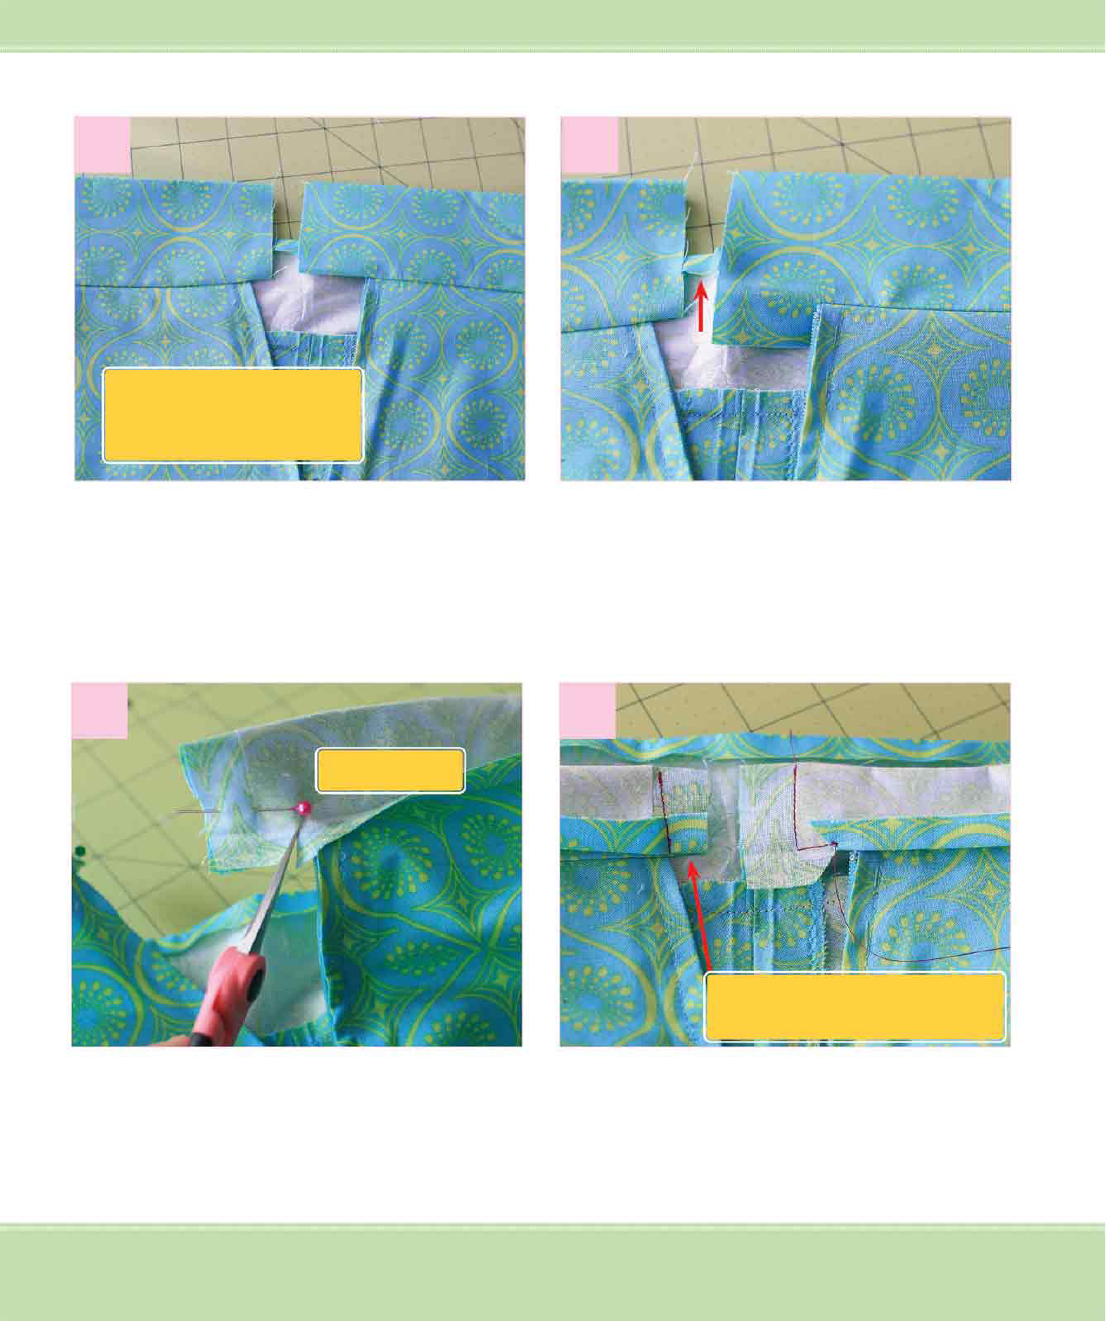
Pin the waistband to the skirt. Notice the end of
the waistband extends past the center back zip-
per about 1
1
⁄
2
inches (3.75 cm) and just
5
⁄
8
inch
(1.5 cm) on the opposite side of the center-back
zipper.
3
4
5 6
Beginning at the center back, straight stitch along
the top edge at a
5
⁄
8
-inch (1.5 cm) seam allow-
ance. Continue around to the other side of the
center back opening.
Trim the seam allowance to
1
⁄
4
inch (.6 cm). Leave
it untrimmed past the zipper; this will be used to
create the tab that overlaps.
Match up the notches on the
waistband piece with the top of
the skirt.
169Chapter 11: Basic Clothing Techniques
ooCH11_Sewing.indd 169 5/23/13 3:39 PM
170 Part 3: More Techniques
Press the waistband up flat, keeping the top edge
pressed under. The seam is pressed up toward the
top.
Pull the seam allowance open on the tab that
extends. Fold the top edge of the waistband over
toward the skirt with the right sides together, and
match the edges.
7 8
9 10
Cut a tiny slit angled to the corner just before the
zipper. This will allow the pressed edge to fold up
while the seam allowance on the left is flat.
Straight stitch down from the top, pivoting at the
corner, and sew a few stitches toward the pressed-
up edge. Backstitch to secure.
Pin in place.
The two sides of the waistband
are designed to overlap, so they
are uneven.
Straight stitch this side at a
5
⁄
8
-inch (1.5 cm) seam allowance.
ooCH11_Sewing.indd 170 5/23/13 3:39 PM
Trim the corners and seams. Turn the two sides
right side out. Following the seam from the tab,
line up the pressed-under edge to just cover the
seam along the inside.
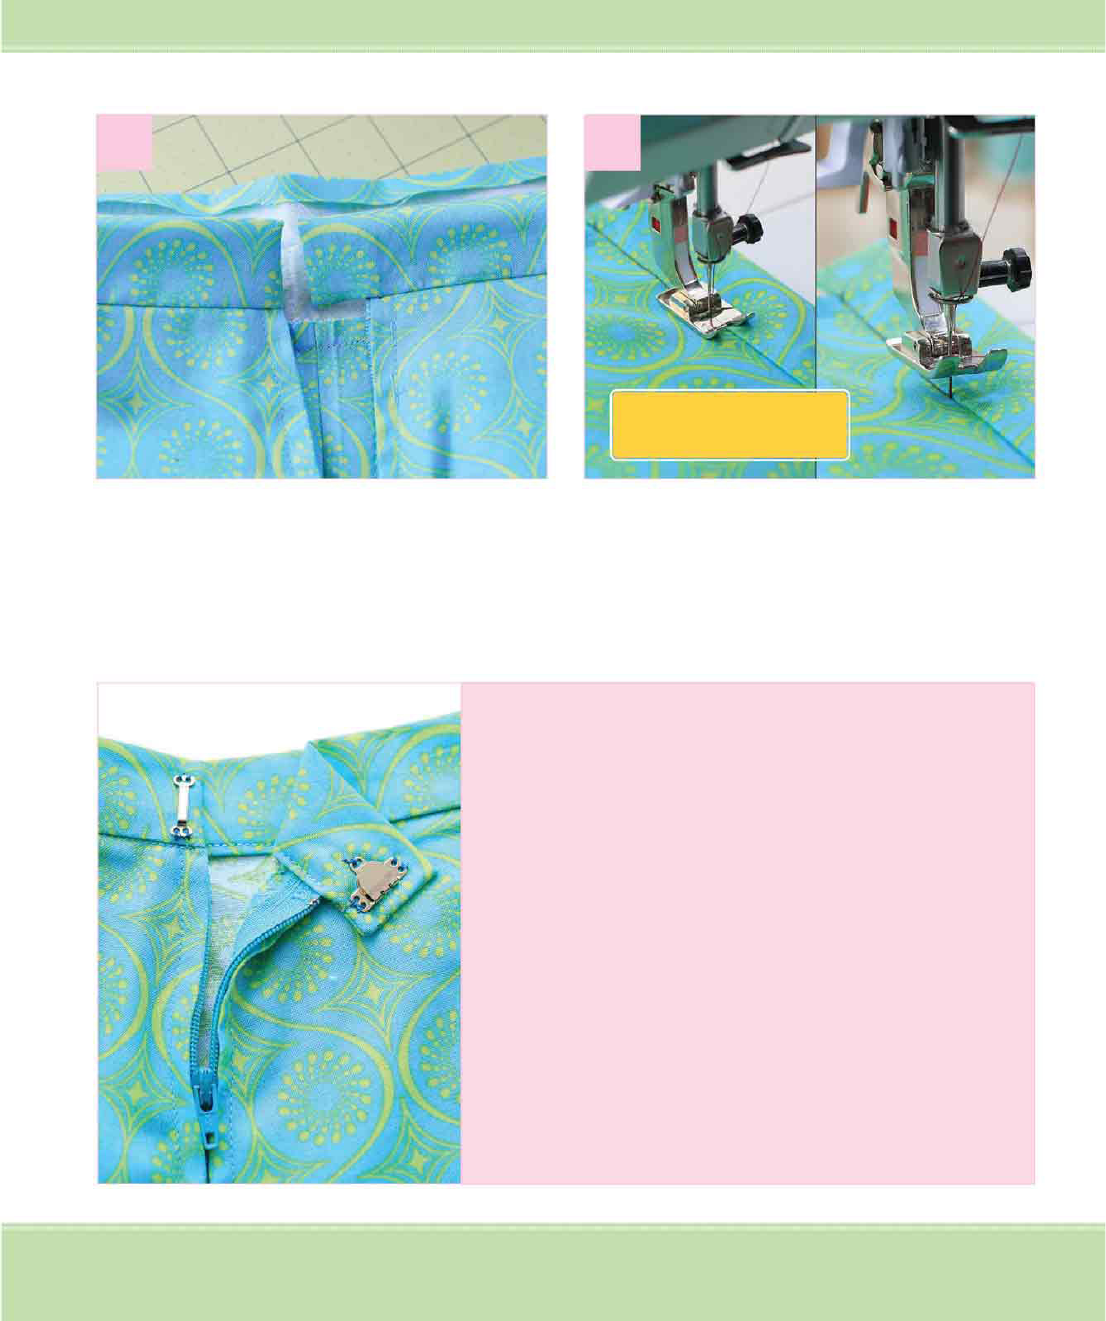
The bottom edge of the waistband is positioned
just past the seam. Straight stitch in the well of
the seam. This will hide the stitching and give it a
professional finish.
11
12
Finishing Your Waistband with a Hook Closure
• Be sure to use a hook and eye closure that’s designed
for a skirt/waistband. It is sturdier and a bit larger than
the smaller ones.
• Mark the placement of the hook on the inside of the
overlap side. Mark the placement of the eye on the
finished side of the opposite side of the waistband
opening.
• Use the hand stitches you learned earlier in this book
to secure the thread and stitch through the tiny holes
along the edges. There are four holes on the eye and
six holes on the hook.
• Be careful not to sew all the way through the waist-
band to the finished side! Simply slide the needle
through just one layer of fabric.
171Chapter 11: Basic Clothing Techniques
This technique is called
stitch in the ditch.
ooCH11_Sewing.indd 171 5/23/13 3:39 PM
..................Content has been hidden....................
You can't read the all page of ebook, please click here login for view all page.