
Sewing with Elastic
Elastic comes in a variety of styles, weights, and sizes.
You can use it to create gathers, ruffles, simple waist-
bands, or straps on a tank top!
Some types of elastic are decorative and exposed,
while others are sewn inside casings. You don’t need a
special machine or special settings to sew with elastic—
just your standard presser foot and straight or zigzag
stitches. The following lessons will show you a variety of
ways to use elastic.
What You Need
• Zigzag (or standard) foot
attachment
• Seam gauge
• Elastic
• Straight pins
• Ruler and marking pencil
• Safety pin
1 2
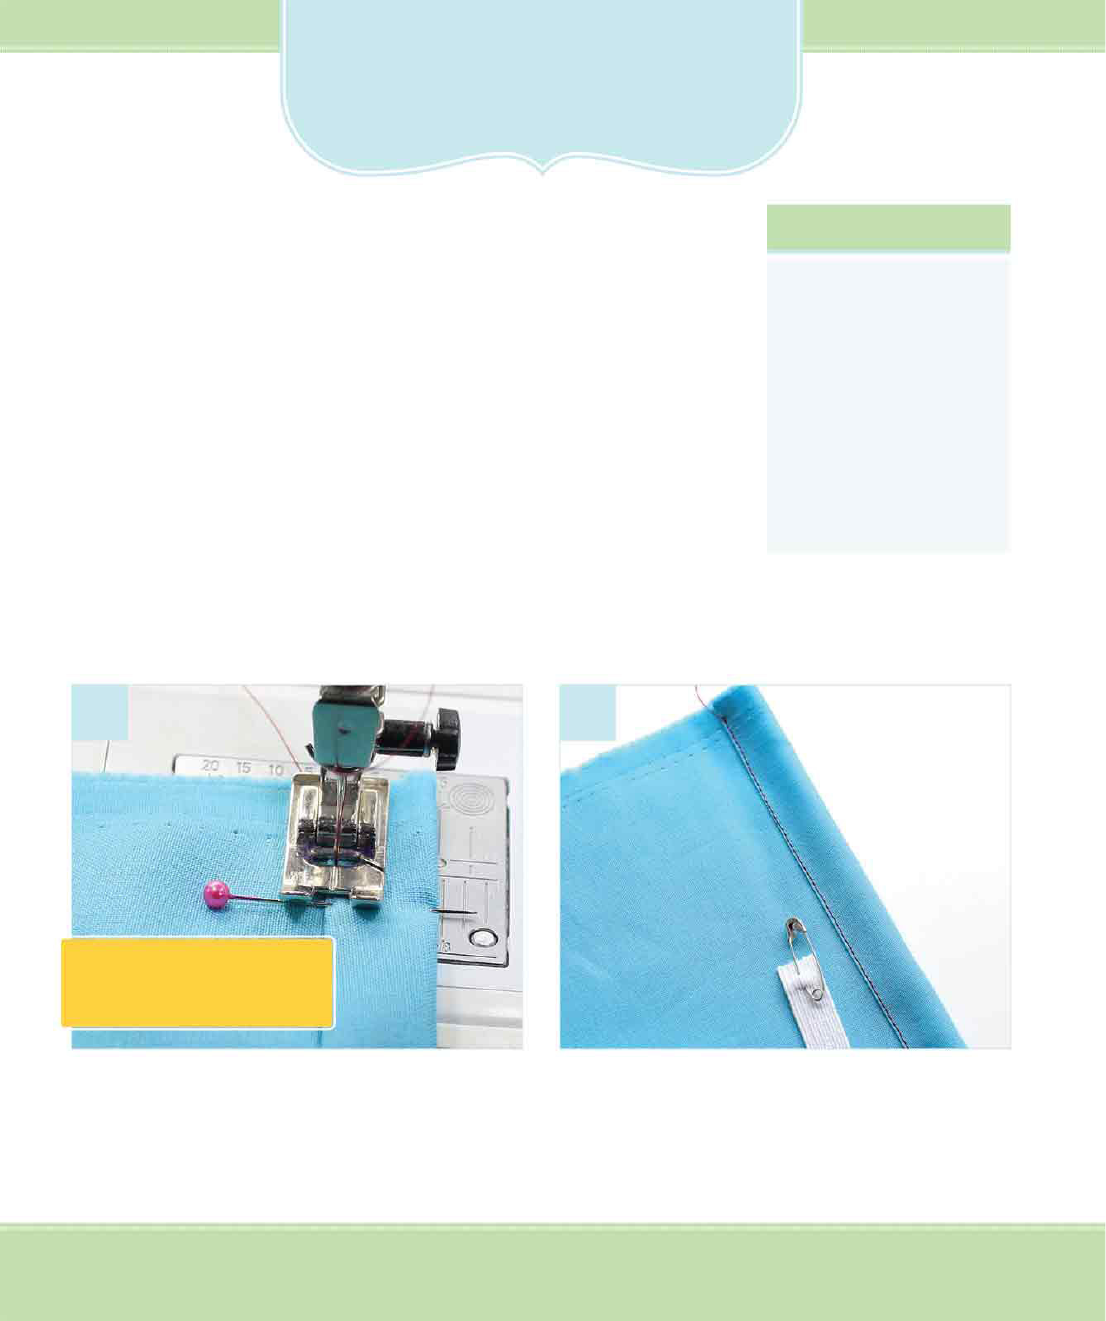
Similar to the hem, fold the fabric under
1
⁄
4
inch
(.6 cm), press, and fold under again, only this time at
5
⁄
8
inch (1.5 cm). Pin and sew a straight seam along
the inside fold.
Secure a safety pin in the end of the piece of elas-
tic. This will guide it through the casing.
Elastic Casing
96 Part 3: More Techniques
This example is for ½-inch-wide
(1.25 cm) elastic, but you can
easily make it any size.
kkCH7_Sewing.indd 96 5/23/13 3:38 PM

The casing tube has been created. Notice the
hollow space; the elastic will slide into this space.
Beginning with the safety pin, slide the elastic into
the tube. You should be able to gently push the
safety pin through the casing.
Push the safety pin forward, grip the end of it with
your fingers, and slide the fabric back. Keep doing
this until the safety pin comes out the other side.
Once you have both ends pulled out of the tube,
you can sew a few straight stitches to secure the
elastic to the casing on both ends.
3
4
5 6
97Chapter 7: Ruffles and Gathers
Watch the other end of the elastic to
be sure it doesn’t slide inside the tube.
When it gets close, pin it to secure.
Be careful not to squeeze the
pin—it might pop open!
kkCH7_Sewing.indd 97 5/23/13 3:38 PM

98 Part 3: More Techniques
Mark the elastic and fabric in fourths with pins—
note that the elastic is shorter than the length of
the fabric.
Line up the pins (center to center, fourth to
fourth, and so on) and pin the fabric to the elastic
at those points.
1
2
Zigzag stitch over the elastic, gently stretching it
to the length of the fabric. Carefully sew over the
pins, or remove them just before the needle.
The zigzag stitching secures the elastic to the fabric,
creating a ruffle, and stretches with the elastic.
3 4
Elastic Ruffle
A narrow hem is
sewn along the
finished edge.
A marked line is
drawn to indicate
where the elastic
should be placed.
kkCH7_Sewing.indd 98 5/23/13 3:38 PM

99Chapter 7: Ruffles and Gathers
This simple zigzag stitch stretches with the elastic.
Exposed Elastic
1
2
Using flat, nonroll elastic, line up the top edge of
the fabric so the elastic overlaps about
3
⁄
8
inch
(1cm).
Set the stitch to the widest zigzag. Sew along the
bottom edge, where the elastic meets the fabric.
3
As you sew, remember to stretch the elastic
to be the length of the fabric.
kkCH7_Sewing.indd 99 5/23/13 3:38 PM
..................Content has been hidden....................
You can't read the all page of ebook, please click here login for view all page.