
In an on-premises hybrid cloud environment, it is common to have different servers segregated as per department, location, areas, or even tenant basis, as service providers would say.
To aggregate resources and make them easier to be allocated and metered, Windows 2012 Hyper-V introduced resource pools.
The idea of resource pools is to put physical resources allocated to virtual systems in a pool. The resource types that can be used in Hyper-V are as follows:
- Memory
- Processor
- Ethernet
- VHD
- ISO
- VFD (Virtual Floppy Disks)
- Fibre Channel ports
- Fibre Channel connections
- PciExpress
In this recipe, you will see some examples of the most common resource pools such as storage and Ethernet pools.
The option to create resource pools is not enabled through the graphical interface, only via PowerShell. However, you should open PowerShell as an administrator before you get started.
The following steps will walk you through the process of creating storage and Ethernet resource pools:
- Before we start to create our storage resource pool, we need to aggregate some virtual hard disks together. In this example, four VHDs are created in a folder called
StoragePool1, as shown in the following screenshot: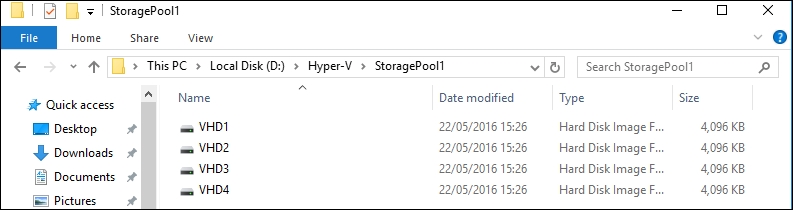
Storage Pool Resources
- Open PowerShell and type the
New-VMResourcePoolcommand specifying the disk's path after the–Pathoption:New-VMResourcePool –Name StoragePool1 –ResourcePoolType VHD –Paths C:Hyper-VStoragePool1 - After creating the resource pool, select the virtual machine you want to add the new storage resource pool to from Hyper-V Manager and open its settings.
- In the Virtual Machine Settings, select the hard drive that you want to add a disk to, select the resource pool in the drop-down list in the pane on the right-hand side, and then select the virtual hard disk from the selected resource pool, as shown in the following screenshot. Click on OK to confirm and add the disk from the resource pool:

Creating a Storage Resource Pool
- To create an Ethernet resource pool, open up PowerShell again and type the
New-VMResourcePoolcmdlet usingEthernetafterResourcePoolType:New-VMResourcePool –Name EthernetResourcePool1 –ResourcePoolType Ethernet - Now open the virtual machine settings for which you want to use the new Ethernet resource pool.
- Select the Network Adapter you want to add the resource pool to and select the new resource pool. Select the virtual switch in the pane on the right-hand side, as shown in the following screenshot:

Creating an Ethernet Resource Pool
- Click on OK and after that your virtual machine will be configured with the new resource pool.
The first steps walked you through an example of creating storage resource pools, which is one of the most common resource pools.
Using the New-VMResourcePool command, we created a resource pool called StoragePool1 using every available disk from the path C:Hyper-VStoragePool1. In following example, all the four disks are available in the new resource pool.
Although the steps have shown only two examples of resource pools, you can create other types as well. The available resource types that can be created are memory, processor, ethernet, vhd, iso, vfd, fibrechannelport, fibrechannelconnection, and, PciExpress.
Some of the existing resource pools don't have a graphical interface option when created, for example, the memory and processor resource pool. But customers can use the Hyper-V Msvm_ResourcePool WMI class to create an advanced option or to integrate resource pools from other management solutions.
Another handy scenario of resource pools is their usage in conjunction with the resource metering feature. With both, you can measure the usage and the workload per resource pools, creating a cost report for a customer using all their resource pools' metering data, for example.
Because of the lack of graphical interface, it is interesting to know that PowerShell has a command to list more information about the resource pools - Get-VMResourcePool. By typing the Get-VMResourcePool cmdlet, PowerShell shows all the existing pools and information such as name, type, computer name, and so on. To list the resource pools by type, you can use a simple filter such as Get-VMResourcePool –ResourcePoolType Ethernet and then get an all Ethernet resources pool, for example.
- The Using Resource Metering recipe in Chapter 10, Monitoring, Tuning, and Troubleshooting Hyper-V.