
Previous versions of Hyper-V had complications and incompatibilities with the built-in backup tool, thus forcing the administrators to acquire other solutions for backing up and restoring.
Windows Server 2012 onwards, Microsoft enhanced the built-in Windows Server Backup (WSB) tool. It has full Hyper-V integration, thus allowing you to back up and restore your server, applications, Hyper-V, and virtual machines. WSB is easy and provides for a low cost scenario for small and medium companies.
This recipe will guide you through the steps to back up your virtual machines using the built-in Windows Server Backup tool.
Windows Server Backup does not support tapes. Make sure that you have a disk, external storage, network share, and free space to back up your virtual machines before you start.
The following steps will show you how to install the Windows Server Backup feature and how to schedule a task to back up your Hyper-V settings and virtual machines:
- To install the Windows Server Backup feature, open Server Manager from the taskbar.
- In the Server Manager Dashboard, click on Manage and select Add Roles and Features.
- On the Before you begin page, click on Next four times.
- Under the Add Roles and Features Wizard, select Windows Server Backup from the Features section.
- Click on Next and then click on Install. Wait for the installation to be completed.
- You can also install Windows Server Backup using Windows PowerShell.
- Open the Windows PowerShell console and run the following command:
Install-WindowsFeature -Name Windows-Server-Backup -IncludeAllSubFeature –Verbose - After the installation, open the Start menu and type wbadmin.msc to open the Windows Server Backup tool.
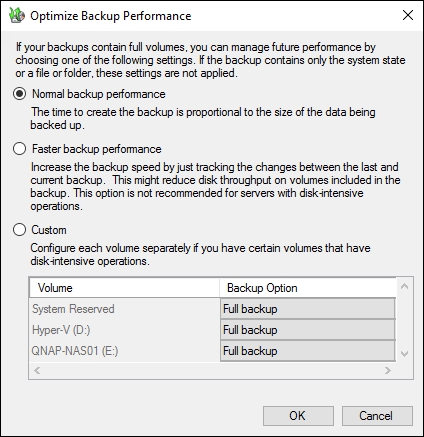
- To change the backup performance options, click on the Configure Performance from the pane on the right-hand side in the Windows Server Backup console.
- In the Optimize Backup Performance window, we have three options to select from—Normal backup performance, Faster backup performance, and Custom, as shown in the following screenshot:
- In the Windows Server Backup console, select the backup that you want to perform, from the right-hand side pane. The two available options are Backup Schedule to schedule an automatic backup and Backup Once for a single backup. The next steps will show you how to schedule an automatic backup.
- In the Backup Schedule Wizard, in the Getting Started page, click on Next.
- In the Select Backup Configuration page, select Full Server to back up all the server data or click on Custom to select specific items to back up. If you want to backup only Hyper-V and virtual machines, first click on Custom and then Next.
- In Select Items for Backup, click on Add Items.
- In the Select Items window, select Hyper-V to back up all the virtual machines and the host components, as shown in the following screenshot. You can also expand Hyper-V and select the virtual machines that you want to back up. When finished, click on OK.

- Back to the Select Items for Backup, click on Advanced Settings to change Exclusions and VSS Settings.
- Click on Add Exclusion in the Exclusions tab of the Advanced Settings window to add any necessary exclusion.
- Click on the VSS Settings tab to select either VSS full Backup or VSS copy Backup, as shown in the following screenshot. Click on OK.

- In the Select Items for Backup window, confirm the items that will be backed up and then click on Next.
- In the Specify Backup Time page, select Once a day and the time for a daily backup or select More than once a day and the time and click on Next.
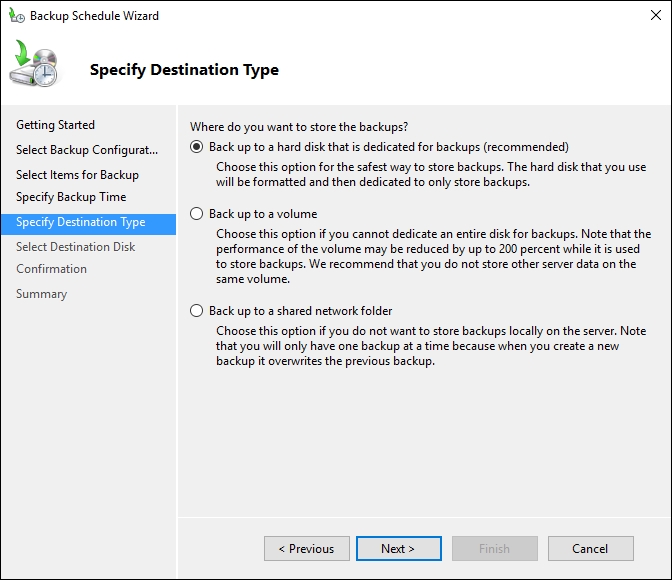
- In the Specify Destination Type page, select the option Back up to a hard disk that is dedicated for backups (recommended), Back up to a volume, or Back up to a shared network folder, as shown in the following screenshot and click on Next.
- In Select Destination Disk, click on Show All Available Disks to list the disks, select the one you want to use to store your backup and click on OK, then click on Next twice.
- If you have selected the Back up to a hard disk that is dedicated for backups (recommended) option, you will see a warning message saying that the disk will be formatted. Click on Yes to confirm.
- In the Confirmation window, double-check the options you selected and click on Finish, as shown in the following screenshot:

- After this, the schedule will be created. Wait until the scheduled time to begin and check whether the backup has been finished successfully, as shown in the following screenshot:
Microsoft reengineered its native backup utility and added full support for Hyper-V, allowing you to back up and restore your server, applications, Hyper-V, and virtual machines.
WSB takes advantage of the Volume Shadow Copy Service to freeze the state of data for the backup. Originally, it was designed to provide only off-site backups on a set of portable hard drives. Tape backups in Windows Server Backup were eliminated; the removable hard drives are the only backup option available.
Fortunately, Microsoft broadened the application to include UNC paths in shared folders and locally attached hard drives and volumes at the time of t release. WSB is easy and provides a low cost scenario for small and medium companies.
By default, WSB is not installed. The feature installation is made by Server Manager or PowerShell. After its installation, the tool can be accessed via a console or command lines.
Before you start backing up your servers, it is good to configure the backup performance options you want to use. By default, all the backups are created as normal. It creates a full backup of all the selected data. This is an interesting option when small amounts of data are backed up. You can also select the Faster backup performance option. This backs up the changes between the last and the current backup, thus increasing the backup time and decreasing the stored data. This is a good option to save storage space and backup time for large amounts of data.
A backup schedule can be created to automate your backup operations. In the Backup Schedule Wizard, you can back up your entire server or a custom selection of volumes, applications, or files. The best option for backing up Hyper-V and its virtual machines is the customized backup, so that you don't have to back up the whole physical server. When Hyper-V is present on the host, the system shows Hyper-V and you will be able to select all the virtual machines and the host-component configuration to be backed up. During the wizard, you can also change the advanced options, such as exclusions and Volume Shadow Copy Services (VSS) settings. WSB has two VSS backup options—VSS full backup and VSS copy backup. When you opt for VSS full backup, everything is backed up and the application might truncate log files later. If you are using other backup solutions that integrate with WSB, these logs are essential to be used in future backups, especially incremental ones. To preserve the log files, you can use the VSS copy backup so that other applications do not have problems with incremental backups.
After selecting the items for backup, you have to select the backup time. This is another limitation common with the previous version—only two schedule options, namely Once a day or More than once a day. If you prefer to create a different backup schedule, such as weekly backups, you can use the WSB commandlets in PowerShell.
Moving forward, in the backup destination type, you can select between a dedicated hard disk, volume, or network folder to save your backups in.
When confirming all these items, the backup schedule will be ready to back up your system.
You can also use the Backup once option to create a single backup of your system.
Windows Server Backup is not supported on Nano Server.
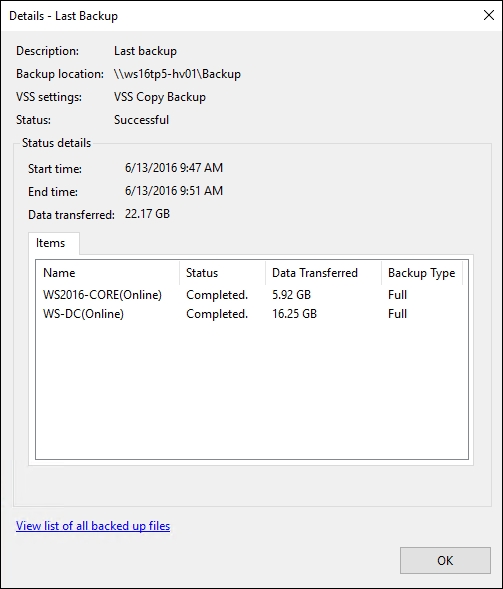
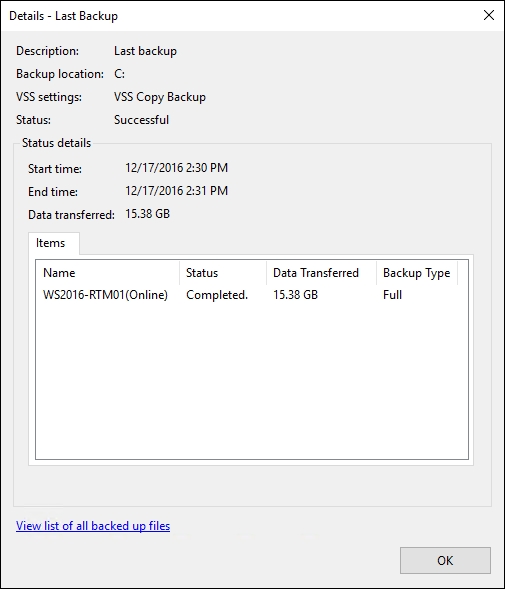
To check whether the previous backups were successful or not, you can use the details option in the WSB console. These details can be used as logs to get more information about the last (previous), next, and all the backups.
To access these logs, open Windows Server Backup, under Status select View details. The following screenshot shows an example of the Last backup.
To see which files were backed up, click on the View list of all backed up files link.
Some options, such as advanced schedule, policies, jobs, and other configurations can only be created through commandlets on PowerShell.
Type the following command to see all the available Windows Server Backup commandlets:
Get-Command –Module WindowsServerBackup
You can also automate the backup for virtual machines using Windows PowerShell.
The following tool will automate the backup process for virtual machine(s).
First, you want to specify the Hyper-V host name and the backup media type you want to use (Disk, Volume or Network share), as shown in the following screenshot:

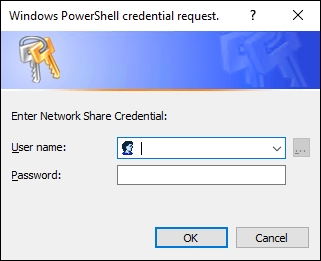
If you select Network Share, you will be prompted to enter the network credentials with necessary permissions.
The script will check if the Windows Server Backup feature is installed, if not, it will install WSB for you, next it will query the Hyper-V host and then you will be prompted to select the desired virtual machines you want to include in the backup set.

You can also specify the desired schedule time for backup, if not specified, the backup policy will be created and scheduled to run every day according to the default schedule at 5 p.m. as shown in the following screenshot:
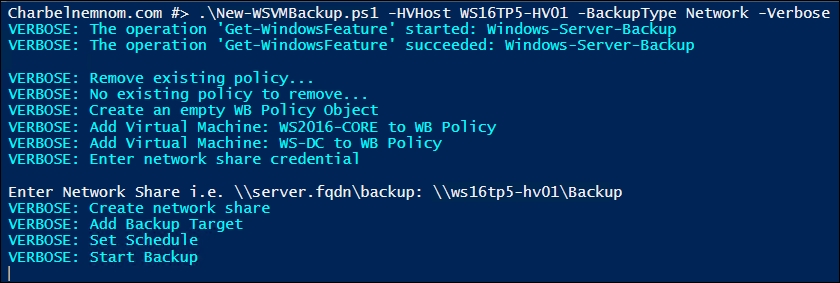
The backup will start once you enter the required information, as shown in the following screenshot:

- The Learning and utilizing basic commands in PowerShell recipe in Chapter 4, Saving Time and Cost with Hyper-V Automation
- The Restoring Hyper-V and VMs using Windows Server Backup recipe in this chapter