
Protecting data at rest is a real security concern in datacenters. Data that is stored here is very important; any leakage can lead to serious problems for companies and can damage their reputation and brand.
BitLocker Drive Encryption is a Windows feature that enables data protection by using strong encryption to protect your data in case of theft. It is a perfect solution for branch offices or datacenters where there is no local security. BitLocker is a solution that protects the disk in case of lost, stolen, or inappropriately decommissioned hard drives. This protection is by way of a password or smart card, and it also supports a recovery key in case of lost passwords.
In virtual and cloud environments, when using virtual hard disks, prior to Windows Server 2012, there's no encryption, by default. If one of your servers or storage is stolen, someone can open the virtual hard disk files with a double-click and obtain all the information they want.
When used in conjunction with a system that supports Trusted Platform Module (TPM), BitLocker also provides additional and advanced security features. A TPM is a chipset present on servers, which BitLocker can use to store the encryption key so that the system can identify, say, whether the hard disk has been moved from one server to another. During the boot process, BitLocker and the TPM verify the hardware and boot file integrity, allowing verification for any modification, say, attaching a disk to another computer in an unauthorized manner.
This recipe demonstrates how to enable BitLocker to encrypt and protect your hard drives.
To enable the additional security features provided by TPM, you need to make sure your server has a TPM chipset and a Trusted Computing Group BIOS.
It is a best practice to use a USB flash drive to store the startup key for a scenario without a TPM chipset. Add a flash drive before you start the BitLocker wizard.
If you don't have a TPM chipset, this recipe will also demonstrate how to enable BitLocker without the need to have TPM.
The following steps will show you how to enable and configure BitLocker for your disk partitions:
- To install the BitLocker Drive Encryption feature, open the Server Manager console from the Taskbar.
- In the Server Manager console, click on Manage in the top-right corner and select Add Roles and Features.
- In the Before you begin section, click on Next.
- In the Select installation type section, click on Next.
- In the Select destination server section, click on Next twice.
- In the Select features section, select the BitLocker Drive Encryption checkbox, as shown in the following screenshot:
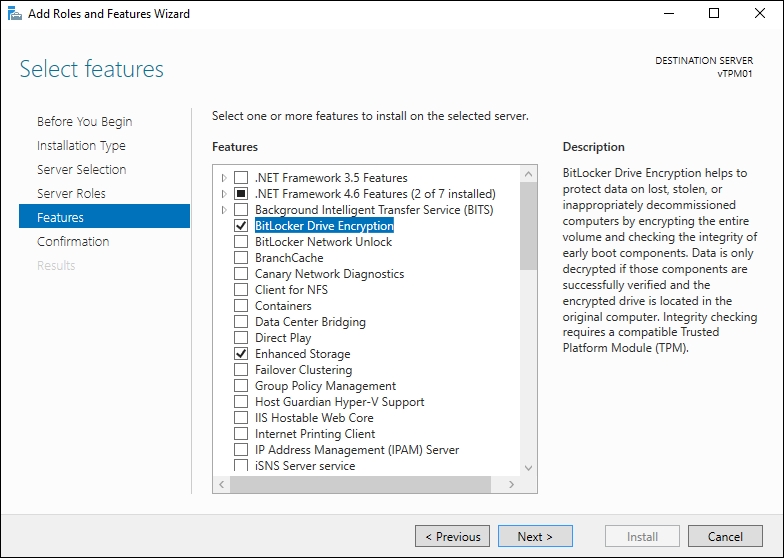
Installing the BitLocker Drive Encryption Feature
- Click on Next, and on the Confirm installation selections screen, click on Install. Wait for the installation to be finished, and restart your server.
- After the installation, to enable BitLocker in a hard disk drive, open the Control Panel.
- In Control Panel, click on System and Security | BitLocker Drive Encryption.
- In the BitLocker Drive Encryption window, select the drive for which you want to enable BitLocker and click on Turn on BitLocker.
- You can also access the same option by right-clicking on the volume or via Windows Explorer. To do this via Windows Explorer, open a new Windows Explorer window, click on Computer in the left-hand pane, select the drive you want to enable, select the Manage tab, click BitLocker, and click on Turn on BitLocker, as shown in the following screenshot:

Enabling BitLocker Drive Encryption
- If you receive an error message saying that BitLocker cannot be enabled because there is no TPM device, continue with the following steps; otherwise, continue from step 20.
- To use BitLocker without a compatible TPM, launch the Start menu and type
gpedit.msc. Click on the gpedit icon to open Local Group Policy Editor. - In the Local Group Policy Editor window, navigate to Computer Configuration | Administrative Templates | Windows Components | BitLocker Drive Encryption, and click on Operating System Drives.
- Double-click on the Require additional authentication at startup policy, and click on Enabled.
- Under Options, check the Allow BitLocker without a compatible TPM (requires a password or a startup key on a USB flash drive) checkbox and click on OK.
- Type the command
gpupdate /forceto make sure the local policy or GPO has been applied. - Open Windows Explorer or Control Panel to turn BitLocker on, as explained in steps 10 and 12.
- In the BitLocker Drive Encryption wizard, specify a password that will be used every time your computer starts, and click on Next. If you are not encrypting a system partition, you can also elect to use a smart card to unlock the drive, by checking the Use my smart card to unlock the drive checkbox.
- In the next window, a recovery key will be created. You need to specify where to save the key. Pick between Save to a USB flash drive, which is an option that is available if using a physical Server/TPM, Save to a file, or Print the recovery key, as shown in the following screenshot:
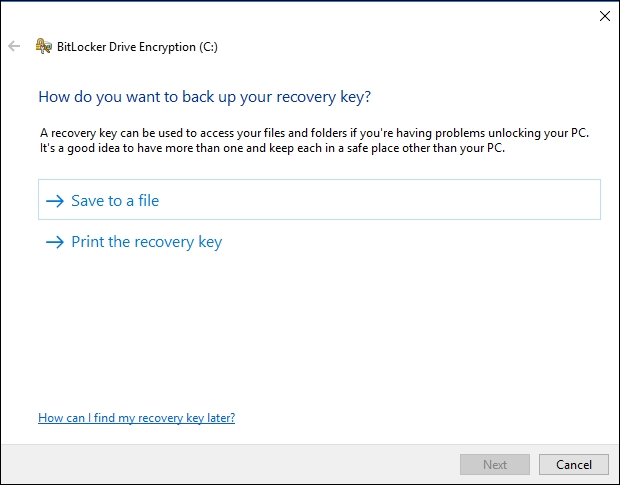
Enabling BitLocker Drive Encryption – Recovery Key
- In the Choose which encryption mode to use window, select the most appropriate option, either New encryption mode, which is used for fixed devices, or Compatible mode, which is used for removable devices, and click Next.
- In the Are you ready to encrypt this drive, optionally select Run BitLocker system check and click Continue; otherwise, click Start encrypting.
- To manage BitLocker configuration, such as recovery keys and passwords, and also to disable it, open Control Panel and click on System and Security | Manage BitLocker.
BitLocker has come far since its initial release in the Windows 2008 operating system.
It is a very common feature enabled on servers located in the branch, to allow disk protection in case the server is stolen, and will become more common in the future for securing virtual machines in the cloud. The good news is that you can also use it on a number of storage options to enable high protection.
On Windows Server 2016, BitLocker is a feature, and must be installed in order to enable BitLocker on a disk drive. By default, you must also have a TPM chipset to use BitLocker. In case the server doesn't have TPM, you can disable the TPM requirement using group policies. However, with the introduction of Windows Server 2016, you can now use a vTPM to secure a virtual machine.
After installing, it is quite easy to get BitLocker enabled. There are several ways to do it, such as through Windows Explorer, by right-clicking on the disk drive, through the Control Panel, and through the command-line interface.
During the process of turning it on the wizard creates a recovery key that needs to be saved on another hard drive or even printed, in case you lose the password.
With these new features, you can apply and manage BitLocker in a vast list of scenarios and storage, including CSVs, within a VM and boot via SANs, which is very useful for branch offices with lower physical security, such as disaster recovery multisite cluster.
BitLocker can also be enabled using two commands. The first one is Manage-BDE. Using the following example, you can enable BitLocker on C: and save the recovery key on H:. After typing the command, the system will prompt for the password, and the encryption process will begin:
Manage-bde –on C: -RecoveryPassword –RecoveryKey H:
If you prefer PowerShell, you can use the cmdlet Enable-BitLocker. For more information, type Help Enable-BitLocker.