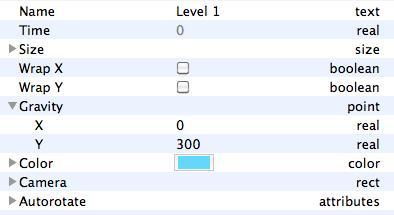
Let's start with the gravity. Go back to Level 1.
- Add the Gravity to the scene in the Inspector, then click the Scene button and expand the Gravity roll-out and change Y to
300.
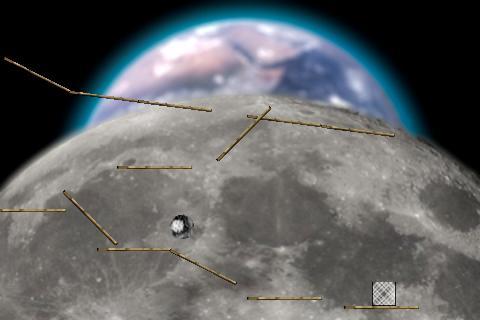
- Next, we are going to start programming the Useable Platforms, the ones that the player will be using to move around to solve the puzzles. To do this, we are going to create some touch controls and physics.
- Double-click the platform which the player will move around. Now you'll see a big lock where you put the behaviors; click that because we only want to edit this specific platform, not all of them.
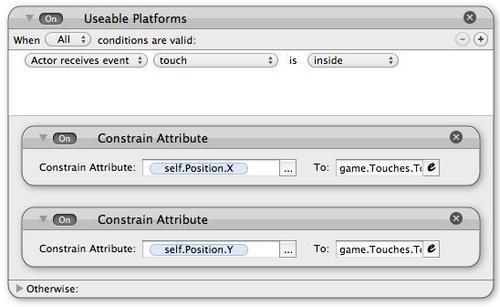
- Under the Physics roll-out, change the Restitution to
0.5. Create a rule and name itUseable Platforms, then change the attributes to Actor receives event | touch | is | inside. Then, as shown in the previous screenshot, drag in two Constrain Attribute behaviors. For the first one, we are going to do Constrain Attribute: | self.Position.X | To: | game.Touches.Touch 1.X. The second will be the same, but instead of X we are going to use Y. - You may need to resize the actor to make it easier for the player. If this is the case, double-click the actor, then click the Graphics roll-out and change Horizontal/Vertical Wrap to Fixed. This allows you to stretch the size of the actor without stretching the image itself. Also, don't forget to uncheck the Moveable option in the Physics Attributes; if we don't, all the platforms will fall! Now, to save ourselves a lot of time, click the Custom button in the Library, and drag the whole rule into the Custom behaviors.
Test the level to see if everything works, if so, wonderful! Now, you should start making it a habit to save every time you incorporate some new changes. This is a good practice because sometimes (not always) you can experience a crash in GameSalad and you will lose a lot of important work.
In this section, we looked at how to add gravity to the level; the value can be any amount that you want. If you want, you can even use a negative number for negative gravity such as in space. Then we saw how to create touch controls for our useable platforms. The moment a player touches them, they will follow their touch.
Time to finish creating this level. We have the canvas all drawn up now, we have to "color it in", and by that I mean adding the behaviors to our actors.
- Open up the second level and change Gravity to
300. - Double-click the two platforms that are going to be useable. Go to your Custom behaviors, and drag Useable Platforms into the behaviors of the actor.
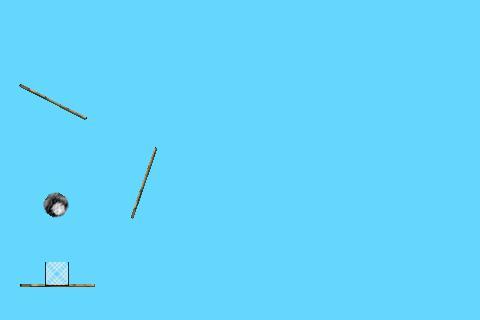
- Test it to make sure everything works well.
Oops, I didn't do it right! As you can see from the previous screenshot, I was unable to pass the level.