
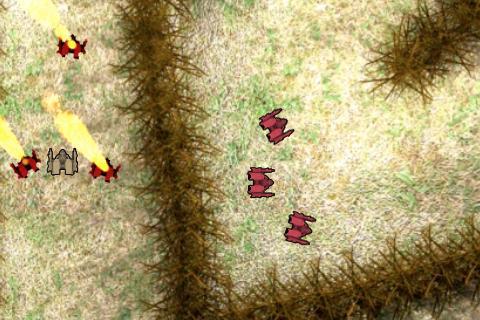
Now, create a wreckage image that will be displayed when the enemy is destroyed, as shown in the following screenshot. I created a twisted and charred wreckage. I took the image of the bad mech, darkened it, and then erased bits and pieces to make it look like it blew apart.
- Let's import the destroyed wreckage image into GameSalad, and create a new actor and name it
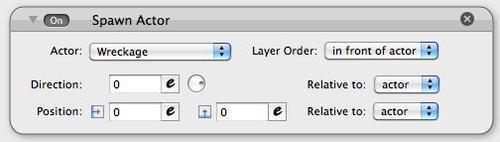
Wreckage. We aren't going to import it into the level, we are going to spawn it when the enemy is destroyed, so let's open up our enemy. - Drag in a Spawn Actor behavior and change the Actor to Wreckage, as shown in the following screenshot.
- Test your game to make sure the enemy is destroyed correctly, and the wreckage spawns appropriately (you may have to fiddle around with the rotation and position settings). If everything worked, great! But it's not quite pretty now, is it? First thing you may notice is when the bullet hits the enemy, nothing happens to the bullet!
- So we have to destroy it, let's edit our Bullet actor, create a new rule and rename it
Destroy. Change the settings to Actor receives event | overlaps or collides | with actor of type | Enemy - Now, simply add in a Destroy behavior, and that's it. Now, when the bullet hits the enemy it will be destroyed as it should.
- Let's edit our Wreckage actor. Drag in a Particle behavior and let's change the settings to the following to make a cool-looking, smouldering, and twisted burning wreckage:
- Spawn Rate Tab
- Number of Particles:
100 - Particle Startup Time:
2 - Particle Lifetime:
5
- Number of Particles:
- Velocity/Position Tab
- Emitter Offset:
0/0 - Direction:
130(Relative to scene not actor) - Speed:
20
- Emitter Offset:
- Size Tab
- Size:
10| Size Changes To | Size Transition Box - Target Size:
30 - Duration:
3
- Size:
- Color Tab
- Color:
Tangerine(Or a tint of orange or yellow that you prefer) - Color Changes to
- Blending:
Additive - Color Transition Box | Target Color:
Black - Duration:
5
- Color:
- Rotation Tab
- Initial Rotation:
0 - Angular Velocity:
0
- Initial Rotation:
- Image Tab
- Set Image to: (Then, select our smoke image, or another one you like)
Then, as seen in the next screenshot, the final result looks pretty cool!
..................Content has been hidden....................
You can't read the all page of ebook, please click here login for view all page.