
When creating a new dashboard, you are prompted to select a default layout; this was outlined earlier in the Creating a user dashboard recipe. However, you might need to design a dashboard that requires a different layout than those provided in the six default layouts. In order to handle this, Dynamics CRM 2011 lets the dashboard editor modify portions of the layout to better accommodate your needs.
Carry out the following steps in order to complete this recipe:
- Select the Dashboards link from the Workplace area.
- Select the same personal dashboard that we created in the first recipe of this chapter (Creating a user dashboard).
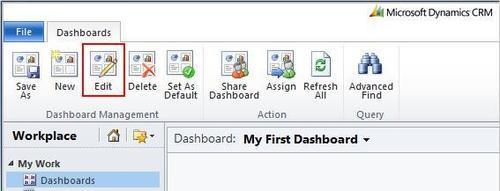
- From the Dashboards menu in the Dynamics CRM 2011 ribbon, click on the Edit button, as highlighted in the following screenshot:
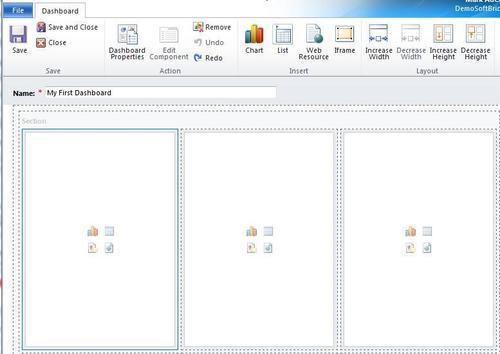
- The dashboard editor screen will open, and your dashboard will be in the edit mode. By using the mouse select the first component placeholder in the first row, on the left. When you select a dashboard component, it will become highlighted with a blue border as seen in the following screenshot:
- Remove the selected component placeholder by clicking on the Remove button located in the Dashboard ribbon toolbar, as shown in the following screenshot:

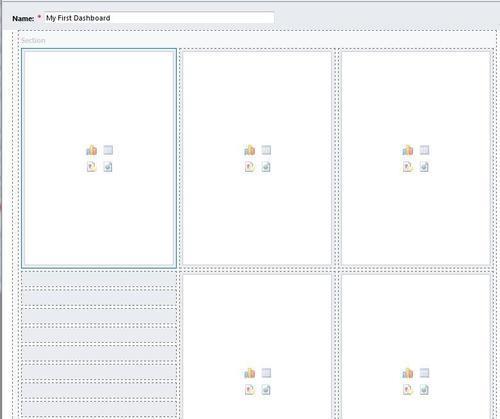
- Once the item has been removed, you will notice that the component placeholder sitting below it has moved up to fill in the empty space. By default, the top section of a dashboard cannot be blank. Make sure that the first item on the left side is still selected, as shown in the following screenshot:
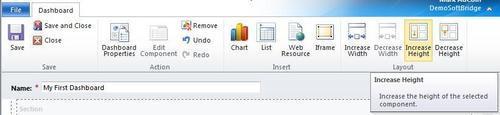
- Locate the Increase Height button in the dashboard editor's ribbon toolbar. Click on this button four times until the selected component placeholder becomes two rows tall:
- Next, select the component placeholder located in the bottom right of the dashboard, as highlighted in the following screenshot:
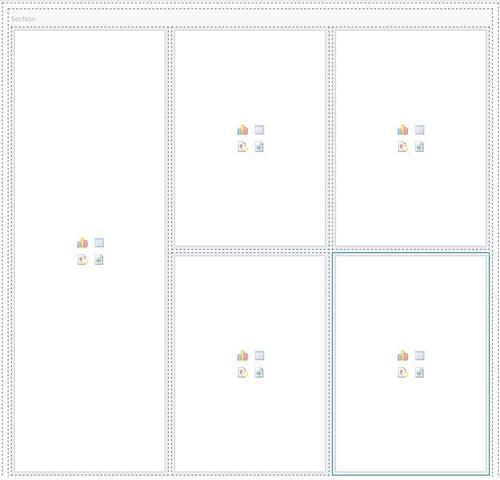
- Remove the selected component placeholder by clicking on the Remove button in the Dashboard ribbon toolbar.
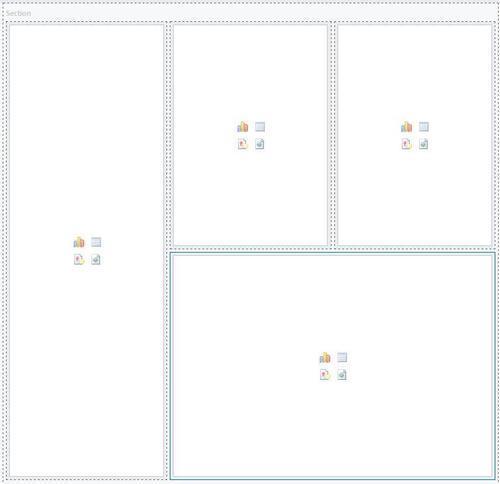
- Select the only remaining small component placeholder in the bottom row.
- Locate the Increase Width button in the Dashboard toolbar ribbon. Click on the Increase Width button once and the selected component placeholder will fill the available horizontal space in the dashboard:
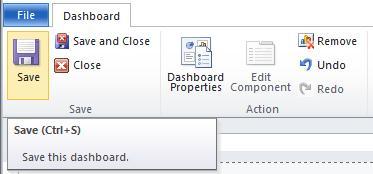
- Click on the Save button in the Dashboard ribbon toolbar to save your custom layout configuration, as shown in the following screenshot:
..................Content has been hidden....................
You can't read the all page of ebook, please click here login for view all page.