
In order to work with a dashboard's Form XML using Microsoft Visual Studio, first you have to export the existing Dashboard using a Solution Package in Dynamics CRM. This recipe will cover exporting the Dashboard and then accessing the Form XML. An in-depth review of importing and exporting Solution Packages is outside the scope of this book, but this section covers the necessary steps to complete the recipe.
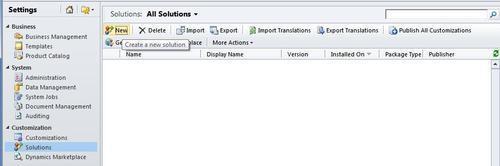
This recipe will be exporting the standard Dynamics CRM Overview dashboard that comes pre-installed with Dynamics CRM 2011. Navigate to the Solutions section in the Dynamics CRM 2011 Settings area.
Carry out the following steps in order to complete this recipe:
- Once you have navigated to the Solutions section in the Settings area, click on the New button to create a blank solution for this recipe, as shown in the following screenshot:
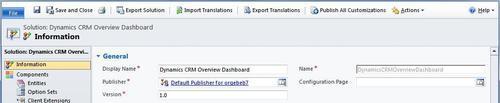
- A screen will open for the new solution, as shown in the following screenshot. Fill in the required fields as listed in the following table and then click the Save button to commit the changes.
Field
Value
Notes
Display Name
Dynamics CRM Overview Dashboard
Name
DynamicsCRMOverviewDashboard
This value will be generated from the Display Name field value will be generated
Publisher
Default Publisher for orgebeb7
There will be at least one default publisher for your CRM instance value will be generated
Version
1.0
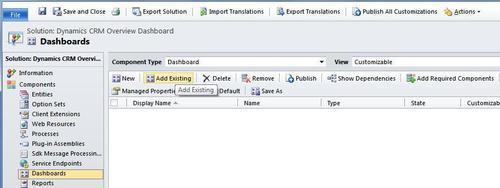
- Once you have saved the solution package, click on the Dashboards area located in the left-hand navigation of the screen. Next, click on the Add Existing button, as shown in the following screenshot:
- A Select solution components screen will appear that shows a list of all the dashboards currently published in the application. Locate and select the Microsoft Dynamics CRM Overview dashboard and then click on the OK button:

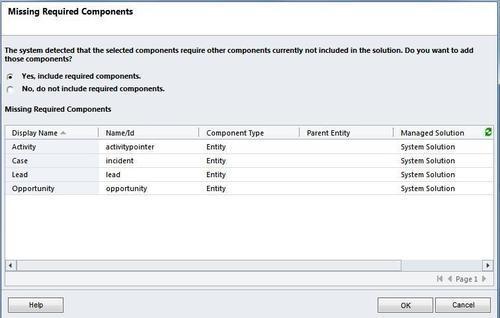
- As the selected dashboard displays data for the different entities (record types) in Dynamics CRM, the Missing Required Components dialog will appear and prompt you to include the component types displayed on the dashboard in your solution package. However, if you are exporting a completely blank dashboard, then you will not be prompted to include missing required components. In this case, since we are extracting the dashboard to modify it and then load back into the same solution, you can skip this prompt by selecting the No, do not include required components option and then click on the OK button. Please note, if you were following proper development guidelines then you would include all missing required components in the solution as well:
- Now that your solution package contains the Microsoft Dynamics CRM Overview dashboard, you can export the solution by clicking on the Export Solution button located on the window toolbar, as shown in the following screenshot:
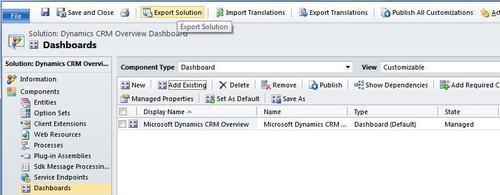
- The first step in the Export Solution process is navigating to the Publish Customizations screen. This screen gives you a chance to publish any and all customizations that you may have worked on in the solution by clicking on the Publish All Customizations button. Since we have not made any changes yet, you can skip this step by clicking on the Next button. Please note that in order to follow best practices in a real development process, you should click on the Publish All Customizations button to ensure that you are getting the latest version of all components:

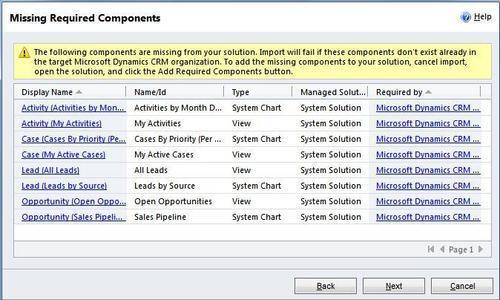
- If the dashboard contains any chart or list components, the Missing Required Components screen will prompt you to include any of the components needed for this solution package.
As mentioned earlier, this step is a warning to remind you that if you try to import a solution package and the required components are missing then the import process will fail. Since, we are editing an existing dashboard and re-importing it right away, you can skip this screen by clicking on the Next button:
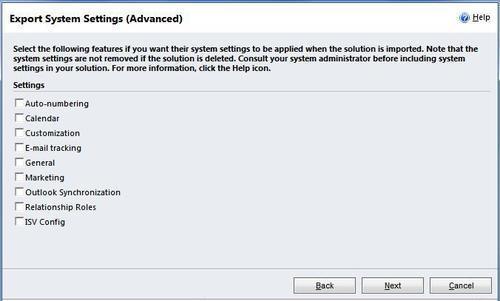
- The next screen will be the Export System Settings (Advanced) dialog. You will not need to include any of these settings in the solution package. Click on the Next button to continue further:
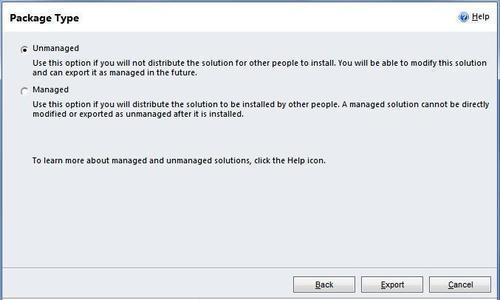
- The final screen is the Package Type dialog, which asks you to select between an Unmanaged or Managed solution export. Delving into the differences between unmanaged and managed solutions in Dynamics CRM is outside the scope of this book, so for this recipe select the Unmanaged option and then click on the Export button, as shown in the following screenshot:
- After you click on the Export button, the dialog will disappear. Dynamics CRM is combining all the components required to export and creating a ZIP file for download. This process may take a few seconds to complete.
- Save the ZIP file to a location on your computer. Locate the file using Windows Explorer and unzip the contents. The contents of the solution package are three XML files.
Filename
Description
Notes
solution.xmlContains the details of the solution package including publisher information and a listing of any missing or key dependencies.
Do not edit this file.
[Content_Types].xmlStandard Microsoft export file that identifies the content of the solution. Since this is all XML there will be only one content type listed.
Do not edit this file.
customizations.xmlThis file contains all of the content and mark-up that will need to be changed.
Edit this file.
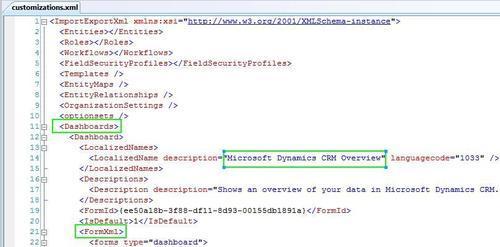
- Open the
customizations.xmlfile in an XML editor, as shown in the following screenshot, so that you can browse the XML content to get familiar with how a dashboard is constructed usingFormXML. Since this recipe started by using a dashboard that already had components on it, the Form XML will contain a lot of information. If you started with a new, empty dashboard, then theFormXMLwould be less complex:
Tip
Backup, Backup, Backup!
Once you have downloaded the compressed Solution Package file, a best practice is to create a backup of that file by adding a descriptive label such as [filename]_base_[date].zip and either load it on your organization's source code repository or at least create a backup folder on your machine. This will save you from trying to reverse customizations if you make any major mistakes.