
Once we have created one or more containers, we can start uploading objects to them. While OpenStack Object Storage does not support nested containers, we can simulate folders or file directories with object names. This presents similar structure to the pseudo-folders we used in container names and both achieve similar end goals to a user expecting a tree-like structure to their object storage use.
Ensure that you are logged on to a correctly configured OpenStack client and can access the OpenStack environment as a user with the swiftoperator privileges. We will use the developer user created in the Common OpenStack identity tasks recipe in Chapter 2, The OpenStack Client, with the cookbook4 password; we have also granted this user swiftoperator privileges.
Refer to Chapter 2, The OpenStack Client, for details of setting up your environment to use OpenStack command-line client.
To upload objects to an OpenStack Object Storage container, follow the following steps:
- We will upload the
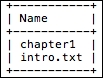
intro.txtfile into thebookscontainer:openstack object create books intro.txtThis will give the following output:

- List objects in a container by providing the container name:
openstack object list booksThis will give an output like the following:
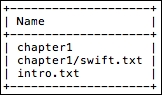
- We can upload an object into the pseudo-folder called
books/chapter1as follows:openstack object create books/chapter1 swift.txtThis will give an output like the following:

- To list objects in a container, issue the following against the container name:
openstack object list booksThis will list the objects available under this container:
- To list all objects in the pseudo-folder container name, use a
prefixflag:openstack object list books --prefix chapter1/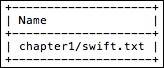
- To list all top-level objects in a container, use a delimiter flag. In this example, the delimiter is
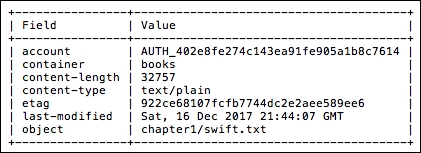
/:openstack object list books --delimiter / - To show information about an object, issue the following command:
openstack object show books chapter1/swift.txtThis will give information about that object:
In order to store files in OpenStack Object Storage, objects have to be uploaded to a container. Containers cannot be nested; however, pseudo-folders or pseudo-directories can be created using the / delimiter. Once a container is created, you can upload files by using the following command:
openstack object create container_name object_1 [object_2 …]
To list objects that were uploaded to a container, execute the following command:
openstack object list container_name
When listing objects in a container, enable filtering using the --prefix and --delimiter flags.
To view details of individual object, use the following command:
openstack object show container_name object_name