
Adding users to OpenStack Identity service requires the user to belong to a domain or a project in the domain and to be assigned a role defined in the domain or the project. For this section, we will create two users. The first user will be named cloud_admin and will have the cloud_admin role assigned to them in the cookbook project. The second user will be named reader and will have the default _member_ role assigned to them in the same cookbook project.
Ensure that you are logged on to a correctly configured OpenStack client and can access the OpenStack environment as a user with admin privileges.
Refer to Chapter 2, The OpenStack Client, for details of setting up your environment to use OpenStack command-line client.
In order to create a user in OpenStack and assign roles to it, we will need to execute the commands listed below.
- First, get the
bookstoredomain ID or domain name: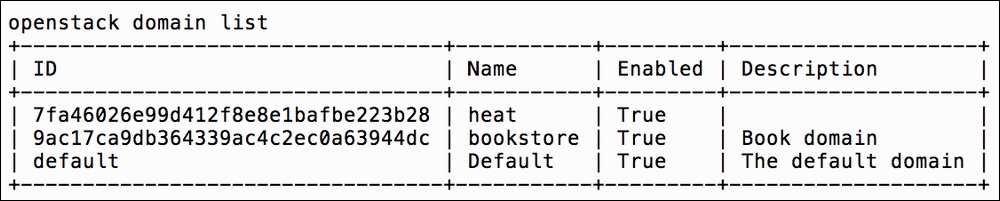
- Using the
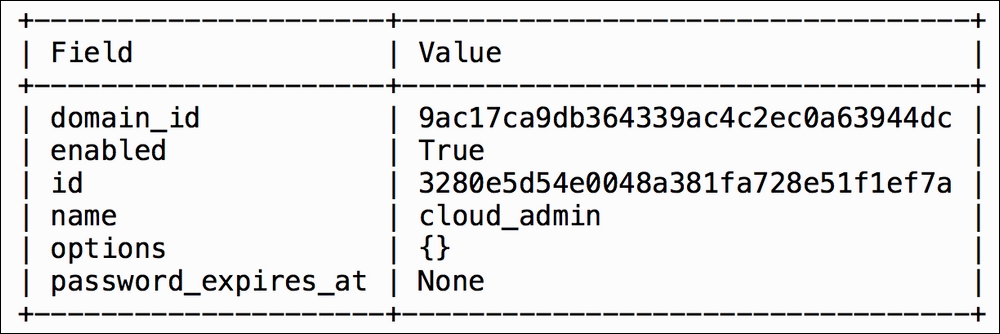
bookstoredomain name, create a newcloud_adminuser:openstack user create --domain bookstore --password verysecret cloud_admin
- Next, get a cookbook project ID or project name:
openstack project list
- Create the
readeruser in thebookstoredomaincookbookproject:openstack user create --domain bookstore --project cookbook --password verysecret reader

- Assign
cloud_adminuser to theadminrole:openstack role add --domain bookstore --user cloud_admin --role-domain bookstore admin
There is no output from this command.
- Assign the
readeruser to the_member_role:openstack role add --project cookbook --user reader _member_
There is no output from this command.
- List user and role assignment:
openstack role assignment listThe output will be a matrix of role, user, group, project, and domain IDs. We omit the example output due to sheer size of the table that contains a matrix of IDs for each role, user, group, project, domain, and whether the role was inherited.
Adding users in the OpenStack Identity service involves a number of steps and dependencies. First, a domain and a project are required for the user to be part of. A user must always belong to a domain. If there are no custom domains created, a default domain will be used. Once the project exists, the user can be added. At this point, the user has no role associated, so the final step is to assign the role to this user, such as _member_, admin, or a custom role.
To create a user with the user create option, the syntax is as follows:
openstack user create --domain <domain>
    --password <password> <user_name>
The user_name attribute is an arbitrary name, but cannot contain any spaces. A password attribute must be present. In the previous examples, these were set to verysecret. If the domain attribute is not specified, the default domain will be set.
To assign a role to a user with the role add option, the syntax is as follows for the default domain:
openstack role add --project <project>
    --user <user>
    <role>
For a user in a custom domain, use the following syntax to assign a role:
openstack role add --domain <domain>
    --user <user>
    --role-domain <role_domain>
    <role>
The role_domain parameter is the name (or ID) of the domain to which the role belongs.
We will also need to have the names or IDs of the user, role, and project in order to assign roles to users. These names or IDs can be found using the following commands:
openstack project list
    openstack user list
    openstack role list
The --domain <domain> option is only required if custom domains are used. To obtain a list of domains, issue the following command:
openstack domain list
To get a matrix of domain, project, user, and role assignments, use the following command:
openstack
role assignment list