
OpenStack Compute provides a handy troubleshooting tool with rescue mode. Should a user lose an SSH key, or otherwise not be able to boot and access an instance, say, bad iptables settings or failed network configuration, rescue mode will start a minimal instance and attach the disk from the failed instance to aid in recovery. This applies to both Windows and Linux instances as this process essentially allows the mounting of the boot volume of your failed instance as a secondary disk to the rescue instance.
To put an instance into rescue mode, you will need the following information:
- The
openstackcommand-line client - The
openrcfile containing appropriate credentials - The name or ID of the instance
The instance we will use in this example is cookbook.test.
To put an instance into rescue mode, use the following steps:
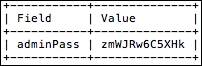
- First, we will put the instance into rescue mode as follows:
openstack server rescue cookbook.testThis will present us with a temporary password we can then use to access the rescue instance:
- To verify that an instance is in rescue mode, use the following command:
openstack server show cookbook.test -c name -c statusThis will present the
statusvalue asRESCUE:
- At this point, we can then access this instance, using the
rootusername, and the temporary password we were given to perform operating system rescue commands on the mounted filesystem (the filesystem that is the boot volume of our original, broke instance). - To exit rescue mode, use the following command:
openstack server unrescue cookbook.test
The openstack server rescue command provides a rescue environment with the disk of your instance attached. First, it powers off the named instance, then it boots the rescue environment attaching the disks of the original instance. Finally, it provides you with the login credentials for the rescue instance.
Accessing the rescue instance is done via SSH. Once logged in to the rescue instance, you can mount the disk using mount <path to disk> /mnt.
Once you have completed your troubleshooting or recovery, the unrescue command reverses this process; first, stopping the rescue environment and detaching the disk, then booting the instance as it originally was.