3.7 Using the mikroC Pro for PIC Simulator
mikroC Pro for PIC IDE includes a powerful and easy-to-use simulator that can be extremely useful during program development and testing. The simulator is a program and does not need any hardware for its operation. Using the simulator we can step through a program, observe and, if required, change the values of variables as the program is running, insert break-points in the program and run the program until the break-point is hit, and so on.
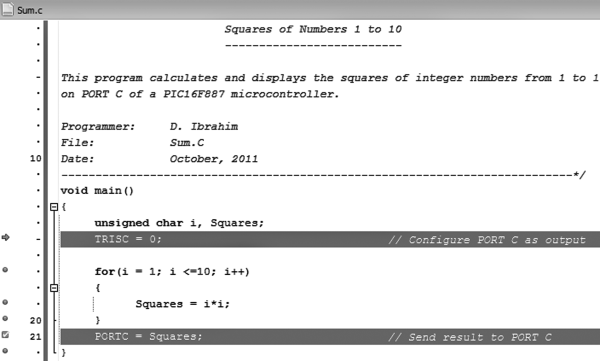
An example use of the simulator is given below, step by step, by considering the program developed in Example 3.12.
Step 1: Compile the program by making sure that the Build Type is set to Release and the Debugger is set to Software in the Project Settings window.
Step 2: From the drop-down menu select Run -> Start Debugger, or press the F9 function key. You will now see the simulator window on the right-hand side. A blue bar across the screen on the left-hand side points to the first executable statement in our program.
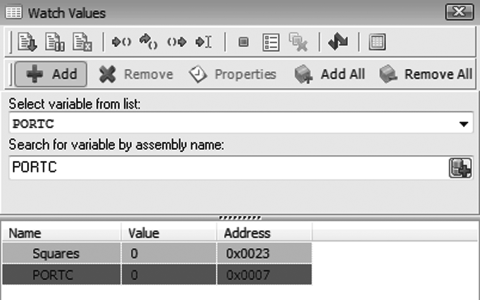
Step 3: Select the variables to be monitored using the simulator window. In this example, we wish to monitor the values of variable Squares and PORTC.
Click to open the list box
Select variable from list: under
Watch Values in the simulator window. Select variable
Squares from the list box. Then click
Add under
Watch Values to add this variable to the monitor list. Repeat for the PORTC. You should now have the simulator window, as in
Figure 3.30.
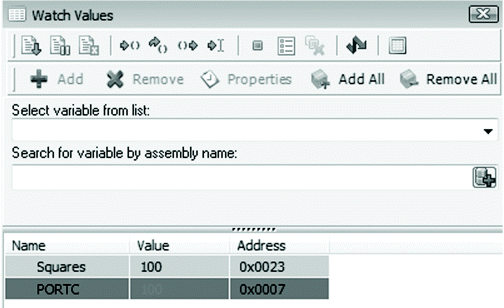
Step 4: We are now ready to single-step our program and observe values of the selected variables as the program is running. Press function key F8 to single-step through the program. The blue bar should move to the
for statement. Pressing F8 again should execute this statement and the blue bar should move to statement where the square of the number is calculated. Pressing F8 again will execute this statement. The value of variable
Squares will change to 1 in the Simulation window. Keep pressing F8 and you will see the value of
Squares changing. The value of any variable can also be displayed by moving the cursor over the variable. For example, move the cursor over variable
i to see its value at any instant in time. After executing the loop 10 times you should see that the final value of
Squares is 100 and PORT C is also set to this value.
Figure 3.31 shows the Simulator window at the end of the simulation.
3.7.1 Setting a Break-Point
Break-points are useful when we want to execute the program up to a point and then display (or change) the variables at this point. In this example we will set a break-point at the statement, which sends the value of Squares to PORTC. The steps are given below:
Step 1: Start the simulator and select the variables to be monitored, as described in steps 1–3 before.
Step 2: Place the cursor on the line where a break-point is to be placed and select
Run -> Toggle Breakpoint from the drop-down menu (or press the F5 function key). A red bar will appear on the line where the break-point is placed, and a red dot will be displayed on the line at the left-hand margin, as shown in
Figure 3.32.
Step 3: Select Run -> Run/Pause debugger (or press function key F6) to run the program until the break-point is hit. At this point you should see that variable Squares has value 100 and PORTC has value 0. Press F8 to execute the next statement, which will set PORTC to 100.
To remove all the break-points, select Run -> Clear Breakpoints (or press SHIFT+CTRL+F5) from the drop-down menu. To remove a specific break-point, click on the red dot at the left-hand line margin where the break-point is placed.