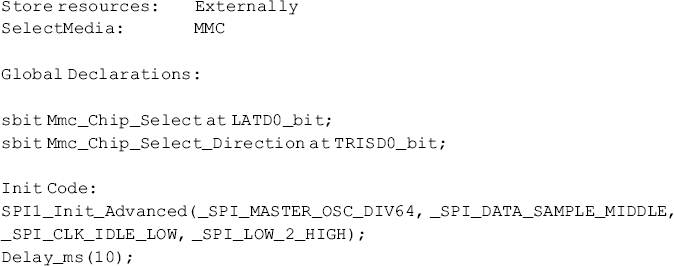
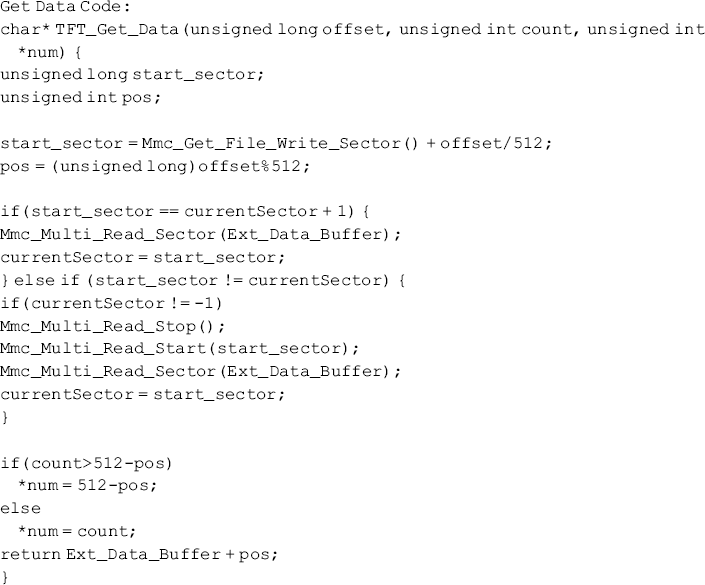
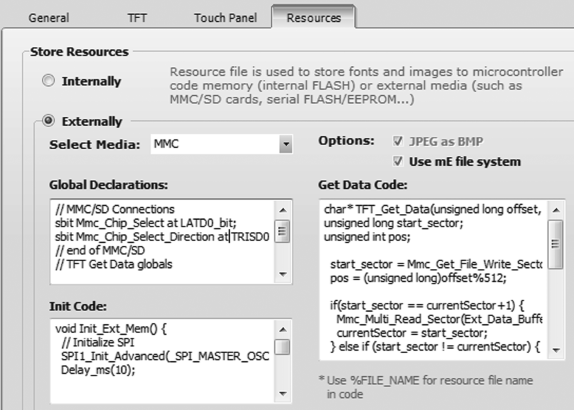
This project describes the design of a slide show where a number of images (four in this project) are stored on a mikroSD card and are displayed on the TFT screen with a delay between each display. The MikroMMB board is used in the design, as in the previous project. The project is named ‘PICTURE_SHOW’. The project configuration steps are as in the previous project. In addition, the Resources window in Settings should be configured as below (see Figure 15.14), to define the interface between the mikroSD card and the MikroMMB board (you may find that this window is already configured when the external resource is clicked):
3. Add Screen and Give it a Name
In this project, we have two screens: the startup screen, and the screen where the pictures are to be displayed. The startup screen will simply have a button and pressing this button will start the picture show. Rename the startup screen as Screen1, and set screen colour to White, with orientation set to Landscape.
4. Place components
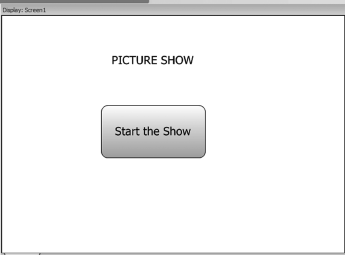
Place a Label on Screen1 and change its caption to ‘PICTURE SHOW’. Also, place a Round button on this screen, and change its caption to ‘Start the Show’.
Figure 15.15 shows the Screen1 layout.
Create a new screen by clicking the green ‘ + ’ toolbar. Rename this as Screen2 and set its orientation to Landscape. We will now load the images in our picture show. Make sure that the images are Bitmap images with extensions ‘.BMP’ and that they have the pixel sizes 320 × 240. Rotate the pictures by 90° clockwise, so that they will fit the screen nicely. There are many programs available to rotate images and to convert them to different sizes (e.g. FastStone Image Viewer).
In this example, four images are selected at random from the Internet for demonstration purposes. These images are converted to 320 × 240 pixels and then rotated by 90° and stored in a directory on the PC.
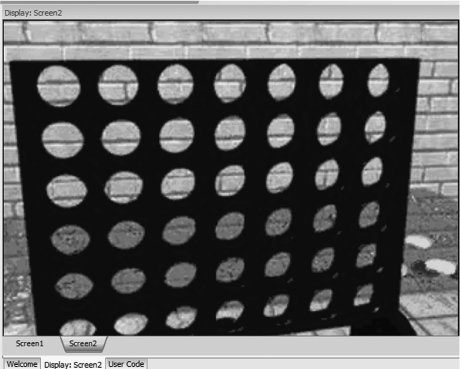
Click the Image tool and place it on the screen. Click next to Picture Name and select the first picture of the picture show from the appropriate directory. Position the image to fit the screen (see
Figure 15.16). Next, click the Image tool again and place it on the screen on top of the existing image. Select the second image from the appropriate directory by clicking next to Picture Name and again position the image to fit the screen. Repeat this process until all the images are placed on the screen. As you place images on the screen, only the last image will be visible. At the end, click the list box under the Components window on the middle left part of the screen. You should see all the image names that are loaded to the screen.
Click ‘Generate Code’ in the top menu of the screen. All the images are now compiled and stored in a file called the Resource file. This file is used to store fonts and images in the microcontroller code memory or in an external memory device, such as a mikroSD card. You should now format a mikroSD card with the FAT16 filing system and copy the Resource file to the card. The SD card should be less than 2 GB in size. Click the button named ‘Locate resource file’, located at the bottom right-hand side of the screen, to find the resource file. The resource file is the one with extension ‘.RES’ attached to the 8 character project name. For this project, the resource file is ‘PICTURE_.RES’, and this file must be copied to the mikroSD card.
5. Assign Actions to Components
We can now assign actions to our components. When the display is reset, and after calibrating the screen, the pictures will be displayed with a delay between each display.
Before assigning actions to components, we need to know the external addresses of the images in our project. This can be obtained from the file PICTURE_SHOW_RESOURCES.C in our project. Click ‘Locate resource file’ and then right click on this file and choose the edit option to see the contents of the file. The addresses of the images for this project are found to be:
We shall be using these addresses to display the images.
Click on the Round button in Screen1. Double click ‘OnClick’ in the Properties window to assign action to this button. Enter the following code in the function body:
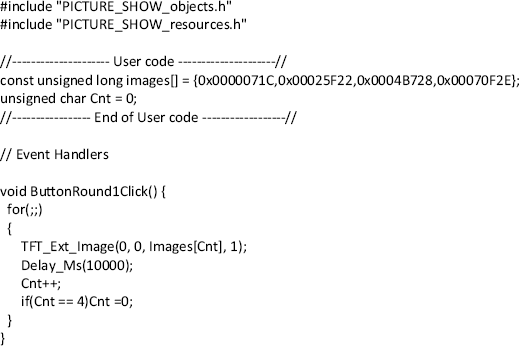
and enter the following code in the user code section:
The addresses of the images are stored in an array called Images, and a variable called Cnt is declared and initialised to 0. When the ‘Start the Show’ button is clicked, function ButtonRound1Click will be called. Inside this function, an endless loop is formed using a for statement. TFT library function TFT_Ext_Image is called to display an image. The address of the image to be displayed is specified by indexing array Images with variable Cnt. Thus, initially the first image is displayed. Then after 10 seconds delay, variable Cnt is incremented by 1 and the second image is displayed, and so on. After displaying the last image (Cnt = 4), variable Cnt is reset to 0 to display the first image again and this process continues forever.
6. Compile the Code and Load to the Microcontroller
Click the icon ‘Start Compiler’ in the top menu to start the mikroC Pro for PIC compiler. Compile the program as before, by clicking the ‘Build’ icon in the top menu. Make sure that the SD card library is included in the build process. To check this, display the Library Manager by clicking View -> Library Manager at the top menu. Tick boxes ‘Mmc’, ‘Mmc_FAT16’ and ‘Mmc_FAT16_Config’, if they are not already ticked. Now, we are ready to program the microcontroller using the Bootloader software, as described in the previous project.
After the programming is finished, reset the MikroMMB board. The display will start after 5 seconds. When the program is run, the user is asked initially to calibrate the screen by touching the bottom-left and upper-right points of the screen. Now, the pictures will be displayed as a picture show, with 10 seconds delay between each output.
