13.2 PROJECT 13.2 – LED Flashing with Variable Rate
13.2.1 Project Description
This project shows how the GLCD and touch screen can be used to develop the project of a flashing LED, where the flashing rate is selected by touching the appropriate button on the GLCDscreen. Figure 13.10 shows the screen layout and co-ordinates of the various boxes and rectangles displayed on the screen.
Figure 13.10 Screen layout of the project
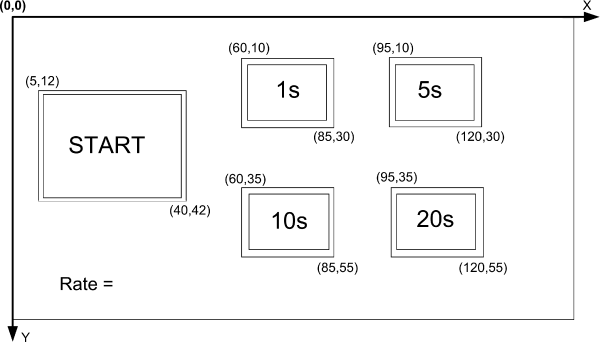
An LED is connected to pin RC7 of the microcontroller. The flashing rate is displayed on the screen in the form of boxes. Four options are available: 1 second, 5 seconds, 10 seconds and 20 seconds. The user initially selects the flashing rate by touching the required box on the screen. The flashing then starts by touching the START button.
13.2.2 Block Diagram
The block diagram of the project is as shown in Figure 13.3.
13.2.3 Circuit Diagram
The circuit diagram of the project is as shown in Figure 13.5.
13.2.4 Project PDL
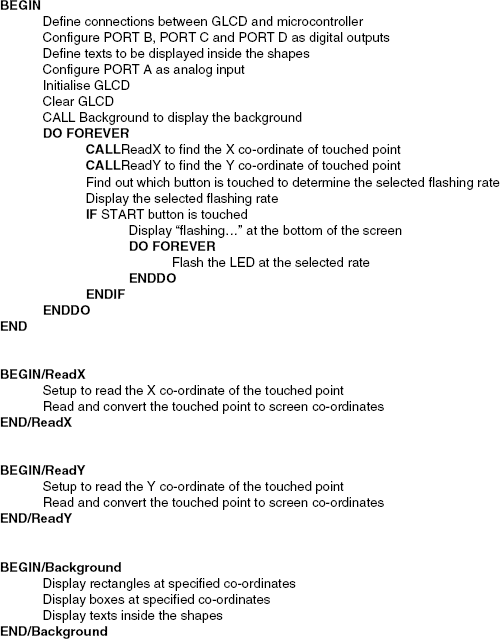
The PDL of this project is given in Figure 13.11.
Figure 13.11 PDL of the project
13.2.5 Project Program
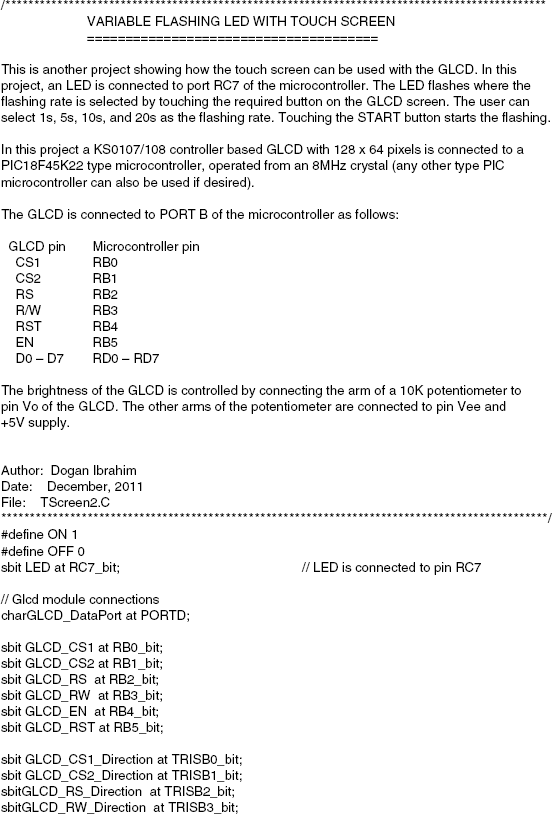
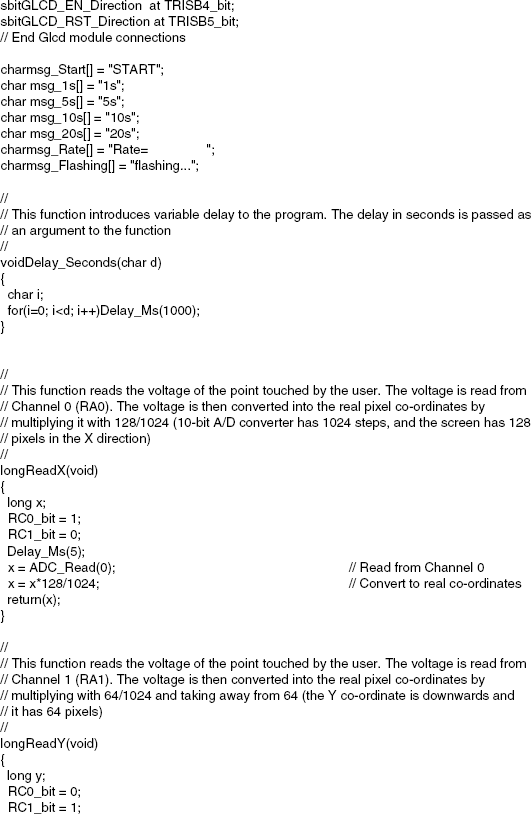
The program is named TScreen2.C and the program listing of the project is shown in Figure 13.12. At the beginning of the project, an LED is assigned to port pin RC7 of the microcontroller. Then, the connections between the microcontroller and the GLCD are defined using sbit statements. PORT B and PORT D are used to drive the GLCD and both of these ports are configured as digital outputs. PORT C is also configured as digital output, since the LED is connected to pin RC7 of this port. PORT A is configured as analogue and bits 0 and 1 of this port are configured as inputs so that RA0 (or AN0) and RA1 (or AN1) become analogue input ports.
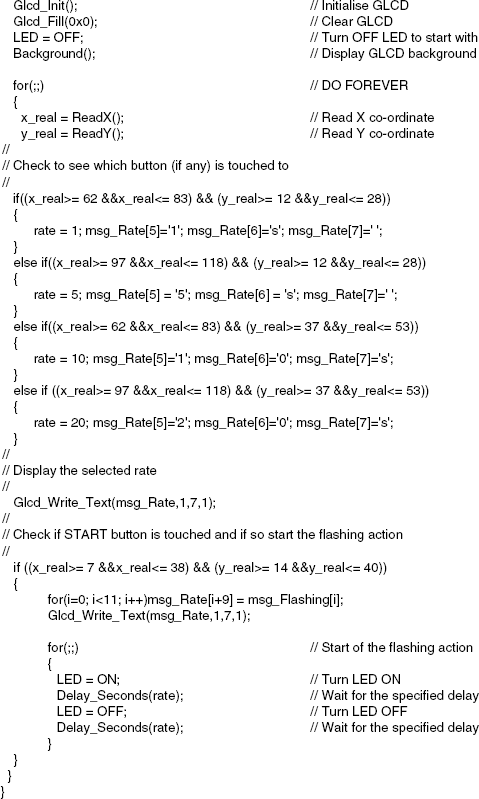
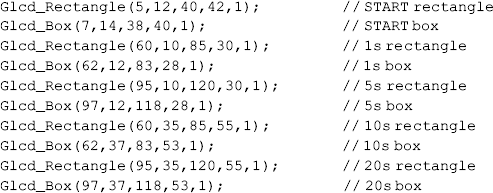
The GLCD is then initialised, the screen is cleared, and the LED is turned OFF at the beginning of the program. The program then draws the boxes and rectangles, and writes the texts START, and the flashing rates inside these shapes. These boxes and rectangles are drawn using the Glcd_Rectangle and Glcd_Box functions, respectively, at the following co-ordinates:
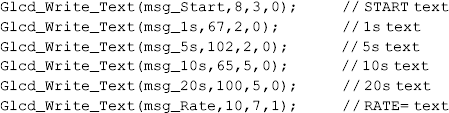
The texts are written inside these boxes at the following co-ordinates:
The program then checks to see if the user touched a rate selection box, and if so, the required flashing rate is selected and loaded into variable rate. When the user touches the START box, the flashing action begins where the LED is flashed continuously at the specified rate inside a for loop, and the text ‘flashing . . . ’ is displayed at the bottom of the screen.
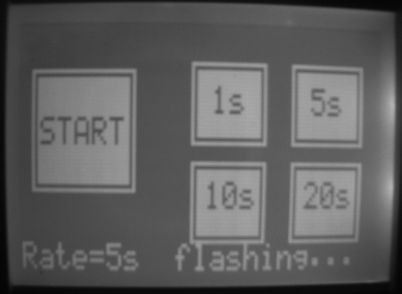
Figure 13.13 shows a typical display on the GLCD before the flashing is started. In Figure 13.14 the display is shown after the user selected the 5-second flashing rate and started the flashing action.
Figure 13.13 Display before starting the flashing action
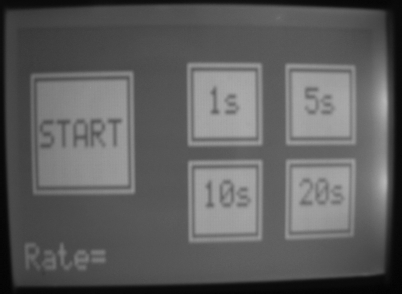
Figure 13.14 Display after starting the flashing action