
Understanding Operating Systems
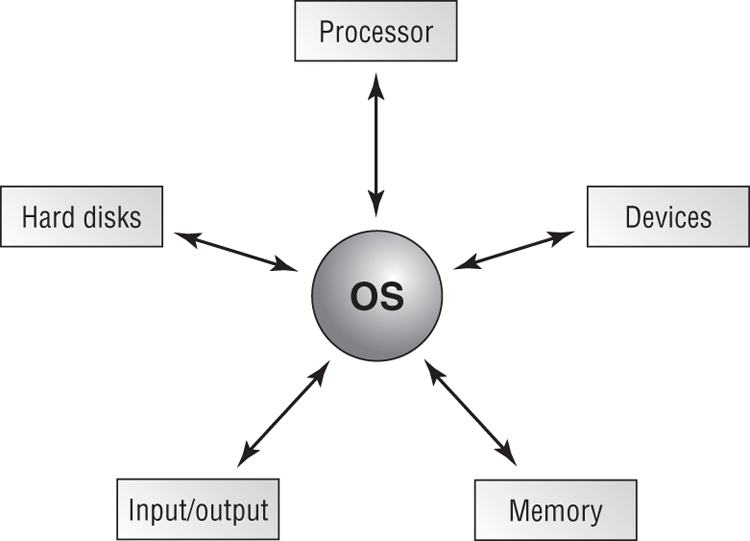
Computers are pretty much useless without software. A piece of hardware might just as well be used as a paperweight or doorstop unless you have an easy way to interface with it. Software provides that way. While there are many types of software, or programs, the most important application you’ll ever deal with is the operating system. Operating systems have many different, complex functions, but two of them jump out as being critical: interfacing with the hardware and providing a platform on which other applications can run.
Here are three major distinctions of software you should be aware of:
- Disk and file management
- Device access
- Memory management
- Output format
Figure 12-1: The operating system interacts with resources.
In the following sections, we’ll look at some terms and concepts central to all operating systems. Then we’ll move into specific discussions on Windows operating systems.
Operating System Terms and Concepts
Before we get too far into our discussion of PC operating systems, it will be useful to define a few key terms. The following are some terms you will come across as you study this chapter and work in the computer industry:
Minimum System Requirements
In the chapters to come, we’ll explore how to install and upgrade each of the operating systems you need to know for the exam, but one of the things that can prevent you from even considering these options is the hardware requirements of the operating system you are thinking of installing. Before you can begin to install an OS, there are several items you must consider. You must perform the following tasks before you even put the OS installation disc into your computer’s optical drive. These items essentially set the stage for the procedure you are about to perform:
- Determining hardware compatibility and minimum requirements
- Determining installation options
- Determining the installation method
- Preparing the computer for installation
Let’s begin our discussion by talking about hardware compatibility issues and requirements for installing the various versions of Windows.
Determining Hardware Compatibility and Minimum Requirements
Before you can begin to install any version of Windows, it is important that you determine whether the hardware you will be using is supported by the Windows version you will be running. That is, will the version of Windows have problems running any device drivers for the hardware you have?
To answer this question, Microsoft first came up with several versions of its Hardware Compatibility List (HCL). This was intended to be a list of all the hardware that worked with Windows and the versions of Windows with which the hardware worked. With the release of Windows XP, Microsoft expanded the idea of the HCL to include software as well, and a list that includes both hardware and software can hardly be called a Hardware Compatibility List. The new term was the Windows Catalog, and it replaced HCLs. This gave way to the Compatibility Center, and the one for Windows 7 can be found at the following location:
www.microsoft.com/windows/compatibility/windows-7/en-us/default.aspx.

The point is, before you install Windows, you should check all your computer’s components against this list and make sure each item is compatible with the version of Windows you plan to install. Just because a product is not on the list does not mean that it will not work; it merely means that it has not been tested. The list represents tested software and hardware that vendors have stated are compatible, but it is by no means all inclusive.
In addition to general compatibility, it is important that your computer have enough “oomph” to run the version of Windows you plan to install. For that matter, it is important for your computer to have enough resources to run any software you plan to use. Toward that end, Microsoft (as well as other software publishers) publishes a list of both minimum and recommended hardware specifications that you should follow when installing Windows.
“Minimum specifications” are the absolute minimum requirements for hardware your system should meet in order to install and run the OS you have chosen. “Recommended hardware specifications” are what you should have in your system to realize usable performance. Always try to have the recommended hardware (or better) in your system. If you don’t, you may have to upgrade your hardware before you upgrade your OS if you’re running more than just a minimal environment. Table 12-1 lists the minimum and recommended hardware specifications for Windows XP Professional. Note that in addition to these minimum requirements, the hardware chosen must be compatible with the selected version of Windows. Also, be aware that additional hardware may be required if certain features are installed (for example, a NIC is required for networking support).
Table 12-1: Windows XP Professional minimum and recommended hardware
| Hardware | XP Professional Requirement | XP Professional Recommendation |
| Processor | 233MHz Pentium/Celeron or AMD K6/Athlon/Duron | 300MHz or higher Intel-compatible processor |
| Memory | 64MB | 128MB |
| Free hard disk space | 1.5GB | 1.5GB |
| Floppy drive | Not required | Not required |
| CD-ROM or DVD drive | Required | Required |
| Video | SuperVGA or better | SuperVGA or better |
| Mouse | Required | Required |
| Keyboard | Required | Required |
Table 12-2 lists the minimum system requirements for various versions of Windows Vista.
Table 12-2: Windows Vista minimum hardware requirements
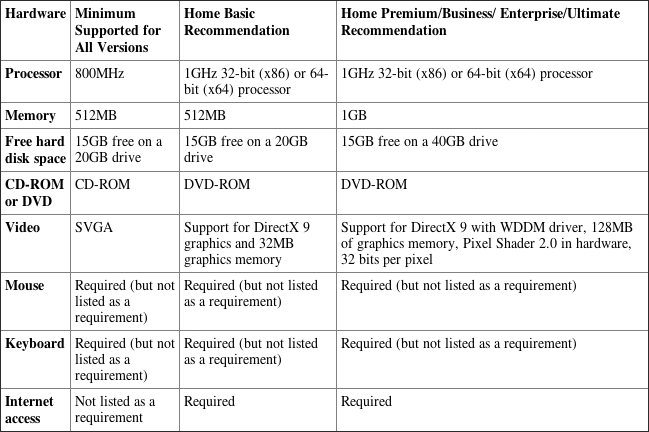
Table 12-3 lists the minimum system requirements for Windows 7. It should be noted that Windows XP Mode requires an additional 1GB RAM and 15GB hard drive space.
Table 12-3: Windows 7 minimum hardware requirements
| Hardware | Minimum Supported for All Versions |
| Processor | 1GHz |
| Memory | 1GB for 32-bit; 2GB for 64-bit |
| Free hard disk space | 16GB free for 32-bit; 20GB free for 64-bit |
| CD-ROM or DVD drive | DVD-ROM |
| Video | DirectX 9 with WDDM 1.0 (or higher) driver |
| Mouse | Required (but not listed as a requirement) |
| Keyboard | Required (but not listed as a requirement) |
| Internet access | Not listed as a requirement |
If there is one thing to be learned from Table 12-1, Table 12-2, and Table 12-3, it is that Microsoft is nothing if not optimistic. For your own sanity, though, we strongly suggest that you always take the minimum requirements with a grain of salt. They are minimum requirements. Even the recommended requirements should be considered minimum requirements. The bottom line is make sure you have a good margin between your system’s performance and the minimum requirements listed. Always run Windows on more hardware rather than less!
Other hardware—sound cards, network cards, modems, video cards, and so on—may or may not work with Windows. If the device is fairly recent, you can be relatively certain that it was built to work with the newest version of Windows. But if it is older, you may need to find out who made the hardware and check their website to see if there are drivers available for the version of Windows you are installing.

There’s one more thing to consider when evaluating installation methods. Some methods only work if you’re performing a clean installation and not an upgrade. We’ll discuss this in greater detail in the next chapter.
The Windows Interface
The interface of a machine running Windows XP is shown in Figure 12-2. If you’ve worked with older versions of Windows, you’ll notice that it looks only a bit different than the older interfaces. Most basic tasks, however, are accomplished in almost identical fashion on everything from a Windows 95 workstation computer to a Windows 2008 Server computer and a Windows 7 computer. Also, although the tools that are used often vary between the different OSs, the way you use those tools remains remarkably consistent across platforms.
This changed a bit with Windows Vista and the Aero interface, as Figure 12-3 shows, but not as dramatically as many in the media have made it out to be. It was tweaked a bit more with Windows 7, as shown in Figure 12-4.
We will begin with an overview of the common elements of the Windows GUI. We will then look at some tasks that are similar across Windows operating systems. If you have a copy of Windows 7, Windows Vista, or Windows XP available, you may want to follow along by exploring each of the elements as they are discussed.
Figure 12-2: The Windows XP interface
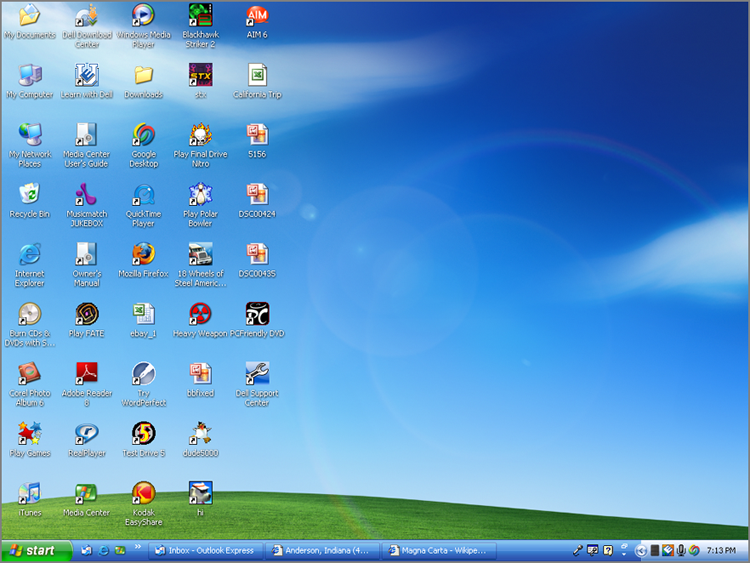
Figure 12-3: The Windows Vista interface
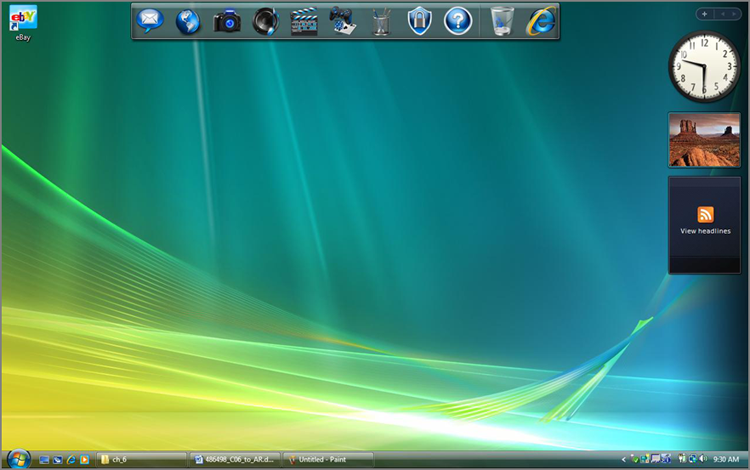
Figure 12-4: The Windows 7 interface
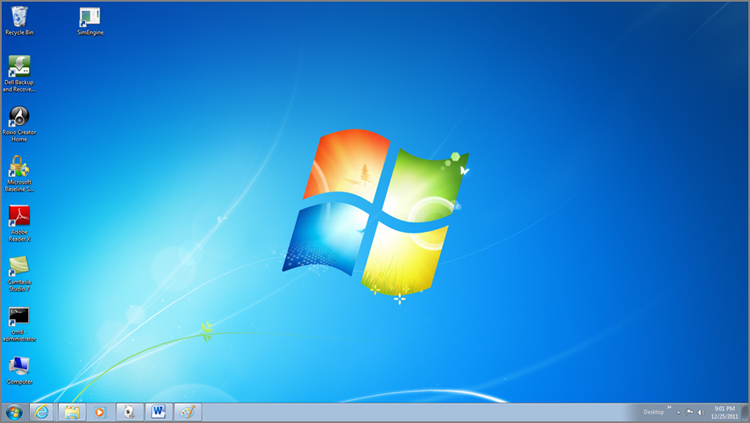
The Desktop
The Desktop is the virtual desk on which all of your other programs and utilities run. By default it contains the Start menu, the Taskbar, and a number of icons. The Desktop can also contain additional elements, such as shortcuts or links to web page content. Because it is the base on which everything else sits, the way the Desktop is configured can have a major effect on how the GUI looks and how convenient it is for users.
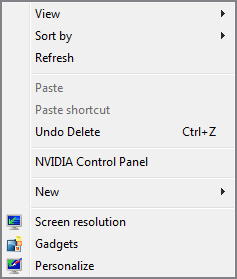
You can change the background patterns, screensaver, color scheme, and size of elements on the Desktop by right-clicking any area of the Desktop that doesn’t contain an icon. The menu that appears allows you to do several things, such as create new Desktop items, change how your icons are arranged, or select a special command called Properties or Personalize, similar to the one shown for Windows 7 in Figure 12-5.
Figure 12-5: The Windows 7 Desktop context menu
When you right-click the Desktop and choose Personalize, then Display, you will see the Display Properties screen shown in Figure 12-6 (for Windows 7).
Figure 12-6: The Display Properties screen for Windows 7
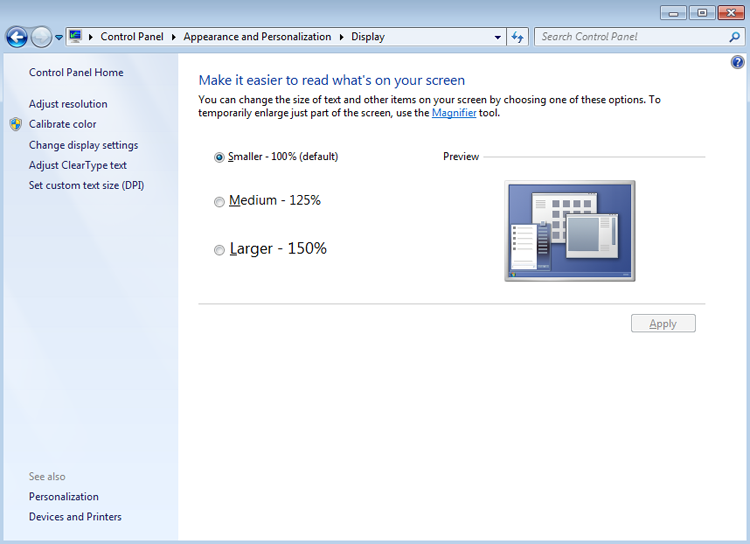
This screen will differ slightly based on the operating system, but you either click the various options at the top to move to the different screens of information about the way Windows looks (non–Windows 7) or choose the options on the left to do the same (Windows 7) . While the options will differ based on the operating system, the main ones in the Display Properties window of most are listed here:
In Exercise 12.1, you will see how to change a screensaver.
The Taskbar
The Taskbar (see Figure 12-7) is another standard component of the Windows interface. Note that although the colors and feel of the Desktop components, including the Taskbar, have changed throughout the operating systems, the components themselves are the same. The Taskbar contains two major items: the Start menu and the system tray (systray). The Start menu is on the left side of the Taskbar and is easily identifiable: It is a button that has the word Start on it, or in the case of Windows 7/Vista, it is the large Windows icon. The system tray is located on the right side of the Taskbar and contains only a clock by default, but other Windows utilities (for example, screensavers or virus-protection utilities) may put their icons here to indicate that they are running and to provide the user with a quick way to access their features.
Figure 12-7: The Taskbar
Windows also uses the middle area of the Taskbar. When you open a new window or program, it gets a button on the Taskbar with an icon that represents the window or program as well as the name of the window or program. To bring that window or program to the front (or to maximize it if it was minimized), click its button on the Taskbar. As the middle area of the Taskbar fills with buttons, the buttons become smaller so they can all be displayed.
A special area on the Taskbar to the right of the Start button is known as the Quick Launch area, and it appears with some Windows OSs (including Windows XP and Windows Vista). Icons of commonly used programs can appear here, and the programs can be started with a single click. If the icons are in the Quick Launch area—as opposed to on the Desktop, or elsewhere—they are always visible and accessible. In Windows 7 the Quick Launch area was replaced with a mechanism where commonly used programs can be pinned to the Task bar.
You can increase the size of the Taskbar by moving the mouse pointer to the top of it and pausing until the pointer turns into a double-headed arrow. Once this happens, click the mouse and move it up to make the Taskbar bigger. Or move it down to make the Taskbar smaller. You can also click the Taskbar and drag it to the top or side of the screen.

You can make the Taskbar automatically hide itself when it isn’t being used (thus freeing that space for use by the Desktop or other windows). In Exercise 12.2, we will show you how.
In addition to the Taskbar, Windows Vista includes the Sidebar, shown in Figure 12-8. This provides a quick interface that allows you to access common utilities (such as the headlines) and gadgets. While the Sidebar existed only for Windows Vista, the concept of gadgets persists and they can be placed directly on the Desktop in Windows 7.
Figure 12-8: The Windows Vista Sidebar

The Start Menu
Back when Microsoft officially introduced Windows 95, it bought the rights to use the Rolling Stones’s song “Start Me Up” in its advertisements and at the introduction party. Microsoft chose that particular song because the Start menu was the central point of focus in the new Windows interface, as it has been in all subsequent versions.
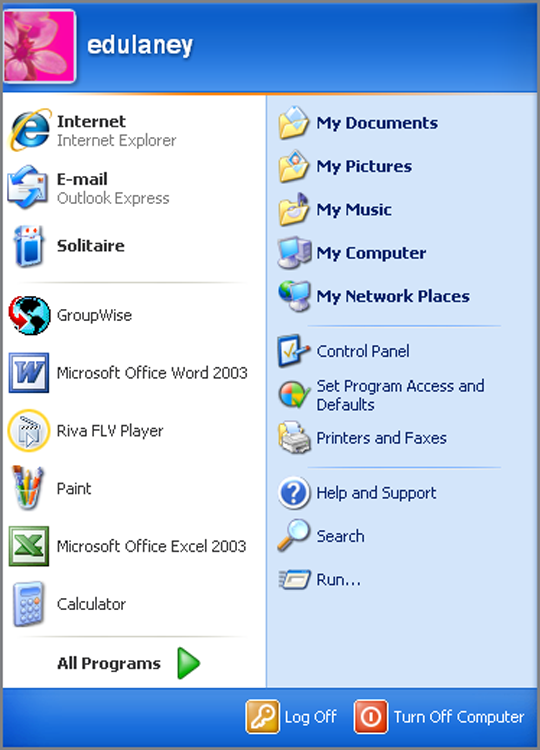
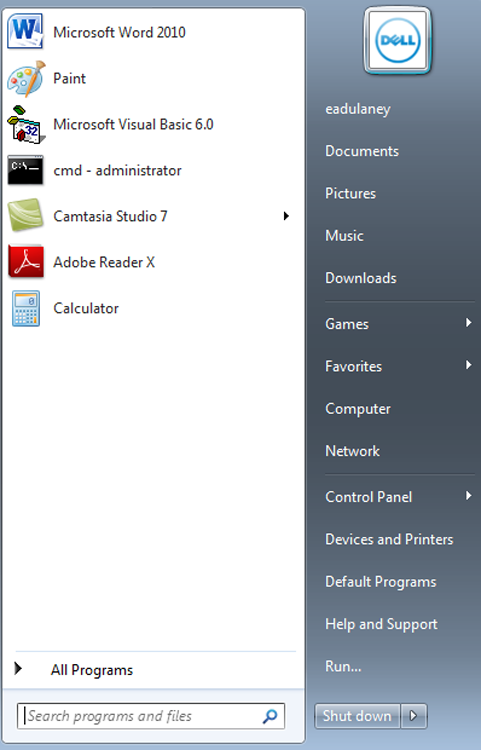
To display the Start menu, click the Start button in the Taskbar. You’ll see a Start menu similar to that shown in Figure 12-9 for Windows XP and Figure 12-10 for Windows 7/Vista. You’ll notice that in Windows XP the look of the Start menu is slightly different than that in Windows 7/Vista, but they all behave the same. Regardless of the operating system, the Start menu always serves the same function: providing quick access to important features and programs.
Figure 12-9: The Windows XP Start menu
From the Start menu, you can select any of the various options the menu presents. An arrow pointing to the right indicates that a submenu is available. To select a submenu, move the mouse pointer over the submenu title and pause. The submenu will appear; you don’t even have to click. (You have to click to choose an option on the submenu, though.) We’ll discuss each of the Start menu’s submenu options and how to use them.
All Programs Submenu
The All Programs submenu holds icons for the program groups. When you select this submenu, you will be shown a submenu for each program group. In Windows 7, Vista, and XP, the look is again a little different, but the functionality is the same. You can navigate through this menu and its submenus and click the icon for program you wish to start.
Figure 12-10: The Windows 7/Vista Start menu
The most common way to add programs to this submenu is by using an application’s installation program. In Windows XP, if you’re using the Classic Start menu, you can also add programs to this submenu by using the Taskbar Properties screen (right-click the Taskbar and choose Properties). Additionally, items can be added by dragging and dropping icons onto these menus.
My Recent Documents (Windows XP)/Recent Items (Windows 7 and Windows Vista) Submenu
The My Recent Documents/Recent Items submenu has only one function: to keep track of the last data files you opened. Whenever you open a file, a shortcut to it is automatically made in this menu. To open the document again, click the shortcut in the Documents menu to open it in its associated application.
In some versions of Windows XP, this feature is not enabled by default. To enable it, in the Taskbar And Start Menu Properties screen, click the Start Menu tab and then click Customize (next to Start Menu). Click the Advanced tab, select the List My Most Recently Opened Documents option, and then click OK. An option called My Recent Documents is added to the Start menu; it lists the 15 most recently opened data files.
Search (Find) Submenu/Option
The name of this Start menu option differs between Search and Find in the various versions of Windows, but its purpose doesn’t. In all cases, it’s used to locate information on your computer or on a network.
In Windows XP, to find a file or directory, click the Search option in the Start menu. Doing so opens the Search Results dialog box. In the left pane, click All Files And Folders, and then enter the appropriate information in the text fields. Expand the down-pointing double arrows to access advanced search options. To start the search, click Search. The search results appear in the right pane.
In Windows 7 and Windows Vista, the Search menu choice has disappeared, but you can search by typing into the Search box that always appears in the upper-right corner of Windows Explorer (technically, searching is still available from the Start menu in the Search Programs And Files bar, but Explorer’s works better). You can search through file content by using the filter contents: followed by the word/phrase/text you are seeking. More importantly, though, to quickly find commands start typing into the Start menu find field and the system displays matching commands. This is sometimes the quickest way of getting to a particular command especially when you can’t remember the exact name (for example, the Disk Management tools can be accessed by typing “ntfs”; the command appears as Create and format hard disk partitions).
Help And Support Command
Windows has always included a very good Help system. In addition, the Help system was updated with a new interface and new tools in Windows 7, Vista, and XP. Because of its usefulness and power, it was placed in the Start menu for easy access.
When you click Help And Support, the Help And Support Center home page opens. This screen may have been slightly customized by a hardware vendor if the operating system was preinstalled on your machine. However, all the options and available tools will still be present.
The Run Command
You can use the Run command to start programs if they don’t have a shortcut on the Desktop or in the Programs/All Programs submenu. When you choose Run from the Start menu, a pop-up window appears. To execute a particular program, type its name in the Open field. If you don’t know the exact path, you can browse to find the file by clicking the Browse button. Once you have typed in the executable name, click OK to run the program.
Applications can easily be started from the Run window; often you will find it faster to open programs this way than search for their icons in the Start menu maze. In Exercise 12.3, you will see how to start a program from the Run window.
While this functionality did not disappear from Windows Vista, it is a bit different. A blank dialog box appears at the bottom of the Start menu with the default phrase Start Search within. Type the name of the command you want to run in here, and press Enter. Vista will look for the executable and run it.
Turn Off Computer Command
Windows operating systems are very complex. At any one time, many files are open in memory. If you accidentally hit the power switch and turn off the computer while these files are open, there is a good chance they will be corrupted. For this reason, Microsoft has added the Turn Off Computer command under the Start menu (in 7/Vista it appears as Shut Down or as an icon of an on/off button and does not have a label). Note that with a configuration called Fast User Switching, Windows XP also displays Shut Down rather than Turn Off Computer. When you select this option, Windows presents you with several choices. Exactly which options are available depends on the Windows version you are running.
The possible choices are as follows:
Icons
Icons are shortcuts that allow a user to open a program or a utility without knowing where that program is located or how it needs to be configured. Icons consist of several major elements:
- Icon label
- Icon graphic
- Program location or path
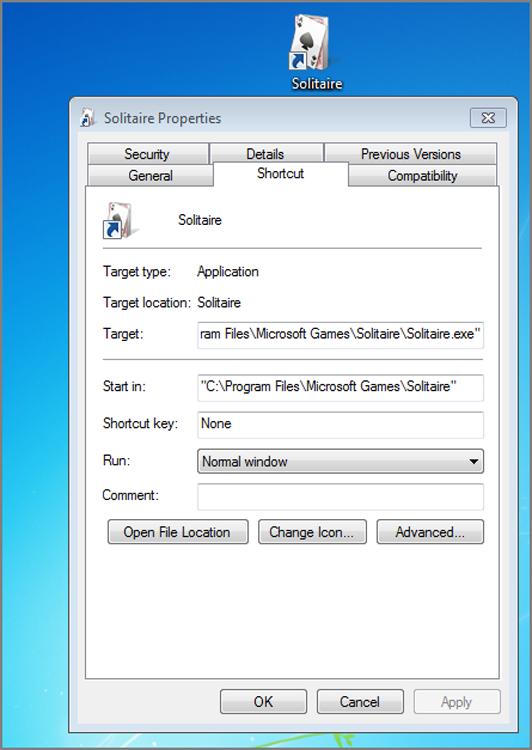
The label and graphic of the icon typically tell the user the name of the program and give a visual hint about what that program does. The icon for the Solitaire program, for instance, is labeled Solitaire, and its icon graphic is a deck of cards. By right-clicking an icon once, you make that icon the active icon and a drop-down menu appears. One of the selections is Properties. Clicking Properties brings up the icon’s attributes (see Figure 12-11) and is the only way to see exactly which program an icon is configured to start and where the program’s executable is located. You can also specify whether to run the program in a normal window or maximized or minimized.
Figure 12-11: The Properties window of an application with its icon above it
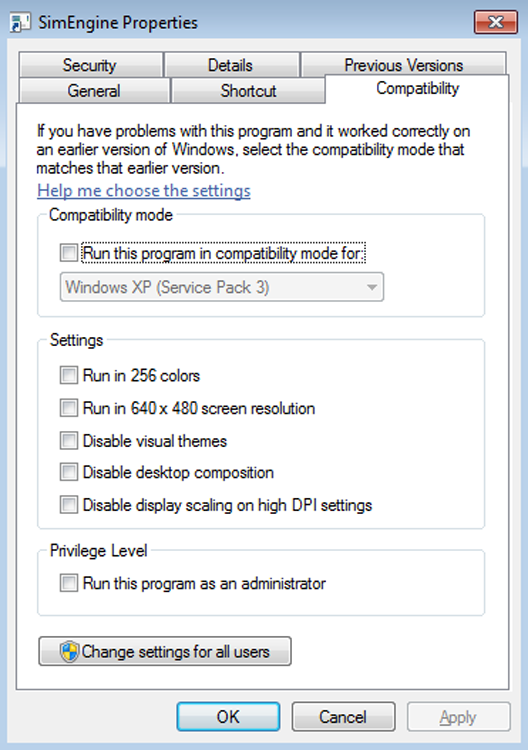
Additional functionality has been added to an icon’s properties to allow for backward compatibility with older versions of Windows (known as compatibility mode). To configure this, click the Compatibility tab and specify the version of Windows for which you want to configure compatibility. Note that you cannot configure compatibility if the program is part of this version of Windows. Figure 12-12 shows the settings available for an older program.
This feature is helpful if you own programs that used to work in older versions of Windows but no longer run under the current Windows version. In addition, you can specify different display settings that might be required by older programs.
Standard Desktop Icons
In addition to the options in your Start menu, a number of icons are placed directly on the Desktop in Windows. The Recycle Bin icon is one of these. In addition to the Recycle Bin icon, two of the most important icons are Computer/My Computer and Network/Network Neighborhood/My Network Places. However, although they are important, they no longer display by default on the Desktop. You can add them if you want to (in Windows 7, for example, choose Personalization from Control Panel, and then choose Change Desktop Icons).
Figure 12-12: The Compatibility settings possible with an older program
The Computer/My Computer Icon
If you double-click the Computer icon, it displays a list of all the disk drives installed in your computer. In addition to displaying disk drives, it displays a list of other devices attached to the computer, such as scanners, cameras, and mobile devices. The disk devices are sorted into categories such as Hard Disk Drives, Devices With Removable Storage, Scanners And Cameras, and so on.
You can delve deeper into each disk drive or device by double-clicking its icon. The contents are displayed in the same window. You can select Tools > Folder Options to configure each folder to open in a new window. Having multiple windows open makes it easy to copy and move files between drives and directories.
In addition to allowing you access to your computer’s files, the Computer icon on the Desktop lets you view your machine’s configuration and hardware, also called the System Properties.
With Windows 7, Vista, and XP, right-clicking Computer in the Start menu allows you to choose Properties and see the same information (choosing Manage, instead of Properties, brings up the Computer Management interface, in which you can make a plethora of changes).
Network/My Network Places
Another icon in Windows relates to accessing other computers to which the local computer is connected, and it’s called Network or My Network Places. (In Windows 7 and Vista, the label for this icon has been changed from My Network Places to simply Network.)
Opening Network enables you to browse for and access computers and shared resources to which your computer is connected. This might be another computer in a workgroup, domain, or other network environment. You can also use Network to establish new connections to shared resources.
Through the properties of Network, you can configure your network connections, including LAN and dial-up connections (should you still live in an area where a now antiquated dial-up connection is required for Internet access).
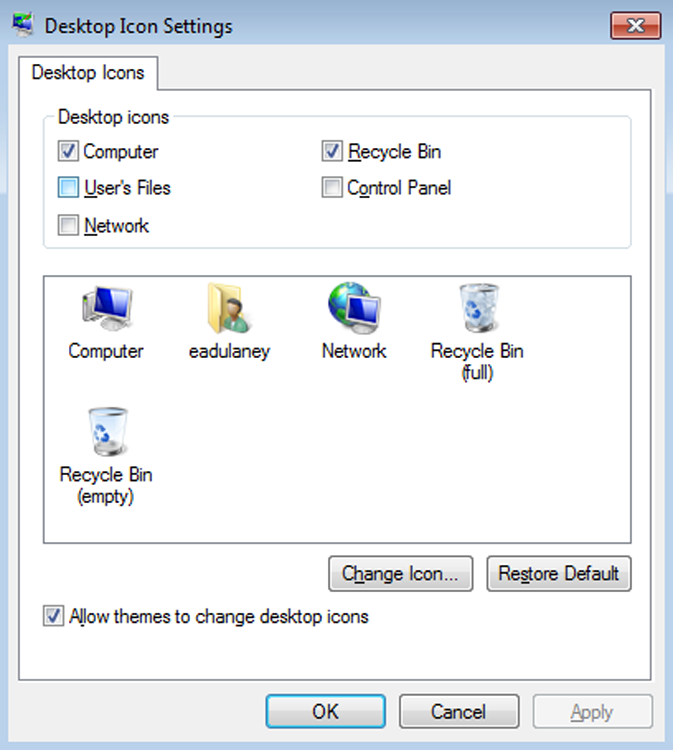
You can choose Network from the Start menu or you can add it—and other common icons—to the Windows 7/Vista Desktop by choosing Start > Control Panel, clicking Appearance And Personalization, and then clicking Personalization. Choose Change Desktop Icons from the choices on the left to open the dialog box shown in Figure 12-13.
The Recycle Bin
All files, directories, and programs in Windows are represented by icons, and these icons are generally referred to as objects. When you want to remove an object from Windows, you do so by deleting it. Deleting doesn’t just remove the object, though; it also removes the ability of the system to access the information or application the object represents. For this reason, Windows includes a special directory where all deleted files are placed: the Recycle Bin. The Recycle Bin holds the files until it is emptied or until you fill it, and it gives users the opportunity to recover files that they delete accidentally. By right-clicking the Recycle Bin icon, you can see how much disk space is allocated, and some larger files that cannot fit in the Recycle Bin will be erased after a warning.
Figure 12-13: Common icons can easily be added to the Desktop.
You can retrieve a file you have deleted by opening the Recycle Bin icon and then dragging the file from the Recycle Bin to where you want to restore it. Alternatively, you can right-click a file and select Restore, and the file will be restored to the location from which it was deleted.
To permanently erase files, you need to empty the Recycle Bin, thereby deleting any items in it and freeing the hard drive space they took up. If you want to delete only specific files, you can select them in the Recycle Bin, right-click, and choose Delete. You can also permanently erase files (bypassing the Recycle Bin) by holding down the Shift key as you delete them (by dragging the file and dropping it in the Recycle Bin, pressing the Del key, or clicking Delete on the file’s context menu). If the Recycle Bin has files in it, its icon looks like a full trash can; when there are no files in it, it looks like an empty trash can.
What’s in a Window?
We have now looked at the nature of the Desktop, the Taskbar, the Start menu, and icons. Each of these items was created for the primary purpose of making access to user applications easier, and these applications are in turn used and managed through the use of windows, the rectangular application environments for which the Windows family of operating systems is named. We will now examine how windows work and what they are made of.
A program window is a rectangular area created on the screen when an application is opened within Windows. This window can have a number of different forms, but most windows include at least a few basic elements.
Elements of a Window
Several basic elements are present in a standard window. Figure 12-14 shows the control box, title bar, Minimize/Maximize button, Restore button, Close button, and resizable border in a text editor called Notepad (NOTEPAD.EXE) that has all the basic window elements—and little else.
The basic window elements are as follows:
Figure 12-14: The basic elements of a window
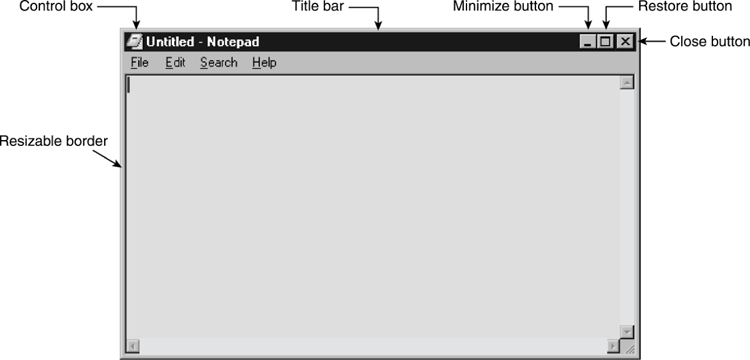
Not every element is found on every window because application programmers can choose to eliminate or modify each item. Still, in most cases they will be constant, with the rest of the window filled in with menus, toolbars, a workspace, or other application-specific elements. For instance, Microsoft Word, the program with which this book was written, adds an additional control box and Minimize and Maximize buttons for each document. It also has a menu bar, a number of optional toolbars, scroll bars at the right and bottom of the window, and a status bar at the very bottom. Application windows can become quite cluttered.
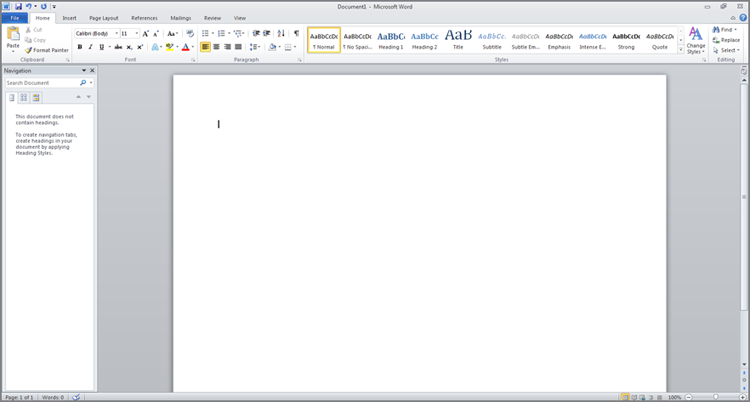
Notepad is a very simple Windows program. It has only a single menu bar and the basic elements seen previously in Figure 12-14. It also starts a simple editor, where you can edit a file that already exists or create a new one. Figure 12-15 shows a Microsoft Word window. Both Word and Notepad are used to create and edit documents, but Word is far more configurable and powerful and therefore has many more optional components available within its window.
Figure 12-15: A window with more components
States of a Window
There is more to the Windows interface than the specific parts of a window. Windows also are movable, stackable, and resizable, and they can be hidden behind other windows (often unintentionally!).
When an application window has been launched, it exists in one of three states:
When one program is open and you need to open another (or maybe you need to stop playing a game because your boss has entered the room), you have two choices. First, you can close the program currently in use and choose to simply reopen it later. If you do this, however, the contents of the window (your current game, for example) will be lost and you will have to start over. Once the program has been closed, you can move on to open the second program.
The second option is to minimize the active window. Minimizing the game window, for example, removes the open window from the screen and leaves the program open but displays nothing more than an icon and title on the Taskbar. Later, you can restore the window to its previous size and finish the game in progress.
Updating Windows
Windows includes Windows Update, a feature designed to keep Windows current by automatically downloading updates such as patches and security fixes and installing them automatically.
By default, Windows Update will run automatically when any administrator user is logged in. However, if you want to run it manually, you can do so by clicking Start > All Programs > Windows Update. With Windows XP, you can also go to http://windowsupdate.microsoft.com to start the process. In Windows 7/Vista, it just tells you to start Windows Update from the Start menu.

Here is an overview of how Windows Update works:
If you choose not to install the updates right away, Windows will do so for you when you shut off the computer. Instead of shutting off right away, Windows Update will install the updates first and then perform a proper shutdown.
By default, Windows Update is enabled. But there might be times you want to configure it. Exercise 12.4 steps through the process of configuring Windows Update in Windows 7/Vista, while Exercise 12.5 does the same for Windows XP.
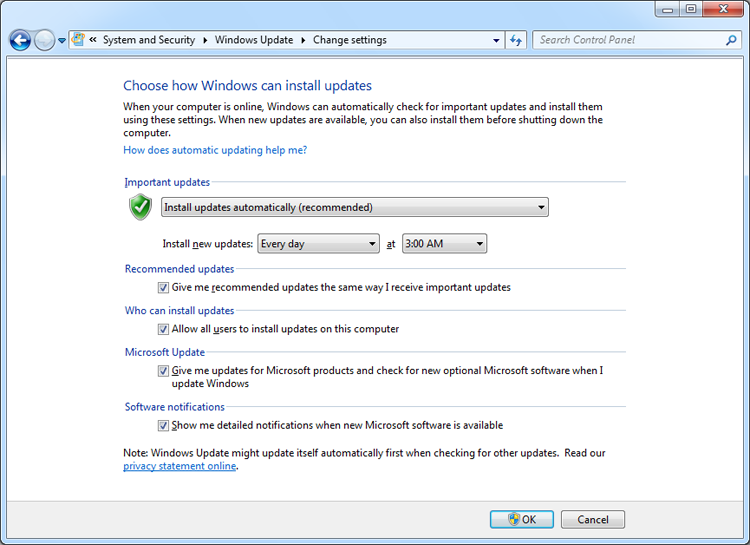
- Install Updates Automatically (Recommended)
- Download Updates But Let Me Choose Whether To Install Them
- Check For Updates But Let Me Choose Whether To Download And Install Them
- Never Check For Updates (Not Recommended)

- Automatically Download Recommended Updates For My Computer And Install Them.
- Download Updates For Me, But Let Me Choose When To Install Them.
- Notify Me But Don’t Automatically Download Or Install Them.
- Turn Off Automatic Updates.
Creating Restore Points
Almost everyone, no matter how hard they’ve tried to keep their computer running properly, will experience a computer crash at some point. Many of the ways to get your computer back up and running (such as reinstalling the operating system) take a lot of time. In Windows 7, Vista, and XP, System Restore allows you to create restore points to make recovery of the operating system easier.
A restore point is a copy of your system configuration at a given point in time. Restore points are created one of three ways. One, Windows creates them automatically by default. Two, you can manually create them yourself (which is highly recommended before you make any significant changes to the system, such as installing new drivers). Three, during the installation of some programs, a restore point is created before the installation; that way, if the install fails, you can “roll back” the system to a preinstallation configuration.
Restore points are useful for when Windows fails to boot but the computer appears to be fine otherwise or if Windows doesn’t seem to be acting right and you think it was because of a recent configuration change.
To open System Restore, click Start > All Programs > Accessories > System Tools > System Restore. In Windows 7, it will open a screen like the one shown in Figure 12-16.
This tool can be used to configure System Restore settings. You can also get to the same place by opening the System control panel (right-clicking Computer and choosing Properties) and selecting the System Restore tab.
Figure 12-16: System Restore
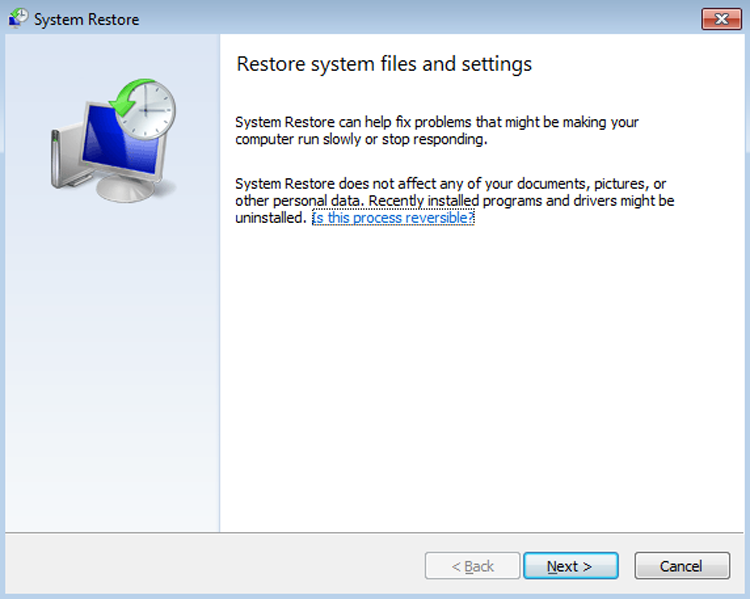
It is possible for you to turn off System Restore. Don’t, unless you really don’t care if your computer crashes and you can’t recover it without a reinstall. The other option is to select how much disk space is available for System Restore. The less disk space you make available, the fewer restore points you will be able to retain. If you have multiple hard drives, you can allocate a different amount of space per hard drive.
Exercise 12.6 demonstrates how to manually create a restore point in Windows 7.
File Management
File management is the process by which a computer stores data and retrieves it from storage. Although some of the file-management interfaces across Windows may have a different look and feel, the process of managing files is similar across the board.
Files and Folders
For a program to run, it must be able to read information off the hard disk and write information back to the hard disk. To be able to organize and access information—especially in larger new systems that may have thousands of files—it is necessary to have a structure and an ordering process.
Windows provides this process by allowing you to create directories, also known as folders, in which to organize files. Windows also regulates the way that files are named and the properties of files. Each file created in Windows has to follow certain rules, and any program that accesses files through Windows must also comply with these rules:
- Each file has a filename of up to 255 characters.
- Certain characters, such as a question mark (?) and slash ( or /), are reserved for other uses and cannot be used in the filename. Periods are used to separate the filename from the extension, and the backslash is used to separate the directories in a path from the filename.
- A filename extension (generally three or four characters) can be added to identify the file’s type.
- Filenames are not case sensitive. (You can create files with names that use both upper- and lowercase letters, but to identify the file within the file system, it is not necessary to adhere to the capitalization in the filename.) Thus, you cannot have a file named working.txt and another called WORKING.TXT in the same directory. To Windows, these filenames are identical, and you can’t have two files with the same filename in the same directory. We’ll get into more detail on this topic a little later.
In Windows 3.x and DOS, filenames were limited to eight characters and a three-character extension, separated by a period. This is also called the 8.3 file-naming convention. With Windows 95, long filenames were introduced, which allowed the 255-character filename convention.
The Windows file system is arranged like a filing cabinet. In a filing cabinet, paper is placed into folders, which are inside dividers, which are in a drawer of the filing cabinet. In the Windows file system, individual files are placed in subdirectories that are inside directories, which are stored on different disks or different partitions.
Windows also protects against duplicate filenames, so no two files on the system can have exactly the same name and path. A path indicates the location of the file on the disk; it is composed of the letter of the logical drive the file is on and, if the file is located in a directory or subdirectory, the names of those directories. For instance, if a file named AUTOEXEC.BAT is located in the root of the C: drive—meaning it is not within a directory—the path to the file is C:AUTOEXEC.BAT. If, as another example, a file called FDISK.EXE is located in the Command directory under Windows under the root of C:, then the path to this file is C:WINDOWSCOMMANDFDISK.EXE.
Common filename extensions you may encounter are .EXE for executable files (applications), .DLL for dynamic linked library (DLL) files, .SYS for system files, .LOG for log files, .DRV for driver files, and .TXT for text files. Note that DLL files contain additional functions and commands applications can use and share. In addition, specific filename extensions are used for the documents created with each application. For example, the filenames for documents created in Microsoft Word have a .DOC or .DOCX extension. You’ll also encounter extensions such as .MPG for video files, .MP3 for music files, .png and .tif for graphics files, .HTM and .HTML for web pages, and so on. Being familiar with different filename extensions is helpful in working with the Windows file system.
Capabilities of Windows Explorer
Although it is technically possible to use the command-line utilities provided within the command prompt to manage your files, this generally is not the most efficient way to accomplish most tasks. The ability to use drag-and-drop techniques and other graphical tools to manage the file system makes the process far simpler, and Windows Explorer is a utility that allows you to accomplish a number of important file-related tasks from a single graphical interface.
Here are some of the tasks you can accomplish using Windows Explorer:
- View files and directories
- Open programs or data files
- Create directories and files
- Copy objects to other locations
- Move objects to other locations
- Delete or rename objects
- Change file attributes
You can access many of these functions by right-clicking a file or folder and selecting the appropriate option, such as Copy or Delete, from the context menu.
Navigating and Using Windows Explorer
Using Windows Explorer is simple. A few basic instructions are all you need to start working with it. First, the Windows Explorer interface has a number of parts, each of which serves a specific purpose. The top area of Windows Explorer is dominated by a set of menus and toolbars that give you easy access to common commands. The main section of the window is divided into two panes: The left pane displays the drives and folders available, and the right pane displays the contents of the currently selected folder. The following list includes some common actions in Explorer:
Besides simplifying most file-management commands as shown here, Windows Explorer allows you to easily complete a number of disk-management tasks. You can format and label removable media and, in some cases, copy the Windows system files to said media so that you can boot from a device other than the hard drive.
Changing File Attributes
File attributes determine what specific users can do to files or directories. For example, if a file or directory is flagged with the Read Only attribute, then users can read the file or directory but not make changes to it or delete it. Attributes include Read Only, Hidden, System, and Archive as well as Compression, Indexing, and Encryption. Not all attributes are available with all versions of Windows. We’ll look at this subject in more detail in a moment.
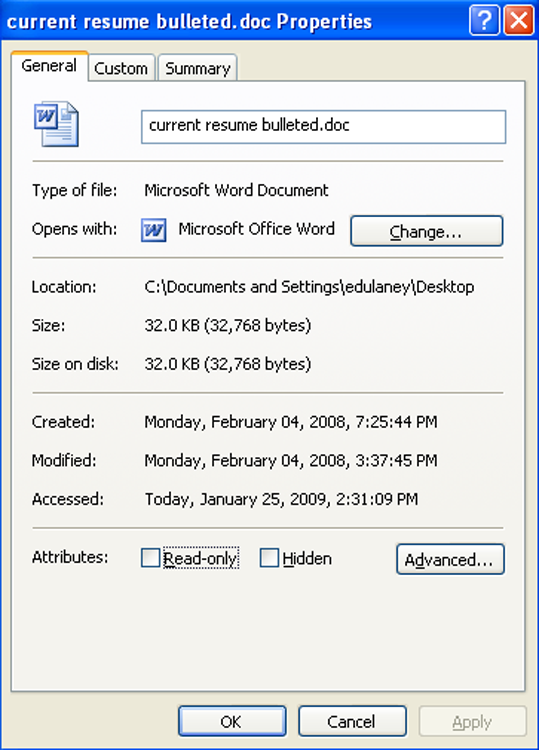
You can view and change file attributes either by entering ATTRIB at the command prompt or by changing the properties of a file or directory. To access the properties of a file or directory in the Windows GUI, right-click the file or directory and select Properties. Figure 12-17 shows the Properties screen of a file in Windows XP. In Windows XP, you can view and configure the Read Only and Hidden file attributes on the General tab. To view and configure additional attributes, click Advanced.
System files are usually flagged with the Hidden attribute, meaning they don’t appear when a user displays a directory listing. You should not change this attribute on a system file unless absolutely necessary. System files are required for the OS to function. If they are visible, users might delete them (perhaps thinking they can clear some disk space by deleting files they don’t recognize). Needless to say, that would be a bad thing!
File System Advanced Attributes
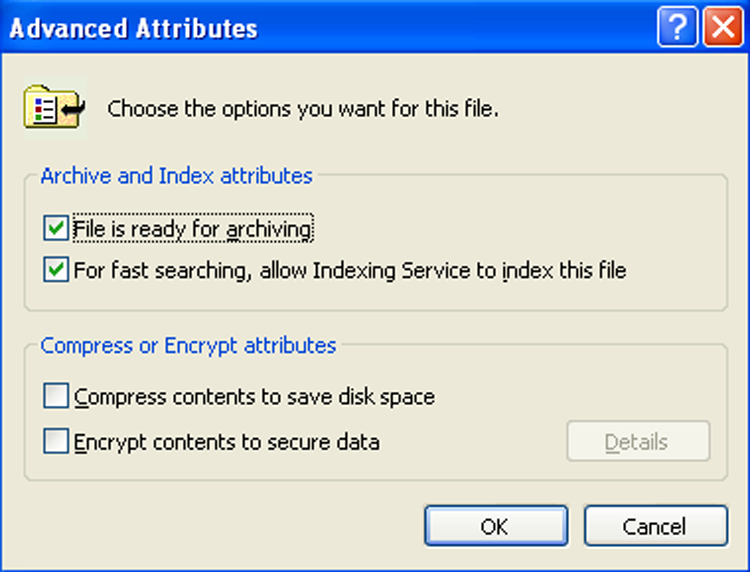
Windows 7, Vista, and XP may use the NT File System (NTFS), which gives you a number of options that are not available on earlier file systems such as FAT and FAT32. A number of these options are implemented through the use of the Advanced Attributes window, shown in Figure 12-18. To reach these options in Windows, right-click the folder or file you wish to modify and select Properties from the menu. On the main Properties page of the folder or file, click the Advanced button in the lower-right corner.
Figure 12-17: The General tab of a file’s Properties screen
On the Advanced Attributes window, you have access to the following settings:
Figure 12-18: The Advanced Attributes window
File Permissions
Windows also supports the use of file permissions because these OSs use NTFS, which includes file-level file system security (along with share-level security). Permissions serve the purpose of controlling who has access and what type of access to what files or folders. Several permissions are available, such as Read, Write, Execute, Delete, Change Permissions, Take Ownership, Full Control, and more. The list is quite extensive. For a complete list, consult the Windows Help files.
Assigning special permissions individually could be a tedious task. To make it easier for administrators to assign multiple permissions at once, Windows incorporates standard permissions. Standard permissions are collections of special permissions, including Full Control, Modify, Read & Execute, Read, and Write. As we said, each of these standard permissions automatically assigns multiple special permissions at once. To see which special permissions are assigned by the different standard permissions refer to http://technet.microsoft.com/en-us/library/cc732880.
Note that you can assign permissions to individual users or to groups. You assign standard permissions on the Security tab of a file or folder, which you access through the file or folder’s properties.
Being able to set file permissions is a great reason to use NTFS. In Exercise 12.7, we will show you how to examine file permissions.