
Windows XP Features
There are a number of features that make Windows XP a solid operating system that has been around—and widely used—as long as it has been. Even when Windows Vista came out, a majority of users and enterprises opted to stick with Windows XP because it offered what they needed. In the following sections, we will look first at some of the tools available within Windows XP, then Windows Error Reporting, and finally, Remote Desktop Connection and Assistance.
Tools in Windows XP
The tools that stand out in Windows XP, and that CompTIA expects you to know for the exam, include System Restore, Windows Defender, Windows Firewall, and Security Center. Each of these are discussed in the sections that follow.
System Restore
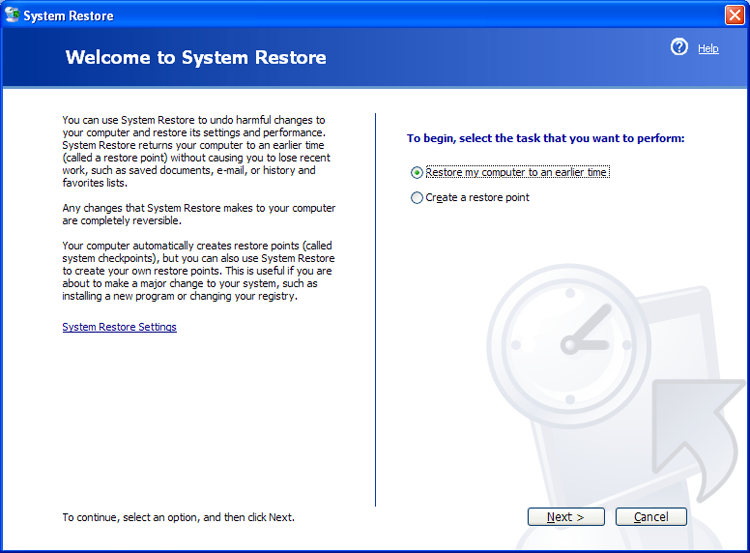
Chapter 12 explored System Restore as it appears in all three versions of Windows. System Restore is arguably the most powerful tool in Windows XP. It allows you to restore the system to a previous point in time. This feature is accessed from Start > All Programs > Accessories > System Tools > System Restore and can be used to roll back as well as to create a restore point. Figure 16-7 shows the opening dialog box, while Figure 16-8 shows the prompt for a restore point that can be created manually.
Figure 16-7: System Restore in Windows XP
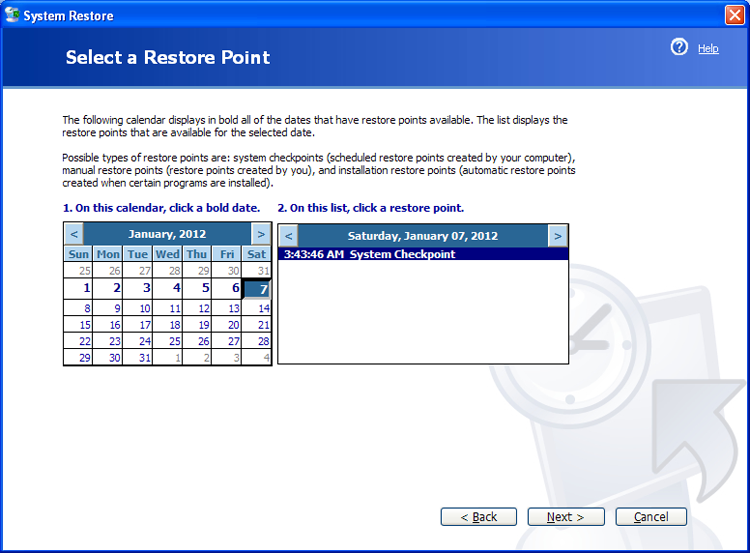
Restore points are created automatically in Windows XP by default, though you can create them manually. Figure 16-9 shows the restore options.
Figure 16-8: Providing a name for the restore point in Windows XP

Figure 16-9: Picking a restore point to return to in Windows XP
Windows Defender
Windows Defender can identify unwanted spyware software. While Defender is native to all versions of Vista and Windows 7, it must be downloaded and installed for XP Service Pack 2 or later. As with similar programs, in order for Windows Defender to function properly (see Figure 16-10), you need to keep the definitions current and scan on a regular basis. In Exercise 16.1, you’ll run Windows Defender in Windows XP.
Figure 16-10: Windows Defender can identify security threats.

Windows Firewall
Windows Firewall (Start > Control Panel > Windows Firewall) is used to block access to the network (be it from an internal source or the Internet). While host-based firewalls are not as secure as other types of firewalls, this was a great move toward enhancing the security of the Windows operating system. The addition of this feature is considered to be a move in the right direction and has been a component of Windows ever since.
Figure 16-11 shows the opening screen of Windows Firewall in Windows XP. As of Service Pack 2, Windows Firewall is turned on by default and it is also included in the Security Center (discussed in the next section).
By default, Windows Firewall blocks incoming traffic. Using the Exceptions tab, you can configure which incoming traffic you want to allow through.
Figure 16-11: Windows Firewall can block unwanted traffic.

Security Center
Security Center (Start > Control Panel > Security Center) provides a single interface where you can administer Windows Firewall, Automatic Updates, and virus protection. Figure 16-12 shows the opening screen.
Figure 16-12: Windows Security Center in Windows XP
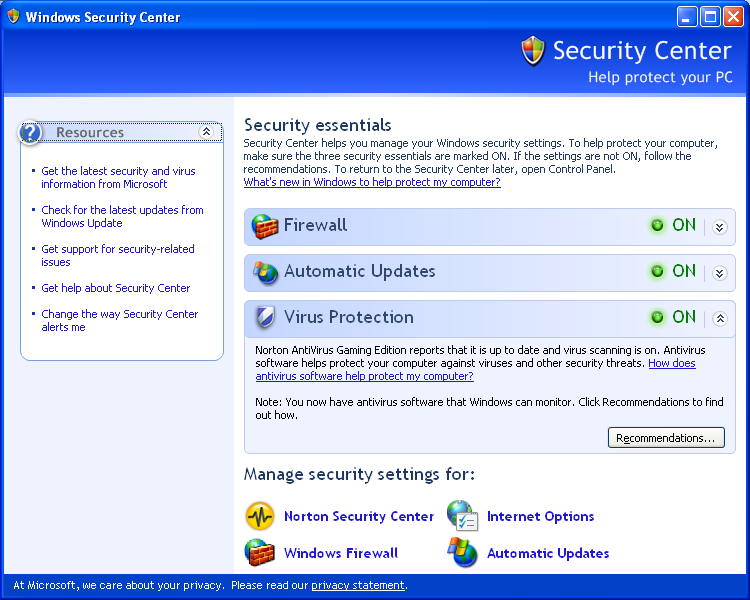
On the machine shown in the example, a version of Norton AntiVirus (Norton AntiVirus Gaming Edition, in this case) has been installed and that is appearing in the Security Center window. Other security-related products installed on the machine should appear in the Security Center window as well.
Windows Reporting
Error reporting is a feature in Windows XP. If a program error occurs (such as Internet Explorer crashing), a window will pop up asking if you want to report the problem to Microsoft. This may occur for non-Microsoft programs as well. If you choose to report the problem, you must have an active Internet connection. If you do have an active Internet connection, technical information about the problem is gathered and sent to Microsoft. If others have reported the same problem, then additional technical information may be available to suggest how to solve the problem.
According to Microsoft, the information gathered is only used by programming groups to help solve technical problems. Your individual information is not stored or tracked in any way.
To configure (or disable) Windows reporting with Windows XP, open System Properties by right-clicking My Computer and selecting Properties. On the Advanced tab, click the Error Reporting button at the bottom of the screen to open a window similar to the one shown in Figure 16-13.
Figure 16-13: Windows Error Reporting options in Windows XP
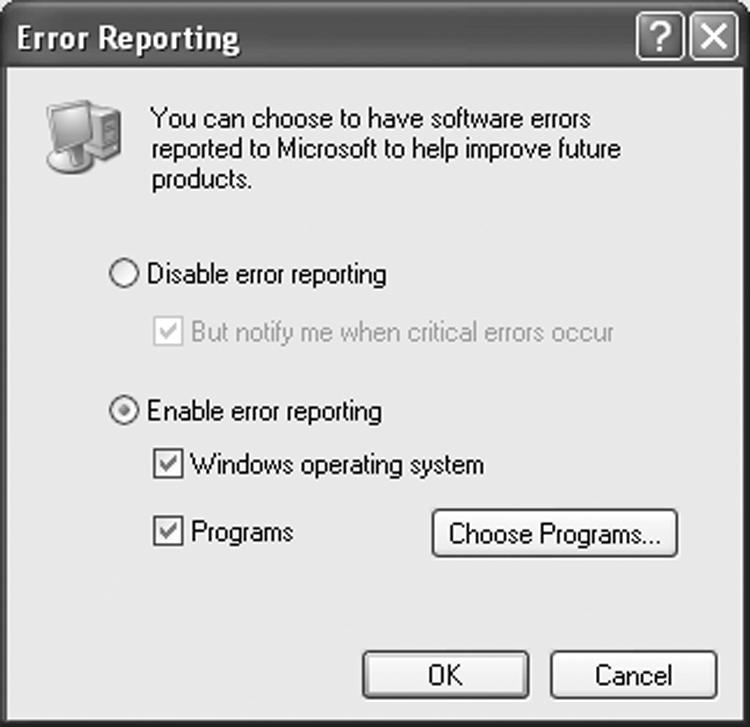
Your two major choices are to disable or enable error reporting. If you choose to disable it, you can still be notified when errors occur. By clicking the Choose Programs button, you can configure error reporting to report on certain programs. By default, all program errors from all programs are reported, but you can configure the reporting of errors on an application-by-application basis.
Remote Desktop Connection and Remote Assistance
Windows contains two remote connectivity applications, called Remote Desktop Connection and Remote Assistance. The following sections describe each in more detail.
Remote Desktop Connection
The Remote Desktop feature of Windows would probably be more accurately named remote control. Remote Desktop allows you to connect to another computer and take control over it as if you were sitting in front of it. This utility allows you to connect to your work computer from home, for example, and it can also work as a great troubleshooting tool by allowing connection from an administrator’s workstation to other workstations or servers in the network. On the flip side, it can also be a huge security risk.
Remote Desktop classifies computers into two categories: home computer and remote computer. The home computer is the one that you are sitting at. For it to use Remote Desktop, it needs to have Remote Desktop Connection installed, which is present by default in Windows XP. The remote computer is the one you are connecting to. It must have Remote Desktop enabled in order to accept incoming connections. Remote Desktop is separate from Remote Desktop Connection.
When you’re using Remote Desktop, keystrokes and mouse movements are transmitted from the home computer to the remote computer. Programs that you open on the remote computer (from the home computer) run locally on the remote computer. You (from the home computer) can see the Desktop of the remote computer, just as if you were sitting there. Finally, sound can also be passed from the remote computer to the home computer. This is enabled by default, but it consumes a lot of bandwidth so you might not want to use it.
By default, users are not allowed to remotely connect to your computer. To change this and allow connections into a system, you must open System Properties (right-click My Computer and select Properties) and click the Remote tab, shown in Figure 16-14.
Figure 16-14: System Properties Remote tab
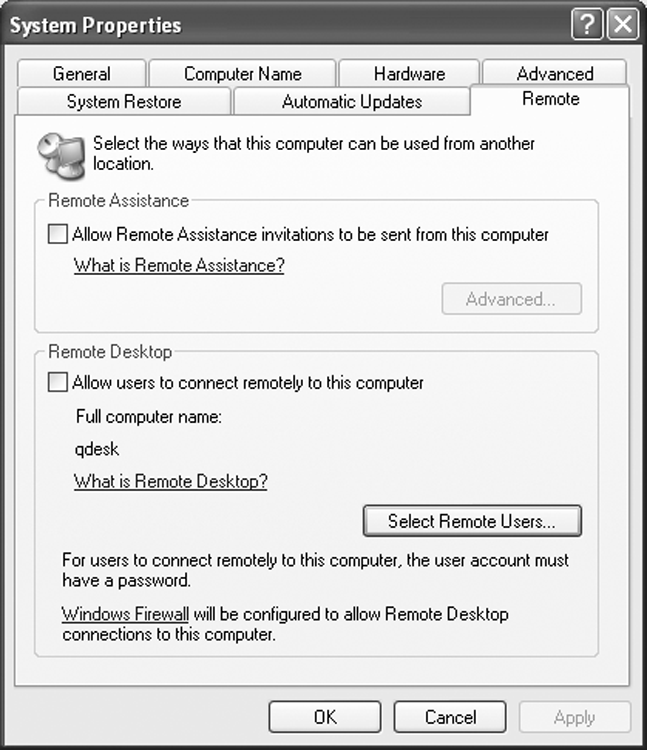
Check the Allow Users To Connect Remotely To This Computer check box to enable access. Then to choose which users can connect remotely, click the Select Remote Users button. For users to be able to access your computer, they must have a user account and password on your computer or domain.
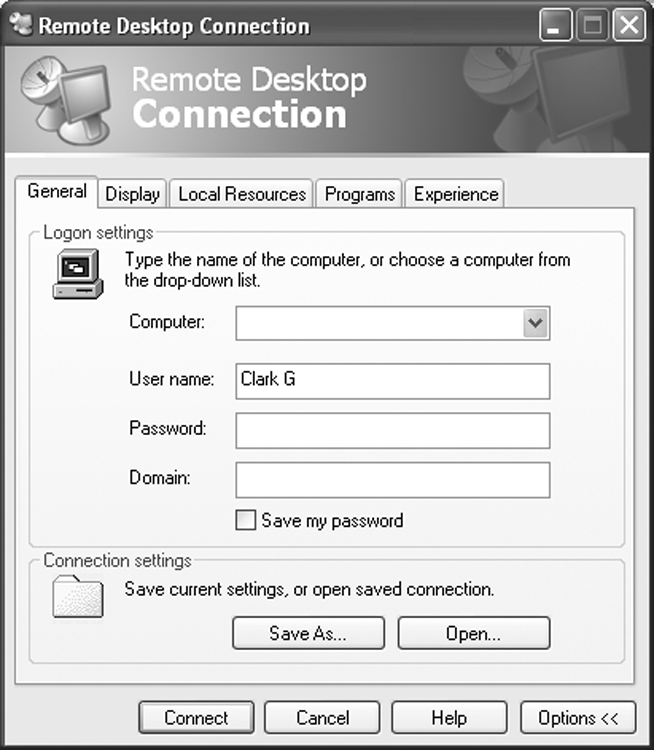
To configure Remote Desktop Connection options, open Remote Desktop Connection by clicking Start > All Programs > Accessories > Communications > Remote Desktop Connection (with SP3 it is on the level above, in the Accessories menu). This opens a window like the one in Figure 16-15.
This is the window you would use to connect to another computer. By clicking the Options button, you can configure desired settings. Looking at Figure 16-16, you can see that there are five tabs of configuration options.
On the bottom of the General tab, you’ll notice that you can save these settings into different profiles. This might be handy if you connect to different computers.
Figure 16-15: Remote Desktop Connection

Figure 16-16: Remote Desktop Connection options
On the Display tab, you can set the size of your Remote Desktop window, up to full screen. It also allows you to configure the depth of color used, much like when you configure your own Desktop.
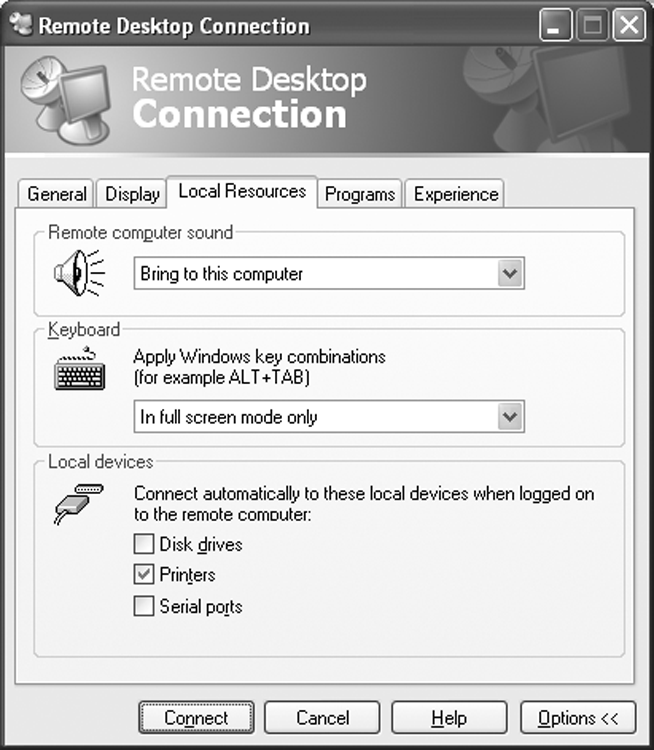
On the Local Resources tab (shown in Figure 16-17), you configure sound (good to leave off unless absolutely necessary), keyboard settings, and connectivity to local devices.
Figure 16-17: Local Resources tab
On the Programs tab, you can choose to start applications when the remote connection is made.
Finally, on the Experience tab, you can choose your connection speed as well as a few graphical options (such as allowing themes or the Desktop background) designed to help optimize your connection.
Remote Assistance
Have you ever tried explaining a computer problem you’re having to someone else and it just isn’t sinking in? Or how about being on the other end and having a user trying in vain to explain a problem to you but they just can’t seem to get their point across?
The Remote Assistance feature of Windows allows you to access someone else’s computer in an effort to repair it. You can act as an expert to their novice and walk through problems that can be corrected with your additional knowledge.
Looking back at Figure 16-14, you will see a check box marked Allow Remote Assistance Invitations To Be Sent From This Computer. By checking that box, you are able to send an invitation to a person on another computer that would allow them to connect to yours, ideally with the intention of fixing a problem. By clicking the Advanced button, you can choose whether or not to allow remote users to be able to take control over your machine. If you want them to fix the problem, it may be helpful to allow them to take control of the system. If giving them control is unwelcome or not possible, you can just give them a guided tour once they’re connected and have them provide verbal instructions instead.
Once you have enabled Remote Assistance on the Remote tab of System Properties, you can send an invitation to others to connect to your computer. Here’s how:
Upon receiving the invitation, the user (expert) will be given the opportunity to accept. After they accept, you (novice) will be notified that they have accepted and the session is started.
To end a Remote Assistance session, click the Disconnect button in the Remote Assistance window or close the session.
Differences Between Remote Desktop and Remote Assistance
Both remote programs use the same base technology, but there are differences. Remote Desktop was designed to give you remote access to a Windows system running on a computer even if you’re not physically there in front of that machine. For example, you can be at home and log in to your work computer to access files or applications.
Remote Assistance allows a friend or a technician to use an Internet connection to access your computer to provide help. By default, the friend sees your Desktop and communicates with you through a messenger window. If you choose, you can allow that friend to have control over your computer.