
Installing the Operating System
Operating system installations can be lumped into two generic methods: attended or unattended. During an attended installation, you walk through the installation manually and answer the questions as prompted. Questions about the product key, the directory in which you want to install the operating system (OS), and relevant network settings are typically asked.
As simple as attended installations may be, they’re time consuming and administrator intensive in that they require someone to fill in a fair number of fields to move through the process. Unattended installations allow you to configure the OS with little or no human intervention.
Windows XP offers a number of methods for performing unattended installations, with the primary ones being Remote Installation Service (RIS), Windows Deployment Services (WDS), and the System Preparation tool (Sysprep). Both RIS and WDS are services that run on Windows Server. Client machines that are to have Windows XP installed must connect to a server service and run the installation across the network.
The System Preparation tool takes a completely different approach. SYSPREP.EXE is used to prepare a preconfigured Windows XP workstation so that an image can be made from it using third-party software. That image, which lacks user/computer-specific information and security identifiers (SIDs), can then be deployed to other client computers, typically also through the use of third-party software.
Setup Manager is not an unattended installation method in and of itself but is used to create answer files (known as uniqueness database files [UDFs]) for automatically providing computer or user information during setup. Setup Manager, like Sysprep, isn’t installed on the system by default but is stored within the Deploy cabinet file on the CD beneath SupportTools.
For the exam, you should be familiar with the attended installation and know that the other methods exist.
Determining OS Installation Options
One of the first steps in preparing to install an OS is to make sure you have appropriate hardware that meets at least the minimum system specifications. (see Chapter 12, “OS Basics,” for information on compatibility and minimum system requirements). In addition, you must make decisions about a few of the Windows installation options. These options control how Windows will be installed as well as which Windows components will be installed:
- Installation type
- Network configuration
- File system type
- Dual-boot support
Installation Type
When you install an application, an OS, or any software, you almost always have options as to how it is installed. Especially with OSs, there are usually many packages that make up the software. You can choose how to install the many different components; these options are usually labeled something like Typical, Full, Minimal, and Custom:
- A typical installation installs the most commonly used components of the software but not all of the components.
- A full installation installs every last component, even those that may not be required or used frequently.
- A minimal installation (also known as a compact installation) installs only those components needed to get the software functional.
- A custom installation usually allows you to choose exactly which components are installed.
All Windows versions use these installation types, or derivations of them, and you should decide ahead of time which method you are going to use (which may be dictated by the amount of disk space you have available).
Network Configuration
With Windows XP, you can choose whether to install networking options. If you do install networking, you can also choose which networking components you want installed. With Windows XP, you also must know whether the machine will join a workgroup or a domain.
File System Type
As Windows has evolved, a number of changes have been made to the basic architecture, as you might expect. One of the architecture items that had changed the most is the disk system structure. When you’re installing any Windows OS, you will be asked first to select a partition on which to install it and then to format the drive using one of the available file systems. Choose based on what the computer will be doing and which OS you are installing. NTFS is generally used (and strongly recommended) unless you will be creating a dual-boot machine.
Dual-Boot Support
Occasionally, a mission-critical program (one you or your business can’t function without) doesn’t support the OS to which you are upgrading. There may be a newer release in the future, but when you need to upgrade, it may not be supported. In that case, you may have to install the new OS in a dual-boot configuration.
In a dual-boot configuration, you install two OSs on the same computer (Windows XP and a legacy copy of Windows 2000, for example). At boot time, you have the option of selecting which OS you want to use.
It is possible to multiboot to all Microsoft OSs, including old versions of DOS and all versions of Windows. Microsoft recommends that each installation target a separate disk or partition in order to avoid conflicts with built-in programs like Internet Explorer. In addition, it is important to install the oldest OS first and then proceed in chronological order to the newest.

Thanks to the ability to create virtual machines (VMs), it is becoming far less common to need dual-boot machines today than in the past. Using VMs, you can run multiple operating systems (or multiple instances of the same operating system) on the same hardware at the same time and not need to reboot the system each time you want a different OS.
Determining the Installation Method
Another decision you must make is which method you are going to use to install Windows. Windows XP is still small enough that it comes on a single CD (Windows Vista added DVDs). It is possible to boot to this disc and begin the installation process. However, your system must be capable of supporting bootable media.
If you don’t have a bootable CD, you must first boot the computer using some other bootable media (such as the hard drive, flash drive, etc.), which then loads the driver for the CD-ROM drive so that you can access the installation program on the CD.
There’s one more thing to consider when evaluating installation methods. Some methods can be used only if you’re performing a clean installation and not an upgrade. Table 16-1 shows you four common unattended installation methods and when they can be utilized. In the following sections, we’ll look at each of these methods in a bit more detail.
Table 16-1: Windows unattended installation methods
| Method | Clean Installation | Upgrade |
| Unattended install | Yes | Yes |
| Bootable media | Yes | No (except for scenarios involving legacy operating systems you do not need to know for the exam) |
| Sysprep | Yes | No |
| Remote install | Yes | No |
Unattended Installation
Answering the myriad questions posed by Windows Setup doesn’t qualify as exciting work for most people. Fortunately, there is a way to answer the questions automatically: through an unattended installation. In this type of installation, an answer file is supplied with all of the correct parameters (time zone, regional settings, administrator username, and so on), so no one needs to be there to tell the computer what to choose or to click Next 500 times.
Unattended installations are great because they can be used to upgrade operating systems to Windows XP. The first step is to create an answer file. Generally speaking, you’ll want to run a test installation using that answer file first before deploying it on a large scale because you’ll probably need to make some tweaks to it. After you create your answer file, place it on a network share that will be accessible from the target computer. Most people put it in the same place as the Windows XP installation files for convenience.
Boot the computer that you want to install on using a boot disk or CD, and establish the network connection. Once you start the setup process from the network location, everything should run automatically.
Sysprep
Another tool that can aid in performing unattended installations is the System Preparation tool, or Sysprep. The Sysprep utility works by making an exact image or replica of an operating system installation (called the master computer), which can then be installed on other computers. Sysprep removes the master computer’s security ID and will automatically generate new security IDs for each computer the image is used to install.
Perhaps the biggest caveat to using Sysprep is that because you are making an exact image of an installed computer, the computers that you will be installing the image on need to be identical (or very close) to the configuration of the master computer. Sysprep images can be installed across a network or copied to a CD for local installation. Sysprep cannot be used to upgrade a system; plan on all data on the system (if there is any) being lost after a Sysprep image is deployed.
There are several third-party vendors that provide similar services, and you’ll often hear the process referred to as disk imaging or drive imaging. The process works the same way as Sysprep, except that the third-party utility will create the image while Sysprep only prepares a source machine so that it can be captured as an image. When a new machine is targeted for deployment, the image file must be transferred to the computer. Typically this is accomplished by booting the target system with the imaging software and then starting the image download. The new system’s disk drive is made into an exact sector-by-sector copy of the original system.
Imaging has major upsides. The biggest one is speed. In larger networks with multiple new computers, you can configure hundreds of computers by using imaging in just hours rather than the days it would take to individually install the OS, applications, and drivers.
Bootable Media
For computers not connected to a network, images can be copied to a CD or DVD for local installation with an answer file you create. This is a quick way to perform a clean installation of an operating system without consuming all of your network bandwidth.
Remote Install/Windows Deployment Service
Older Windows Server operating systems have a feature called Remote Installation Service (RIS), which allows you to perform several network installations at one time. Beginning with Windows Server 2003 SP2, RIS was replaced by Windows Deployment Service (WDS). This utility offers the same functionality as RIS.
A network installation is handy when you have many installs to perform and installing by CD is too much work. To prepare for a network installation, the installation CD is copied to a shared location on the network. Then individual workstations boot and access the network share to execute the installation. The workstations can boot either through a boot disk or through a built-in network boot device known as a boot ROM (which is where PXE comes in). Boot ROMs essentially download a small file that contains an OS and network drivers and has enough information to boot the computer in a limited fashion. At the very least, it can boot the computer so it can access the network share and begin the installation.
Preparing the Computer for Installation
Once you have verified that the machine on which you are planning to install Windows is capable of running it properly, you’re sure all hardware is supported, and you have chosen your installation options, you need to make certain that the system is ready for the install. The primary question is whether you are planning to perform a fresh install of Windows or whether you are going to upgrade an existing system. We’ll deal with upgrading later in the chapter; for now, we’ll focus on new installations.
Preparing the Hard Drive
If you are installing Windows onto a system that does not already have a functioning OS, you have a bit of work to do before you get to the installation itself. New disk drives need two critical functions performed on them before they can be used:
- Partitioning is the process of dividing part or all of a hard drive into sections, or partitions, for use by the computer.
- Formatting is the process of preparing the partitions to store data in a particular fashion.
With older operating systems, you dealt with these two procedures by using the FDISK.EXE and FORMAT.COM commands (from Windows XP onwards, the DISKPART.EXE program replaced them). Running any sort of command on a machine that has no OS is impossible, though. You need a way to boot the computer—usually with a disk that is bootable.
For Windows XP, the process is to boot up using the Windows XP CD, which starts the installation process, and then utilize the installation process to partition and format the hard drive.
Partitioning the Hard Drive
Partitioning refers to establishing large allocations of hard drive space to create logical disks. A partition is a continuous section of sectors that are next to each other. In DOS and Windows, a partition is typically referred to, once mounted, by a drive letter, such as C: or D:. Partitioning a hard drive into two or more parts gives it the appearance of being two or more physical hard drives. At the beginning of each hard drive is a special file called the master boot record (MBR). The MBR contains the partition information for the hard drive and includes the beginning and end of each partition that has been defined on the drive.
Formatting the Hard Drive
The next step in management of a hard drive is formatting, initiated by the FORMAT or DISKPART command (or automatically by selecting to format a partition during the installation program). When formatting is performed, the surface of the hard drive platter is briefly scanned to find any possible bad spots, and the areas surrounding a bad spot are marked as bad sectors. Then magnetic tracks are laid down in concentric circles. These tracks are where information is eventually encoded. These tracks are split into pieces of 512 bytes called sectors. Some space is reserved in between the sectors for error-correction information, referred to as cyclic redundancy check (CRC) information. The OS may use CRC information to recreate data that has been partially lost from a sector. An operating system boot record is created along with the root directory. Finally, the File Allocation Table (FAT) or Master File Table (MFT) is created. This table is used to store and retain information about the location of files as they are placed onto the hard drive.
Starting the Installation
The installation processes for operating systems has arguably gotten easier over time. Being able to boot to a CD and automatically begin the installation is a good example of this ease of use. Although modern operating systems have more options for you to choose from, care has also been taken to minimize the stress involved in the process. In the next sections, we will look at the installation of Windows XP specifically.
Installing Windows XP
Installing Windows XP is a breeze compared to previous editions of Windows. As a matter of fact, you can install it with a minimal amount of user interaction. Microsoft has designed Windows XP to be incredibly simple to install.
As with other versions of Windows, you will go through various phases of the installation:
- Installation preparation phase
- Text-based installation phase
- Graphical installation phase
Windows XP, however, does almost everything for you. It is a very quick OS installation.
Installation Preparation Phase
During this phase, you begin the installation of Windows XP, which includes configuring the disk system to accept Windows XP and then starting the graphical phase of Windows XP Setup.
To start a Windows XP installation, as with the other Windows OSs, you must first check your prerequisites (hardware support, available disk space, and so on). Additionally, you must ensure that your computer supports booting to a CD-ROM. Most systems do these days, especially those that are able to support Windows XP.
Once you have validated these things, you are ready to start the installation. First power up the computer and quickly insert the Windows XP CD into the CD-ROM drive. If you don’t do this quickly enough, you may get an Operating system not found message because the CD-ROM wasn’t ready as a boot device because it hadn’t spun up yet. If this happens, leave the CD in the drive and reboot the computer.
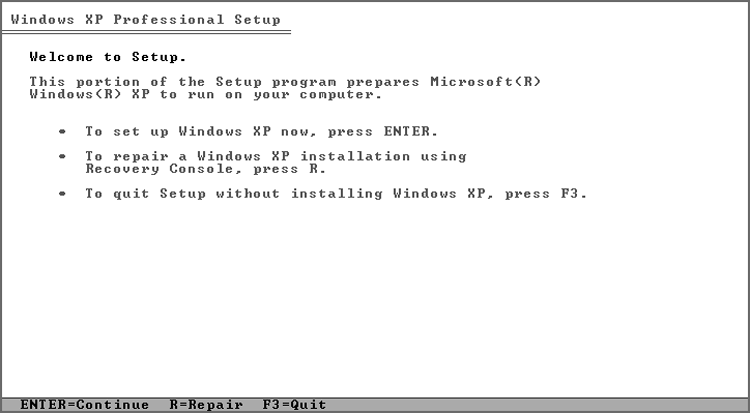
If the CD is inserted successfully, the screen clears, and the words Setup is inspecting your computer’s configuration appear. After that, you’ll see the Windows XP Setup main screen. Then the Windows XP main Setup screen appears, shown in Figure 16-1.
Figure 16-1: Windows XP main Setup screen
Text-Based Installation Phase
When the Setup screen appears, you can press Enter to begin the installation. The End User License Agreement (EULA) is then displayed, which you must accept (otherwise you can’t install Windows XP—as with other versions of Windows). Windows Setup then presents you with a series of screens where you can prepare the disk to accept Windows XP by partitioning it and then formatting it with either FAT or NTFS. It is best to choose NTFS for performance and security reasons.
Windows Setup will format the partition as you specified and then copy the files to the selected partition, which is needed to start the graphical portion of Setup. When it’s finished copying and unpacking the files, Setup reboots the computer and starts the graphical portion of Windows XP Setup. If the text-based installation phase has been successful, you will see a screen similar to that in Figure 16-2.
Graphical Installation Phase
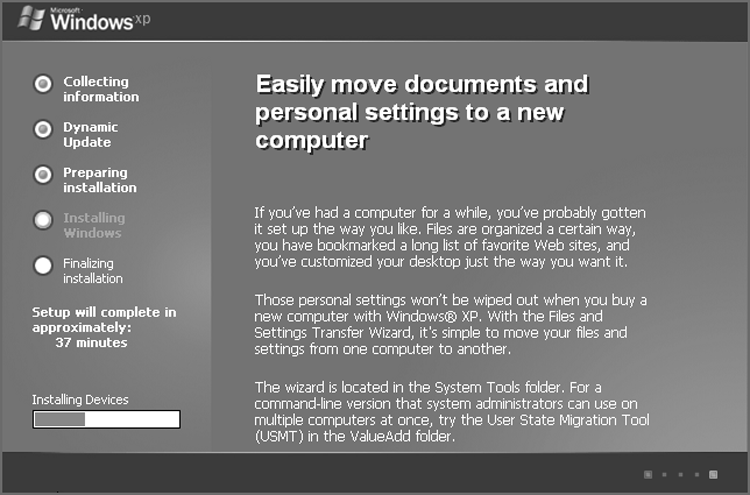
During the graphical installation phase, Windows XP Setup performs almost all of the actions necessary to bring Windows XP to a functional level. The first thing it does is copy files to the hard disk and begin installing device drivers (as shown in Figure 16-3). This process takes several minutes and should not be interrupted.
Figure 16-2: Windows XP Setup
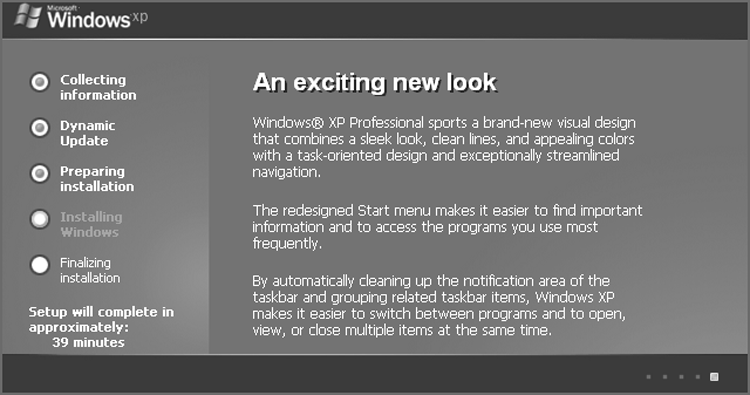
Figure 16-3: Installing devices in Windows XP Setup
Proceed with the installation with the following steps:
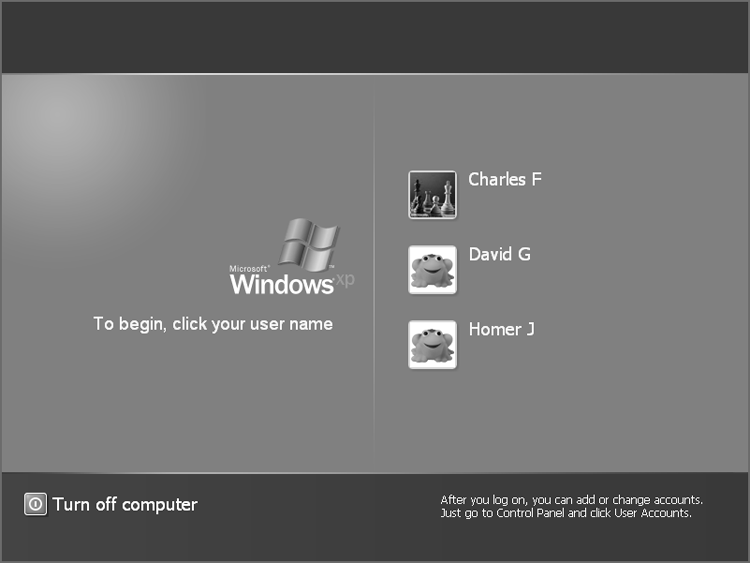
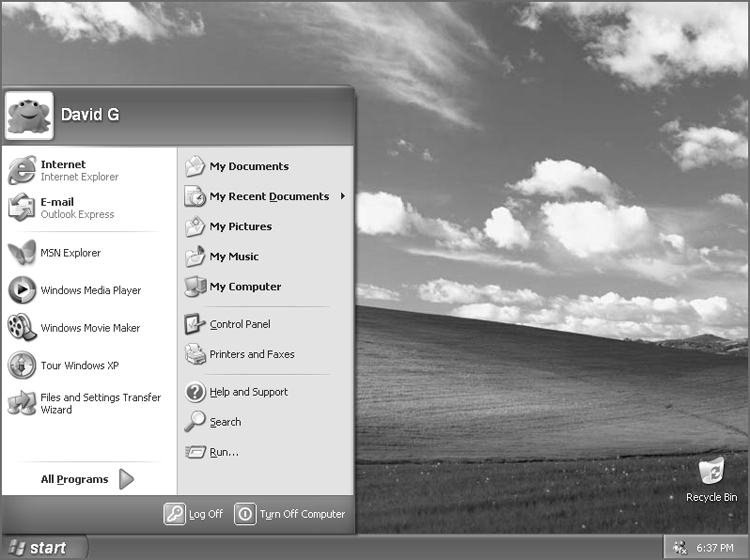
Upon reboot, Windows automatically adjusts the screen size for optimum use. You are presented with a screen welcoming you to Windows XP. It walks you through connecting your computer to the Internet (to register and activate your copy of Windows XP), asks you for the names of people who are going to use this computer, and then presents you with the login screen (Figure 16-4 shows the screen for a machine that is a member of a workgroup). Click a username you want to use to log in and Windows XP will present you with a Desktop (Figure 16-5).
Postinstallation Routines
Even though you have now installed your OS, there are a few items you must do to be truly finished:
- Updating drivers
- Restoring user data files
- Verifying installation
If you don’t perform these tasks, you will find using the newly installed OS less than enjoyable.
Updating Drivers
After you have gotten the OS up and running, you may find that a few items aren’t configured or working properly. That is somewhat typical. The drivers for some hardware aren’t found on the Windows installation disc, which may cause the driver installation to fail even though the device was detected properly. Or, more commonly, the drivers on the installation disc are installed successfully but are horribly out-of-date. In either situation, it is a good idea to search for and install or update the drivers for your hardware.
Figure 16-4: A Windows XP login screen
You should check the version of drivers for the following hardware against their manufacturer’s website and ensure that you have the most current driver for each item:
- Motherboard and chipset
- Video adapter
- Network adapter
- Sound card
- Disk controller
To update a driver, use the Update Driver button accessible from Device Manager. You can also download the appropriate driver file package from the hardware manufacturer’s website, extract it, and either run the setup utility that is included or use the Add Hardware Wizard that comes with Windows XP.
Figure 16-5: A Windows XP Desktop
The easiest way to see or change drivers in Windows XP is to click the Driver tab in the properties for the device. For example, to see the driver associated with the hard drive in Windows XP, double-click the hard drive in Device Manager (Start > Control Panel > System, and then click the Hardware tab and the Device Manager button), and choose the Driver tab. Among other things, this shows the driver’s provider, date, version, and signer. You can choose to view details about it, update it, roll it back to a previous driver, or uninstall it. We’ll talk more drivers later in this chapter.
Restoring User Data Files
After you have installed an OS, you will want to use the computer. This involves installing applications and (if applicable) restoring data from either an older computer or this computer if you are reinstalling the OS.
Most often, restoring data files simply involves copying them from a different medium (such as thumb drives, a floppy disk, external hard drive, magnetic tape, or other removable media). However, it can also involve copying the older data files from another computer. Windows XP includes a utility known as the Files and Settings Transfer Wizard that will transfer most of your files and individual application settings from an old computer to a new one. To prepare to run the wizard, you must first connect the two computers either by LAN or by null modem serial cable. Then, to start the transfer, execute the wizard on both computers. The files and settings are automatically transferred to the new computer without much trouble.
While the Files and Settings Transfer Wizard can be used by individual users, there is also a User State Migration Tool (USMT) that can be downloaded from Microsoft and offers the same functionality and more. It is intended to be used by administrators and requires a client computer connected to a Windows Server–based domain controller. More information on USMT can be found at http://support.microsoft.com/kb/321197.

Verifying Installation
The last thing you should do after installing any operating system is perform a verification. It sounds easy enough, but many people forget to do it, and not doing it can come back to haunt you later. Simply reboot (not that the installation didn’t reboot a few times already), and log in as a user. Make sure all of the appropriate programs are there and all of the devices (such as the network card and video card) are working properly.