
Windows 7 Administrative Tools
There are a number of system tools included with Windows 7 that you need to know for the exam. These administrative tools, discussed in the order they appear in the objectives, also include Windows Firewall, but it was covered earlier in this chapter.
Users and Groups
You can use Computer Management to access Users and Groups. As an administrator, you can also configure the users and groups on a system in the Microsoft Management Console (MMC). Start by clicking Start > and typing MMC in the Search box and pressing Enter. If Local Users And Groups is not visible in the left pane, choose File, then Add/Remove Snap-in, and select Local Users And Groups from the list of possible snap-ins. You can choose to manage the local computer or another computer (requiring you to provide its address). Figure 14-10 shows the default groups and explanations for each. The built-in groups for a domain are a superset of this set.
Figure 14-10: Default groups in Windows 7

Local Users And Groups is not available for Windows 7 editions lower than Professional. In all other editions, you must manage user accounts using the User Accounts applet in Control Panel, and you cannot create or manage groups. The default users created are Administrator, Guest, and the administrative account created during the install.
Local Security Policy
Local Security Policy (choose Start > and then enter secpol.msc) allows you to set the default security settings for the system. This feature is not available for Windows 7 in any edition other than Windows 7 Professional, Windows 7 Ultimate, and Windows 7 Enterprise. Figure 14-11 shows the utility.
Figure 14-11: Local Security Policy in Windows 7

The following sections examine some of the Security Settings choices.
Account Policies
Account Policies further divides into Password Policy and Account Lockout Policy. The following choices are available under Password Policy:
Because the likelihood of laptops being stolen always exists, it’s strongly encouraged that you use good password policies for this audience. Here’s an example:
- Enforce Password History: 8 passwords remembered
- Maximum Password Age: 42 days
- Minimum Password Age: 3 days
- Minimum Password Length: 6 to 8 characters
Leave the other two settings disabled.
Account Lockout Policy
The Account Lockout Policy setting is divided into the following three values:
When you’re working with a mobile workforce, you must weigh the choice of users calling you in the middle of the night when they’ve forgotten their password against keeping the system from being entered if the wrong user picks up the laptop. A good recommendation for a medium to low security environment may be to use a lockout after five attempts for a period of time between 30 and 60 minutes.
Local Policy Settings
The Local Policies section divides into three subsections:
System Configuration
The System Configuration tool (MSCONFIG.EXE) in Windows 7 is unchanged from Windows Vista. The five tabs it offers are General, Boot, Services, Startup, and Tools. The “tools” you can run, and the executables associated with them, are as follows:
- About Windows: WINVER.EXE
- Change UAC Settings: USERACCOUNTCONTROLSETTINGS.EXE
- Action Center: WSCUI.CPL
- Windows Troubleshooting: CONTROL.EXE /NAME MICROSOFT.TROUBLESHOOTING
- Computer Management: COMPMGMT.MSC
- System Information: MSINFO32.EXE
- Event Viewer: EVENTVWR.EXE
- Programs: APPWIZ.CPL
- System Properties: CONTROL.EXE SYSTEM
- Internet Options: INETCPL.CPL
- Internet Protocol Configuration: IPCONFIG.EXE
- Performance Monitor: PERFMON.EXE
- Resource Monitor: RESMON.EXE
- Task Manager: TASKMGR.EXE
- Command Prompt: CMD.EXE
- Registry Editor: REGEDT32.EXE
- Remote Assistance: MSRA.EXE
- System Restore: RSTRUI.EXE
Each of these should be considered troubleshooting utilities that you can use to solve system problems. Know what they do and the executable associated with each to solve the majority of problems you will encounter when working with Windows 7.
Component Services
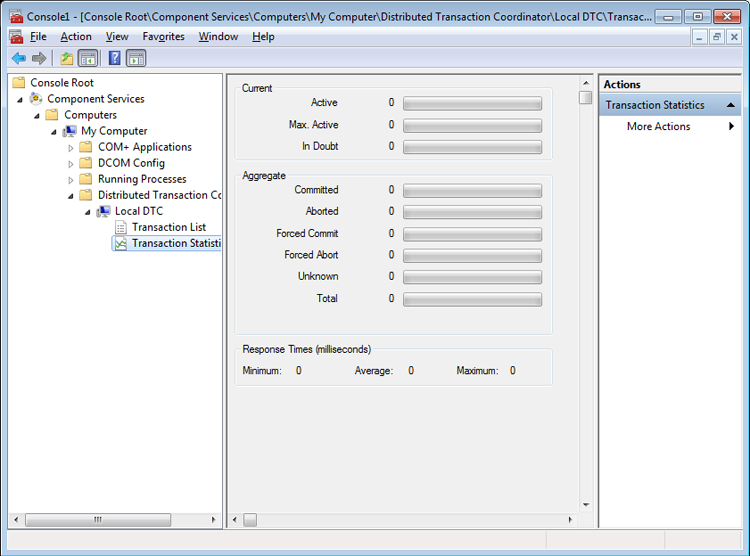
Component Services is an MMC snap-in in Windows 7 that allows you to administer, as well as deploy, component services and configure behavior like security. Figure 14-12 shows an example of the interface (Start > Control Panel > Administrative Tools > Component Services).
Figure 14-12: Component Services in Windows 7
Data Sources
ODBC Data Source Administrator—Start > Control Panel > Administrative Tools > Data Sources (ODBC)—allows you to interact with database management systems. Figure 14-13 shows an example of the screen.
Figure 14-13: Data Sources in Windows 7
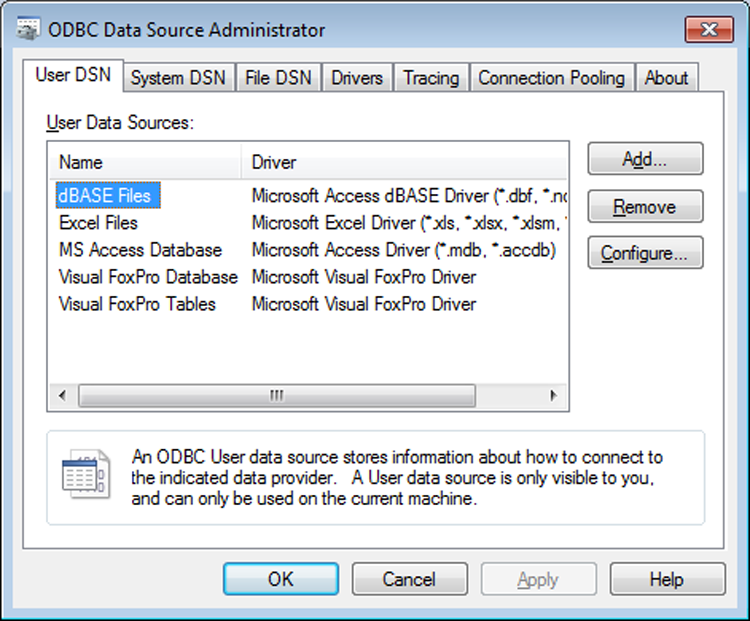
Database drivers that are added to the system will show up here and can be shared between applications.
Print Management
Carrying over from Windows Vista, Print Management (Start > Control Panel > Administrative Tools > Print Management) allows you to manage multiple printers and print servers from a single interface (see Figure 14-14).
Figure 14-14: Print Management in Windows 7
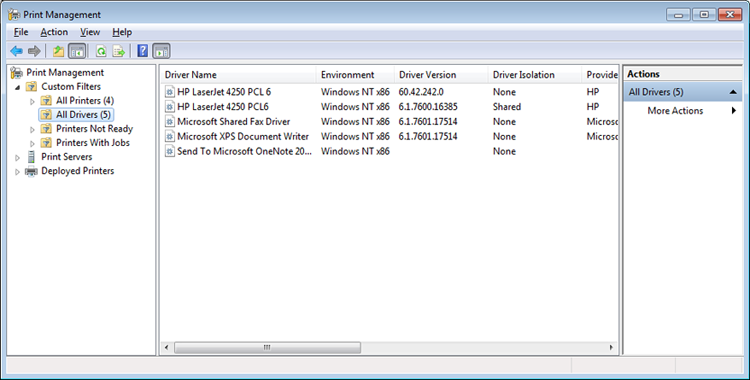
Print Management is not available for Windows 7 in any edition lower than Windows 7 Professional. In all other editions, you must manage individual printers using the Printers applet in Control Panel, and you are very limited in what you can manage.
Windows Memory Diagnostics
The Windows Memory Diagnostics Tool (Start > Control Panel > Administrative Tools > Memory Diagnostics Tool) can be used to check a system for memory problems. For the tool to work, the system must be restarted. The two options that it offers are to restart the computer now and check for problems and wait and check for problems on the next restart.
When the computer reboots, the test will take several minutes and the display screen will show which pass number is being run and the overall status of the test (percent complete). When the memory test concludes, the system will restart again and nothing related to it is apparent until you log in. If the test is without error, you’ll see a message that no errors were found. If any issues have been detected, the results will be displayed.