
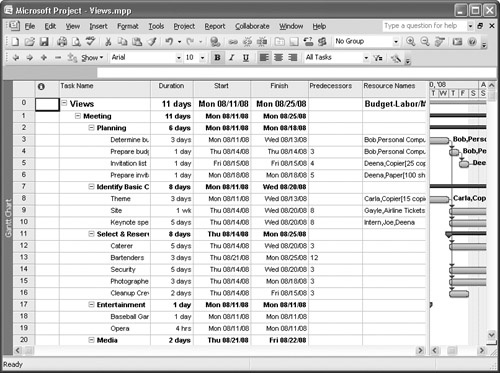
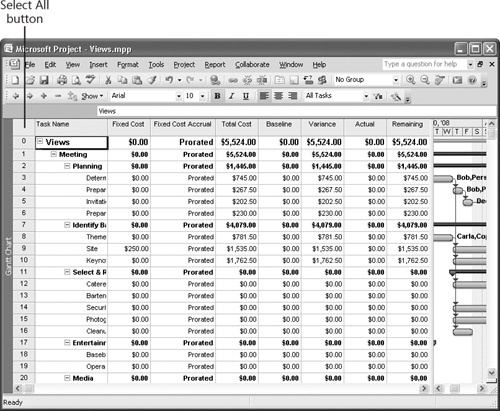
Tables appear in many views, and sheet views are made up entirely of tables. But the table you see when you display a view isn’t the only table available—that is, you can switch the table to view different information in the view. For example, 4-7 shows the Entry table of the Gantt Chart view. 4-8 shows the Cost table for the same view.
You’ll see different sets of fields on the tables of task-oriented views than you see on the tables of resource-oriented views. But the fields that appear on task-oriented tables don’t change from view to view, and the fields that appear on resource-oriented tables don’t change from view to view. That is, the Entry table for all task-oriented views contains one set of task-related fields, and the Entry table for all resource-oriented views contains one set of resource-related fields.
To switch to a different table, right-click the Select All button (as shown in 4-8) and select a table. If the table you want to view doesn’t appear on the shortcut menu, click More Tables. In the More Tables window, select the table you want to view and click Apply.
In addition to using the tables as they appear on-screen, you can add fields to a table or hide fields that you don’t want to view. Fields are the elements Project uses to store information you enter into your project. Every column heading in every table associated with any view represents a field in Project.
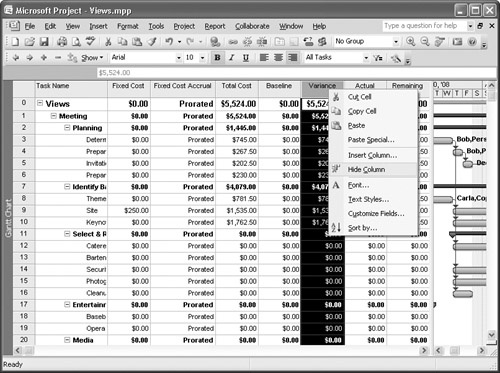
To hide a field, right-click the column heading for that field. Project selects that column and displays a shortcut menu. Click Hide Column (see 4-9). Remember, the information remains in your Project file; it’s just hidden from view.
To display a field, right-click the column heading of the column that should appear to the right of the new field. On the shortcut menu that Project displays, click Insert Column, and Project displays the Column Definition dialog box (see 4-10).

In the Field Name list, type a few characters of the name of the field that you want to add to the table or use the list box to select the field. Then click OK. Project adds the new field to the left of the field you originally right-clicked.
Tip
You can change the row height or column width of any row or column in a table by dragging a border. To adjust any row’s height, move the mouse pointer into the row number area and drag the row’s lower border up or down. To adjust any column’s width, move the mouse pointer into the column heading area and drag the column’s right border to the left or right.
While we’re talking about tables, let’s review the Details portion of the Task Usage and Resource Usage views. The table portion of these views appears on the left side of the screen, and the Details portion, another type of table, appears on the right side of the screen. In the Details portion of these views, you find assignment information distributed over time—Project calls this information timephased information.
You can display additional information in the Details section. Unlike the tables we just reviewed, where you add fields as columns in the table, you add fields to the Details section by adding rows. By default, Project displays the Work field in the Details section of both usage views. To add fields to the Details section, right-click anywhere in the Details section and then click the appropriate field from the shortcut menu that appears (see 4-11). Rows in the table of the view get wider to accommodate fields you add to the Details section.

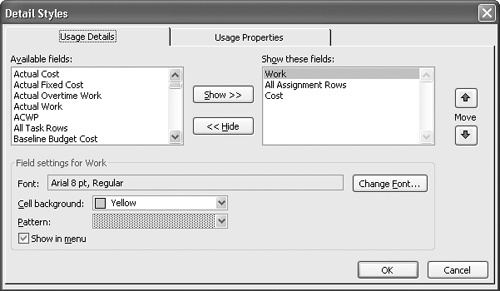
If the field you want to add doesn’t appear on the shortcut menu, click Detail Styles on the shortcut menu to display the Detail Styles dialog box (see 4-12). In the Available Fields list, click a field and then click the Show button.
Tip
If you add a particular field to the Details section often, add it to the shortcut menu by selecting the Show In Menu check box in the Detail Styles dialog box. For example, if you use budget resources regularly, you might want to add the Budget Work and Budget Cost fields to the shortcut menu to have easy access to them.
You hide fields in the Details section of a usage view the same way you display them: right-click anywhere in the Details section to display a shortcut menu of available fields and click the field you want to hide. Project removes the field from the Details portion of the view.