
The Project 2010 ribbon contains the commands for the features you use every day to plan and track your projects. You can customize the Project 2010 ribbon in the following ways:
Add a custom tab, group, or command.
Change the name, order, and content of existing tabs, groups, and commands.
Remove a tab, group, or command from the ribbon.
When you customize the ribbon, be aware of the following characteristics and guidelines:
The ribbon shows one active tab at a time.
Tabs contain groups.
Groups contain commands.
Commands can be added only to custom groups. This is true for built-in commands and macro commands that you create.
The customizations you make to the Project 2010 ribbon apply only to Project 2010 and not to any other Office applications.
Minimize or Expand the Ribbon
You can hide the ribbon so that only the tabs are showing, without a tab’s groups or buttons. When you click a tab in the minimized ribbon, the full ribbon appears. After you click a button, the ribbon is minimized again. This is a great way to give yourself more working space in the project plan, either temporarily or after you’re familiar with where commands are on the ribbon.
In the upper-right corner of the Project 2010 window, click the Minimize The Ribbon icon.
To show the full ribbon again, in the upper-right corner of the Project 2010 window, click the Expand The Ribbon icon.
You can create a custom group on any existing tab and add commands to that group. You can even create a custom tab and add custom groups of commands to it.
If you want to add commands (either built-in commands or macros) to the ribbon, you must first create a custom group to contain them. Because the commands in existing groups are fixed, you can add commands only to a custom group you create. However, you can add that custom group to an existing tab, such as the Task tab or the View tab, or you can add it to a custom tab you create.
To create a custom group on the ribbon, follow these steps:
On the File tab, click Options.
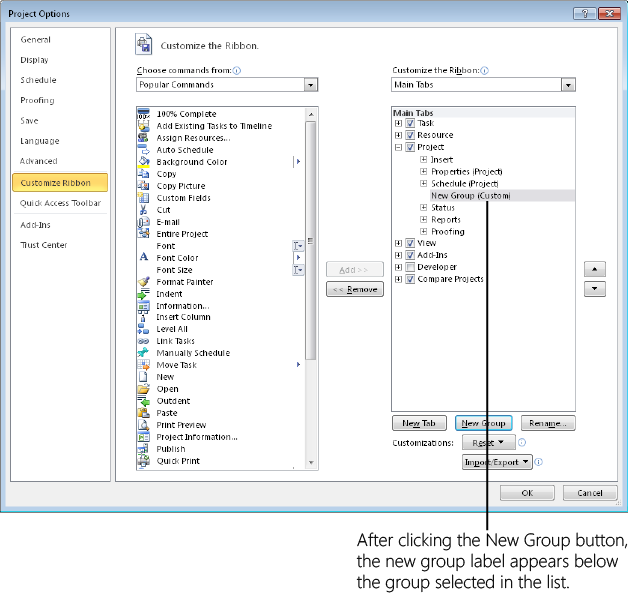
In the left pane of the Project Options dialog box, click Customize Ribbon.
You can also right-click anywhere in the ribbon and then click Customize The Ribbon.
In the Customize The Ribbon box on the right side of the dialog box, make sure that Main Tabs is selected.
In the Main Tabs list, click the plus sign next to the tab where you want to add your custom group.
The tab expands to show the existing groups on that tab.
In the expanded list of groups, click the name of the group after which you want to add your custom group.
Click the New Group button below the list.
The label New Group (Custom) appears below the group you selected, as shown in Figure 29-6.
With New Group (Custom) still selected, click the Rename button below the list.
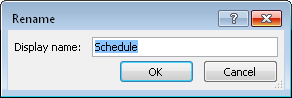
The Rename dialog box appears, showing a gallery of buttons. Ignore the buttons for now. You’re just creating the group name.
In the Display Name box, type the name you want for your custom group, and then click OK.
The new name appears in the list, with (Custom) after the name. This helps you distinguish your custom groups from the built-in groups.
If you want to change the position of the custom group, click its name, and then click the Move Up or Move Down arrow button to the right of the box until the group is located where you want it.
After you create a custom group, you have a place to add commands. You can add built-in commands or custom commands (macros) to your custom group. You can also change the name or button icon associated with any command you add to the custom group.
To add an existing command to a custom group, follow these steps:
Be sure that the Project Options dialog box is still open.
Click the arrow in the Choose Commands From box, and then select the category from which you want to choose your command—for example, All Commands, Commands Not In The Ribbon, or Tool Tabs.
The commands in the category you select are listed in the box on the left.
In the Main Tabs box on the right, click the name of the custom group to which you want to add the command.
In the command list on the left, click the name of the command you want to add to the custom group, and then click the Add button.
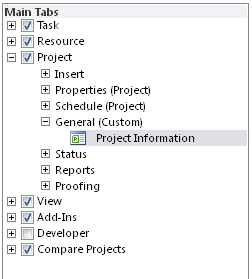
The command name appears under the custom group name, as shown in Figure 29-7.
Repeat steps 2 through 4 to add any other commands you want to the custom group.
It’s okay to have a group containing just a single command. Keep in mind that as a group grows larger, it’s more likely to affect the visibility of other groups on that tab. Buttons might become smaller, and groups on the far right might “fall off” the ribbon.
When you are finished adding commands, click OK in the Project Options dialog box.
Navigate to the tab where you added the custom group.
You’ll see your custom group with the commands you’ve added (see Figure 29-8).

Note
For information on adding a macro command to a custom group, see Adding Macros to a Custom Group.
Find Commands
Suppose you used a certain command in earlier versions of Microsoft Project, and now you can’t find it on the Project 2010 ribbon. You can search for it by following these steps:
Right-click anywhere in the ribbon or Quick Access Toolbar, and then click Customize Quick Access Toolbar or Customize The Ribbon. The Project Options dialog box appears.
In the Choose Commands From box, click All Commands. All commands in Project 2010 are listed.
Scroll through the list to find the command.
To find where the command is located on the ribbon, rest the mouse pointer over the command name. The location of the command appears, including the name of the tab, group, and command.

The commands are listed in alphabetical order. You might need to look in different places if you’re not sure of the exact command name.
You might also try clicking Commands Not In The Ribbon in the Choose Commands From box. If you need to use a command that’s not on the ribbon, you can add it to a custom group or to the Quick Access Toolbar.
You might find it advantageous to add your custom groups to a custom tab rather than to a built-in tab. You can move built-in groups from other tabs to your custom tab and really customize the layout of commands on the Project 2010 ribbon.
To create a custom tab, follow these steps:
Right-click anywhere in the ribbon, and then click Customize The Ribbon in the shortcut menu that appears.
In the Customize The Ribbon box, make sure that Main Tabs is selected.
In the Main Tabs list, click the tab after which you want the custom tab to appear.
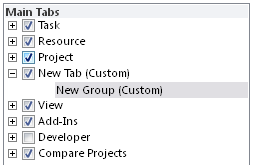
Below the Main Tabs list, click the New Tab button.
The new tab is added, and it contains one new custom group. (See Figure 29-9.) You can now add commands to the custom group, rename the custom group, add other groups to the tab, and rearrange the position of the custom groups and the custom tab.
Whether custom or built-in, the tabs, groups, and commands on the Project 2010 ribbon can be modified in several ways. You can rearrange the order of tabs and groups, and you can rename tabs and groups as well.
Using the Move Up and Move Down arrow buttons in the Customize The Ribbon dialog box, you can rearrange tabs, groups, and, in certain cases, commands.
First open the dialog box by right-clicking anywhere in the ribbon, and then clicking Customize The Ribbon in the shortcut menu. In the Customize The Ribbon box, make sure that Main Tabs is selected.
Rearrange ribbon elements as follows:
Change the order of tabs. In the Main Tabs list, click the tab you want to move to a different location, and then click the Move Up or Move Down arrow button until the tab is positioned where you want it.
Change the order of groups. In the Main Tabs list, click the group you want to move to a different location on the tab, and then click the Move Up or Move Down arrow button until the group is positioned where you want it.
Move a group to a different tab. In the Main Tabs list, click the group you want to move to a different tab, and then click the Move Up or Move Down arrow button until the group moves to the adjacent tab. Keep clicking Move Up or Move Down until it’s located on the tab and in the position you want.
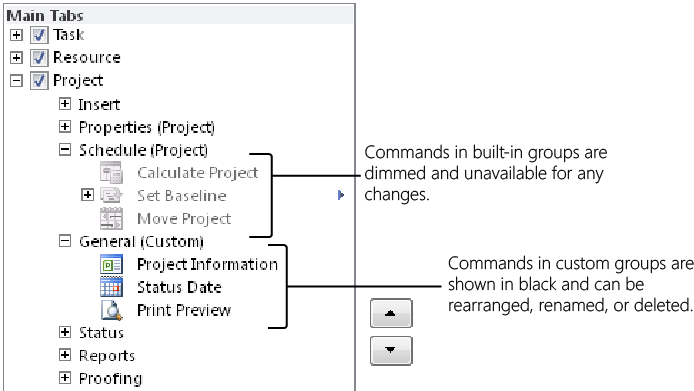
Rearrange commands in a custom group. Although you cannot rearrange commands in a built-in group, you can rearrange commands in a custom group. This is true for built-in commands and for macro commands you create yourself. In the Main Tabs list, navigate to and expand the tab and custom group that contain the commands you want to rearrange. Commands in built-in groups are dimmed and unavailable for any changes; commands in custom groups are shown in black. Click the command you want to move, and then click the Move Up or Move Down arrow button until the command is located where you want it within the custom group.
You can rename built-in or custom tabs, as well as built-in or custom groups.
To start, open the Customize The Ribbon dialog box by right-clicking anywhere in the ribbon and then clicking Customize The Ribbon in the shortcut menu. In the Customize The Ribbon box, make sure that Main Tabs is selected.
To rename a tab or a group, select the item in the Main Tabs list, and then click the Rename button located near the lower-right corner of the dialog box. The Rename dialog box appears.
Type the new name in the Display Name box, and then click OK. Click OK in the Customize The Ribbon dialog box, and you’re done.
Along with renaming tabs and groups, you can rename commands added to custom groups. This means that the only elements you cannot rename are commands in built-in groups. You can also change the button icon for commands added to custom groups. This is true for built-in commands as well as for macro commands you’ve created. If it’s in a custom group, the command is fair game for you to change.
To change the name and button icon of a command in a custom group, follow these steps:
Right-click anywhere in the ribbon, and then click Customize The Ribbon in the shortcut menu that appears.
In the Customize The Ribbon box, make sure that Main Tabs is selected.
In the Main Tabs list, expand the tab and custom group to navigate to the location of the command you want to change.
Click the name of the command whose name or icon you want to change.
Remember, you can change the name or icon only for a command you’ve added to a custom group. Commands in built-in groups cannot be changed.
Below the tab listing, click the Rename button.
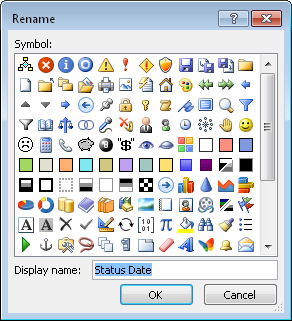
The Rename dialog box appears, as shown in Figure 29-10. The Rename dialog box includes not only the Display Name box but a symbol gallery of options for the command’s button icon.
If you want to change the display name of the command, type the new name in the Display Name box.
If you want to change the icon shown for the command, find and click the icon you want in the symbol gallery.
Click OK in the Rename dialog box, and then click OK in the Project Options dialog box.
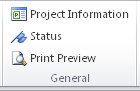
In the ribbon, navigate to the tab where the custom group resides.
You’ll see that the command name or icon has been updated according to your specifications. (See Figure 29-11.)
Note
For specifics on naming and assigning a button icon to a macro command, see Changing the Macro Icon or Display Name.
You can remove a built-in tab or group and easily add it back later should the need arise. This can help remove clutter from your ribbon or make room for your own custom groups of commands. You can replace a built-in group that doesn’t quite have the combination of commands you prefer with a custom group that has exactly the commands you want.
You can remove any tab, any group, and certain commands from the Project 2010 ribbon. The following rules apply:
You can remove a built-in tab from the ribbon. When you do this, all the groups and commands it contains are also removed. A built-in tab can easily be added back if needed.
You can delete a custom tab, along with any groups and commands it contains.
You can remove built-in groups from a tab. They can easily be added back if needed.
You can delete custom groups from a tab.
You can remove commands only from a custom group. Commands in a built-in group are always dimmed and unavailable for any changes.
Note
An easy way to see whether you can remove a ribbon element is to click it in the Main Tabs list in the Customize The Ribbon dialog box. If the Remove button is available when you click an element, you can remove that element. If the Remove button is dimmed, you cannot remove that element. The Remove button should be dimmed only for commands in built-in groups.
To remove any tab, any group, or a command in a custom group, follow these steps:
Right-click anywhere in the ribbon, and then click Customize The Ribbon in the shortcut menu to open the Customize The Ribbon dialog box.
In the Customize The Ribbon box, make sure that Main Tabs is selected.
In the Main Tabs list, navigate to and click the name of the tab, group, or command you want to remove.
Remember that only commands in a custom group can be removed. Commands in built-in groups cannot be changed in any way.
Click the Remove button, which is located between the two list boxes.
The item selected in the Customize The Ribbon list is removed from the box. If it’s a built-in tab or group, it’s still available in the Choose Commands From box. Whether it’s a built-in command or a macro, it also remains available in the Choose Commands From box. However, if it’s a custom tab or custom group, clicking the Remove button completely deletes it.
When you are finished removing ribbon elements, click OK in the Customize The Ribbon dialog box.
Your changes are shown in the Project 2010 ribbon.
It’s safe to experiment with the ribbon because you can always reset it to its default configuration. You can reset just a selected tab or the entire ribbon. When you reset defaults, any changes you made to the tabs, groups, or commands are reversed. This includes any custom tabs, groups, or commands you added, so be sure to reset with care.
To reset the selected tab, follow these steps:
Right-click anywhere in the ribbon, and then click Customize The Ribbon in the shortcut menu.
In the Customize The Ribbon box, be sure that Main Tabs is selected.
In the Main Tabs list, navigate to and click the name of the tab you want to reset to its original default settings.
Click the Reset button, which is located below the Customize The Ribbon list.
In the menu that appears, click Reset Only Selected Ribbon Tab.
The selected tab is reset to its original defaults.
Click OK in the Customize The Ribbon dialog box.
When you choose to reset the entire ribbon to all default settings, you lose any customizations you made to the ribbon. This includes any custom tabs, any custom groups, and any commands added to those groups. Resetting the entire ribbon also resets the Quick Access Toolbar to its default commands.
To reset the entire ribbon to all default settings, follow these steps:
Right-click anywhere in the ribbon, and then click Customize The Ribbon in the shortcut menu.
Click the Reset button, and then click Reset All Customizations.
A message appears that confirms that you want to remove all customizations for the ribbon and Quick Access Toolbar.
Click Yes.
The entire ribbon and the Quick Access Toolbar are reset to their original defaults.
Click OK in the Customize The Ribbon dialog box.