
Now that your task list is sequenced to your satisfaction, you’re ready to organize the tasks into a structure representing the hierarchy of tasks, from a broad perspective to the deep and detailed perspective where the real work actually takes place.
A task at a higher outline level than other tasks is called a summary task; the tasks beneath that summary task are called subtasks. (See Figure 3-24.) Summary tasks typically represent phases in a project. For example, in a website development project, you might have summary tasks for creating the web structure, designing the site, determining the hardware and software needed, and developing the content.
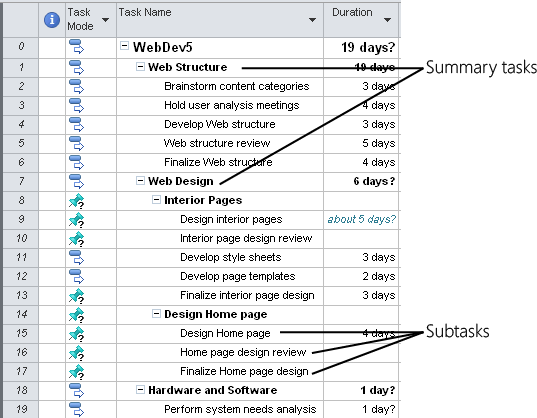
The subtasks under those phases can be actual tasks that are assigned to resources, or they could be another set of summary tasks. For example, the “Web Design” summary task could have subtasks such as “Design interior pages” and “Design Home page.” These subtasks in turn can be summary tasks to still more subtasks.
Note
As of Project 2007, the number of available outline levels became unlimited. Earlier versions of Microsoft Project had a limit of nine outline levels.
Many project managers use the outline levels to correspond to their WBS, in which the lowest-level subtask corresponds to the work package.
Note
For more information about the WBS in Project 2010, see Setting Up Your Work Breakdown Structure.
As you create the outline structure in your task list, you might find that you need to refine the task list even more by inserting, moving, and deleting tasks.
All your tasks are initially at the first outline level. To make a summary task, you need to indent subtasks beneath it. The following list describes various outlining techniques:
Make a task a subtask. Click the task. On the Task tab, in the Schedule group, click Indent Task. The task is indented, and the task above it becomes its summary task. Summary tasks are highlighted in bold in the table area of the Gantt Chart and are marked with a black bar spanning the summary tasks in the chart area of the Gantt Chart.
Regardless of your default task scheduling mode, summary tasks are always set as automatically scheduled tasks because summary task information is calculated from the aggregate of its subtasks.
Insert a summary task. Click the task above which you want to insert a new summary task. On the Task tab, in the Insert group, click Summary. A new summary task is inserted above the selected task, and that selected task becomes the first subtask for the new summary task. This method of creating a top-down summary task is new for Project 2010.
If you insert a summary task above a blank row, the new summary task row appears with a new subtask beneath it.
Create a subtask under a subtask. Click a task under a subtask. On the Task tab, in the Schedule group, click Indent Task twice. This task is now at the third outline level, as a subtask of a subtask.
Move a subtask to a higher level. Click a subtask. On the Task tab, in the Schedule group, click Outdent Task.
Indent several tasks at one time. Drag the mouse pointer across several adjacent tasks to select them, or use the Ctrl key to select several nonadjacent tasks at once. On the Task tab, in the Schedule group, click Indent Task. This method also works to create subtasks under different summary tasks.
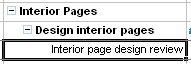
Hide or show the subtasks for a selected summary task. Next to each summary task is a plus or minus sign. The plus sign indicates that there are hidden subtasks for this summary task. Click the plus sign, and the subtasks appear. You can also select a summary task, and then on the View tab, in the Data group, click Outline, and then click Show Subtasks.
The minus sign indicates that the subtasks are currently displayed. Click the minus sign, and Project 2010 hides the subtasks. You can also select a summary task, and then on the View tab, in the Data group, click Outline, and then click Hide Subtasks.
Show all tasks at a specified outline level. You can make visible only those tasks at the first and second outline levels, for example, throughout your entire project plan. On the View tab, in the Data group, click Outline. In the drop-down menu that appears, click Outline Level 2. You can select any level from Outline Level 1 through Outline Level 9.
To show all levels again, in the Outline drop-down menu, click All Subtasks.
Delete a summary task. If you decide to delete a summary task, just be aware that all of its subtasks will be deleted as well. If this is indeed what you want to do, select the summary task’s row heading and then press Delete.
However, you might really just want to change the task’s level from a summary task to a subtask or a nonoutlined task. To do this, click somewhere in the summary task row, and then on the Task tab, in the Schedule group, click Indent until the task is showing at the level you want.
Likewise, you can make a summary task a subtask or a nonoutlined task by outdenting its subtasks. Select all the subtasks under the summary task, and then on the Task tab, in the Schedule group, click Outdent until the summary task and subtasks are at the levels you want.


Summary tasks show rolled-up task information that is an aggregate of the information in the associated subtasks. For example, if each of four subtasks has an associated cost of $100, the summary task shows the total of $400. You can also see rolled-up summary information for total elapsed duration for all subtasks, the earliest start date and the latest finish date for all subtasks, and other such information.
You can also display a summary task for the project as a whole. The project summary task shows rolled-up summary information for the entire project; for example, total costs, total duration, project start, and project finish.
To show the project summary task, on the Format tab, in the Show/Hide group, select the Project Summary Task check box. The project summary task name is adopted from the project file name. You can change this summary task name if you want.