
The more you work with Project 2010, the stronger your preferences become about how you want elements laid out in the window. You can make changes to the Project 2010 window that will persist across your working sessions with the project plan as well as to other projects you create. For example, you can reset which view should be the default when you first start a new project plan. You can also show or hide different elements in the default Project 2010 window. In making these changes, you can set up your Project 2010 window to be the most efficient for your own working methods.
On the other hand, sometimes you need to rearrange the Project 2010 window temporarily to accomplish a specific task. For example, you can zoom the window or the timescale. You can arrange one window in two different panes. You can also easily switch between multiple open projects.
The Gantt Chart is the default view that appears whenever you start Project 2010 or create a new project file. This is because project managers use this view most often, at least as a starting point. However, if a different view is your favorite, you can make that one the default view. To do this, follow these steps:
On the File tab, click Options, and then click General in the left pane.
Under Project View, in the Default View box, click the view you want to appear first whenever you create a new project file.
The Zoom slider is the control on the status bar in the lower-right corner of the Project 2010 screen.
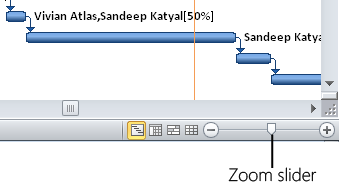
Use the Zoom slider to see more or less detail in your view. If you’re working in a view with a timescale, such as a Gantt chart or usage view, use the Zoom slider to expand or contract the time periods shown. If you’re working in a graphical view such as the Calendar or a network diagram, the Zoom slider expands or shrinks the entire current view.
You can click the plus button or drag the slider to the right to see more detail. Or, you can click the minus button or drag the slider to the left to see more in the window at one time.
The Zoom slider is not available in views that don’t need to be zoomed in or out, such as sheet views and forms.
Troubleshooting: You can’t find the Zoom slider
If the status bar is not showing at all along the bottom of your Project window, you need to turn it on to see the Zoom slider. On the File tab, click Options, and then click Advanced in the left pane. Under Display, select the Show Status Bar check box.
If the status bar is showing, but the Zoom slider is not, right-click the status bar. Near the bottom of the shortcut menu that appears, click Zoom Slider to turn it on.
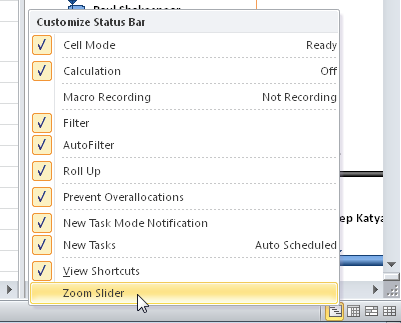
After turning the Zoom slider on, click off the shortcut menu to dismiss it.
Many Project 2010 views, including Gantt charts and usage views, use a timescale to indicate time in the project. The timescale appears above the chart or timesheet area of a view. You can display up to three timescales (see Figure 4-22), with each timescale in a tier. The highest tier shows the broadest period of time, and the lowest tier shows the most detailed period of time. For example, you can show days within weeks within months, or you can show weeks within quarters.

The default timescale is two tiers: days within weeks. To set your timescale options, do the following:
Show a view that contains a timescale, for example, the Gantt Chart, Task Usage view, or Resource Graph.
On the View tab, in the Zoom group, click the arrow in the Timescale box, and then click Timescale in the drop-down menu.
The Timescale dialog box appears, providing four tabs: Top Tier, Middle Tier, Bottom Tier, and Non-Working Time. The Middle Tier tab is displayed by default.
Under Timescale Options, in the Show box, click the number of timescale tiers you want to display (one, two, or three).
Under Middle Tier Formatting, in the Units box, specify the time unit you want to display at the middle tier—for example, quarters, months, or weeks.
In the Label box, click the format in which you want to display the time unit—for example, January 28, Jan 28, Sun 28, and so on. If necessary, scroll to see more time unit formats to find the one you want.
If you choose to display more than one tier, click the Top Tier and/or Bottom Tier tabs and repeat steps 4 and 5.
Certain screen elements are displayed by default in the Project 2010 window. Figure 4-23 shows these screen elements. To expand your working area, you can hide elements that you don’t use much or that you just want to get out of the way temporarily. (You can still use these elements when you need them.)
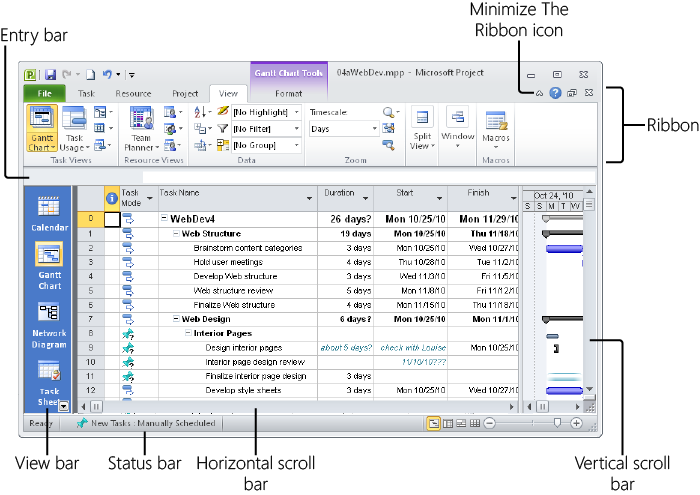
Table 4-10 lists the screen elements you can show or hide, along with the procedure for doing so.
Table 4-10. Screen Elements
Screen element | How to display or hide it |
|---|---|
Ribbon | You can hide the ribbon to the extent that only the tab names are showing. In the upper-right corner of the Project 2010 window, click the Minimize The Ribbon icon. To show the ribbon again, click the Expand The Ribbon icon. |
View bar | To show the View bar, right-click the Active View bar—the gray bar at the left edge of the Project 2010 window that shows the name of the current view. At the bottom of the drop-down menu, click View Bar. To hide the View bar, right-click the View bar, and then click View Bar. |
Status bar (the bar below the view) | On the File tab, click Options, and then click Advanced in the left pane. Under Display, select or clear the Show Status Bar check box. |
Scroll bars (horizontal and vertical) | On the File tab, click Options, and then click Advanced in the left pane. Under Display, select or clear the Show Scroll Bars check box. |
Entry bar (the bar above the view) | In Project 2010, the Entry bar above the current view does not show by default. On the File tab, click Options, and then click Display in the left pane. Under Show These Elements, select or clear the Entry Bar check box. |
You might be familiar with the Split function in Microsoft Excel or Microsoft Word, with which you can divide a single window into two panes and scroll each pane independently. In Project 2010, you might need to refer to different parts of the same Project 2010 view. Perhaps you want to show different parts of the same view in a split screen because you’re modeling a new section of a project on an existing section farther up the view. Or maybe you want to see two different views at the same time.
The problem is that when you split a screen in Project 2010 (by dragging the split bar), a form appears in the lower portion of the split that gives you a combination view. You can switch to a different view, but the lower view is designed to show information relevant to the information selected in the upper view.
The solution is to open a second instance of the same window and then arrange them side by side in your Project 2010 window. To see your project plan in two independent panes at the same time, follow these steps:
Display the project plan you want to see in a split screen format.
On the View tab, in the Window group, click New Window.
In the New Window dialog box, click the name of your project plan, and then click OK.
This opens a second instance of your project plan. The two instances are marked in the title bar with a “:1” and “:2” after the file name, indicating that these are separate windows for the same project file. Any changes you make in one window are simultaneously made in the other.
On the View tab, in the Window group, click Arrange All.
Any open project plans are tiled in your project window. (See Figure 4-24.)
If you have other project plans open besides the two you want to work with, close or hide them. To hide an open window, select it, and then on the View tab, in the Window group, click Hide, and then click Hide again.
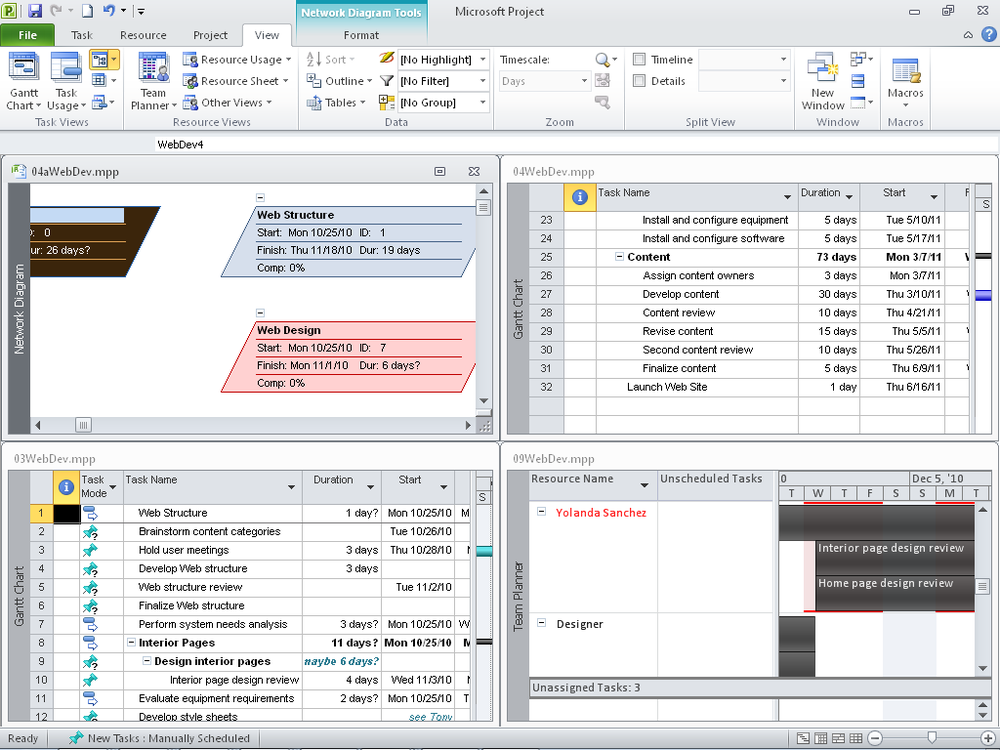
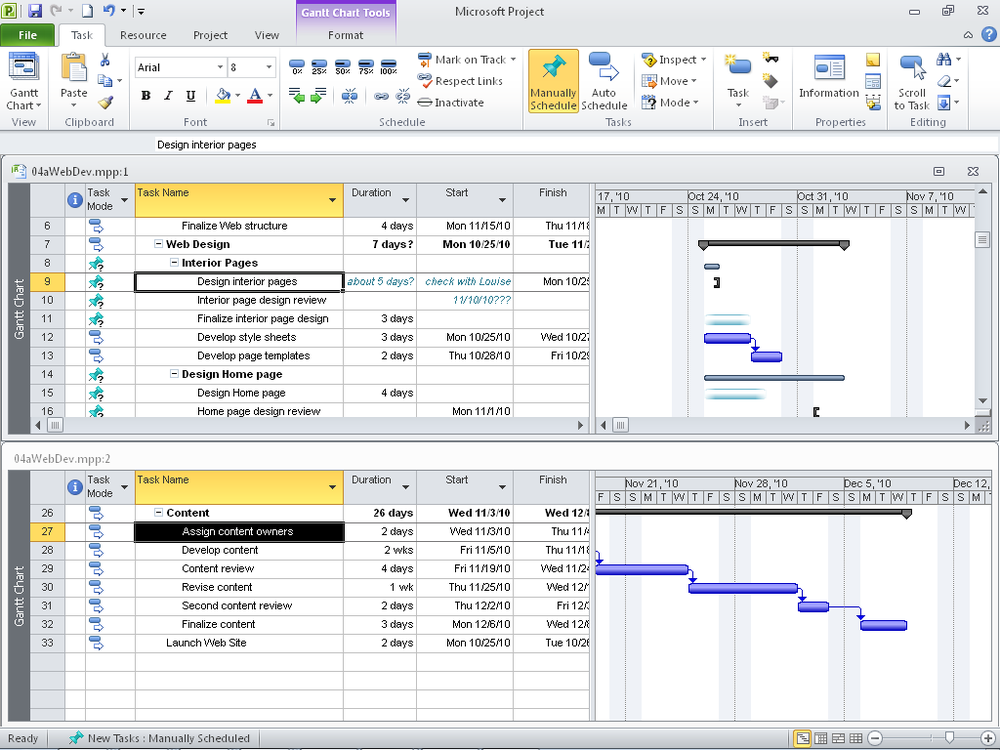
When only the two instances of the project plan are displayed, click Window, Arrange All again. The two open projects are tiled horizontally: one above, and the other below, as shown in Figure 4-25. Now you can scroll the two windows independently of each other and also look at different views independently.
To return to a full-screen view of a single project file, close the file in one of the panes and maximize the file in the remaining pane.
Note
To give yourself more working space while viewing two project windows at one time, minimize the ribbon. Click the Minimize The Ribbon icon in the upper-right corner of the Project window. The tabs of the ribbon still show, so you still have access to commands. To restore the ribbon, click the Expand The Ribbon icon.
If you have multiple projects open at the same time, there are several ways to switch between them. You can do the following:
Click the project’s button on the Windows taskbar
Press Alt+Tab to cycle through all open programs and windows
Press Ctrl+F6 to cycle through all open projects
Note
By default, multiple open Project 2010 files are represented as individual buttons on the Windows taskbar. You can change this so that there’s just a single Project 2010 button on the taskbar, regardless of the number of open project files. On the File tab, click Options, and then click Advanced in the left pane. Under Display, clear the Show Windows In Taskbar check box.