
Along with the basic resource information such as the resource name, type, units, and calendar, you can add supplementary information to work, material, or cost resources. This data can include additional fields of resource information, notes, or hyperlinks.
You can add initials, group designations, or a code to a resource by using the appropriate field in the Resource Sheet or on the General tab in the Resource Information dialog box. The following list provides examples of how you might use these fields:
Initials. If you want a resource’s initials, rather than his or her entire name, to appear in certain fields in your project plan, enter the initials in the Initials field in the Resource Sheet or on the General tab in the Resource Information dialog box.
Group. Use the Group field to specify any categories of resources that might be useful for sorting, grouping, or filtering. For example, you can specify the department the resources come from, such as Product Development or Marketing. If you are using contracted resources, you can enter their company’s name in the Group field, or you can use the Group field to specify the resource’s title or skill set—for example, Engineer, Architect, or Designer.
Code. Enter any code meaningful to you or your company in the Code field. It can be any alphanumeric designation you want. In fact, you can use it the way you use the Group field. You can enter job codes or skill codes, for example. Like the Group field, you can then sort, group, or filter these codes.
Cost-related fields are an important part of the Resource Sheet. The Resource Information dialog box also includes a Costs tab.
Note
For more information about resource cost information and using the cost fields in the Resource Sheet and the Resource Information dialog box, see Planning Resource Costs.
In addition to the default Entry table on the Resource Sheet, other tables containing different collections of resource fields are available. To apply a different table to the Resource Sheet:
Display the Resource Sheet.
On the View tab, in the Data group, click Tables. Click the table you want.
If the table you want is not listed, click More Tables. Click the table in the list (see Figure 7-16), and then click Apply.

Dozens of additional resource fields are available to add to your Resource Sheet. Some examples include Available From, Booking Type, Cost Center, and many more. To add a new field to your current table:
Click the column heading next to where you want to insert the new column.
On the Format tab, in the Columns group, click Insert Column.
A new column appears showing a temporary drop-down menu of all available resource fields.
Click a field to apply it to the new column.
The fields listed are all resource fields. You can quickly move to a field by typing the first one or two letters of its name.
To hide a field you don’t need, follow these steps:
Click the column heading you want to hide.
On the Format tab, in the Columns group, click Column Settings, and then click Hide Column. You can also simply press the Delete key.
The column is hidden, but the information is not deleted. It’s still in the project database and can be shown again whenever you display its column.
If you plan to communicate project information to resources electronically, you might need to complete one or more of the following fields on the General tab in the Resource Information dialog box:
E-mail. Specifies the resource’s e-mail address, which is essential if you exchange e-mail messages, schedule notes, or project files with team members. If the resource is outside your company—that is, the resource uses a different e-mail system than you—be sure to specify the full e-mail address; as in [email protected]. If you added resources from your MAPI e-mail address book (Resource, Insert, Add Resources, Address Book), the resources e-mail addresses are already filled in.
Note
For more information about communicating project information through e-mail, see Chapter 19.
Windows account. Finds the resource’s user account in the local address book and places it in that resource’s Windows User Account field. Click the Windows Account button. In the alert that appears, click Allow. If there is more than one match, click the entry you want in the Check Names dialog box. Click OK. This field is useful if you’re working in an enterprise project management environment, and the enterprise resources are set up in Project Server with Windows user account names.
Use notes to add comments regarding a resource. Notes might include information about the skills or experience of the resource or anything you believe is pertinent to this resource working on this project. To add a note to a resource:
Display the Resource Sheet or other resource view, and then click the name of the resource to which you want to add a note.
On the Resource tab, in the Properties group, click Notes
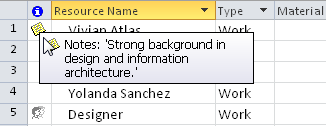
The Resource Information dialog box appears with the Notes tab open, as shown in Figure 7-17.
In the Notes area, type the note.
When you are finished, click OK.
The Note indicator appears next to the resource name in the Indicators field of the Resource Sheet. (See Figure 7-18.) You can double-click this icon when you want to read the note.

If there’s a document or website relevant to a resource, you can insert a column containing a hyperlink to reference it. This technique is a very efficient method for opening associated documents quickly. To insert a hyperlink, follow these steps:
Display the Resource Sheet or other resource view.
Right-click the resource to which you want to link a web page or document.
On the drop-down menu that appears, click Hyperlink.
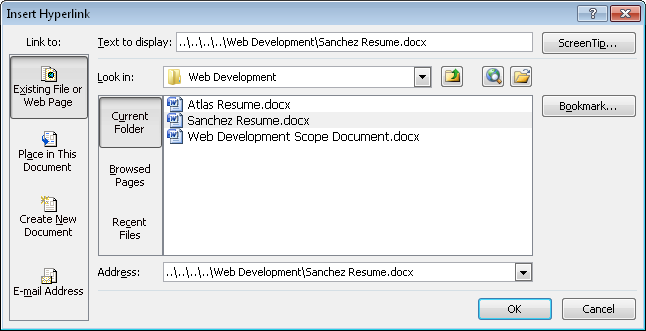
The Insert Hyperlink dialog box appears.
In the Text To Display box, type a descriptive name for the document to which you are linking; for example, Quarterly Goals.
Find and select the document or site you want to link to your project file. (See Figure 7-19.)
Click OK.
The Hyperlink indicator appears in the Indicators field of the Resource Sheet, as shown in Figure 7-20.
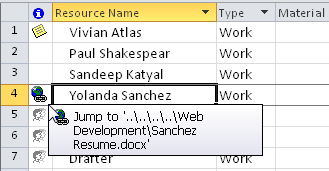
Whenever you need to review the target of the hyperlink, just click the Hyperlink indicator. The content opens in its own application window.
If you have difficulty clicking the Hyperlink indicator or getting the target to open, right-click anywhere in the resource row, point to Hyperlink, and then click Open Hyperlink. If a security message appears, click Yes to continue.