
The Resource Center is where executives and resource managers can keep a close eye on the performance of enterprise resources. In the Resource Center, you can review skills and other identifying attributes for resources, their current assignments, their current or future workload allocation, and their current or future availability for additional work.
You can see the entire enterprise resource pool and then examine details for an individual resource. To see the enterprise resource pool, follow these steps:
On the Quick Launch, under Resources, click Resource Center.
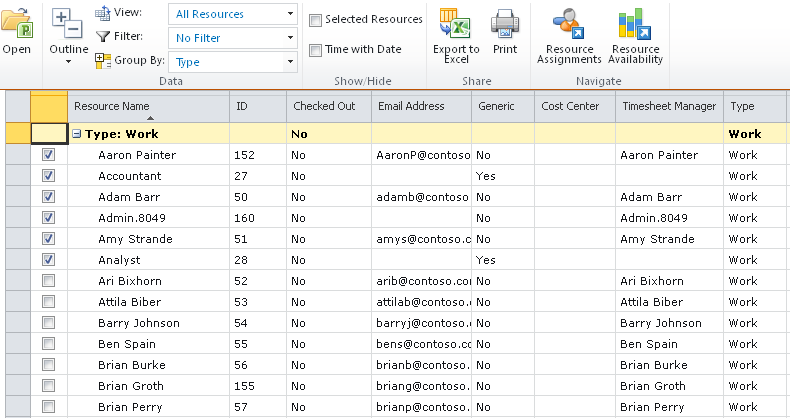
The Resource Center appears, showing the enterprise resource pool. Each resource occupies a single row that shows basic resource information. (See Figure 26-7.)
If you want, on the Resource tab, in the Data group, click in the View box, and then click the view that shows the type of resource information you want to see.
The project server administrator or portfolio manager can create and add different views to the Resource Center.
You can also sort, filter, or group resource information.
To view detailed information for a particular enterprise resource, follow these steps:
In the Resource Center, select the check box next to the name of the resource for which you want to see details. If you want to see details for multiple resources one after another, select the check boxes for each of them.
On the Resources tab, in the Editing group, click Edit Resource.
Scroll through the Edit Resource page to see resource details. Included on the page are the resource’s contact information, assignment attributes, and availability dates, as well as the contents of any custom fields that have been designed.
By default, executive privileges do not include the ability to edit resource information. However, if you need that capability, talk with your project server administrator.
If you selected multiple resources, when you’re finished with the first resource, click the Save And Continue or Continue Without Saving button.
The Edit Resource page for your second selected resource appears.
Continue in this manner until you get to the last resource. On the page for the last resource, click Save or Cancel. To return to the Resource Center at any time, you can also click the Cancel Remaining button.
The Resource Center showing all enterprise resources appears.
To see the resources assigned to specific projects, use the Project Center, as follows:
On the Quick Launch, under Projects, click Project Center.
Show the projects that are in the Plan or Manage phase: On the Projects tab, in the Data group, click in the View box, and then click Plan And Manage Phase.
Typically only projects in the Plan or Manage phases would have resources assigned.
Click the name of the project whose assigned resources you want to see.
The names of the available project detail pages are listed at the top of the Quick Launch.
In the Quick Launch, under the project name, click Schedule.
The Schedule project detail page appears.
If the Resources Summary view is not already showing, on the Task tab, in the Data group, click in the View box, and then click Resources Summary.
The Resources Summary view lists all resources assigned to the selected project, as shown in Figure 26-8.

To review resource assignments, follow these steps:
On the Quick Launch, under Resources, click Resource Center.
In the Resource Center, select the check box next to the name of the resource whose assignments you want to see. If you want to see assignments for multiple resources at once, select the check boxes for each of them.
On the Resources tab, in the Navigate group, click Resource Assignments.
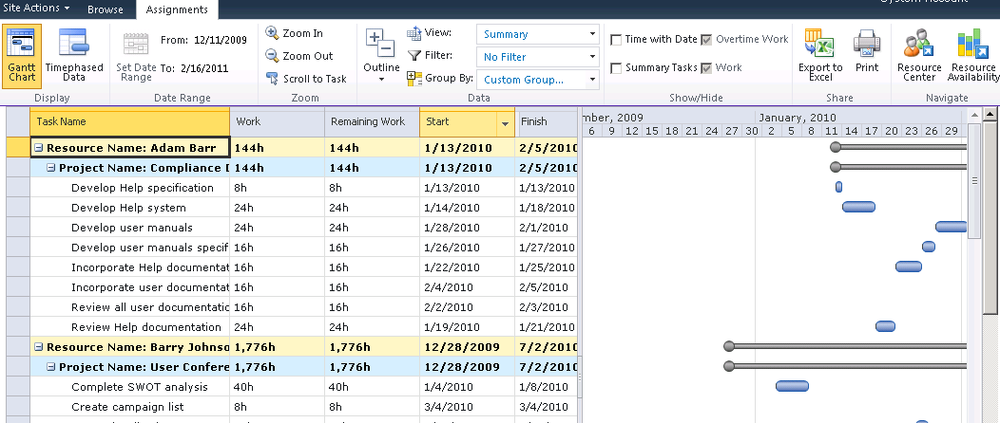
The Resource Assignments page appears, as shown in Figure 26-9. In a Gantt chart format, the assignments for the selected resources are listed, grouped by resource name and then by project name.
Scroll through the table and the chart to view the information you want.
When you are finished, on the Assignments tab, in the Navigate group, click the Resource Center button.
To review resource availability, follow these steps:
On the Quick Launch, under Resources, click Resource Center.
In the Resource Center, select the check box next to the name of the resource whose availability you want to see. If you want to see availability for multiple resources, select the check boxes for each of them.
On the Resources tab, in the Navigate group, click Resource Availability.
The Resource Availability page appears, as shown in Figure 26-10. The availability, as measured by work amounts over time, is drawn in a column chart for each selected resource. Availability and capacity information are shown for each resource in a table below the chart.
If you want to hide a resource’s availability information, clear the check box next to the resource’s name in the legend. Select the check box to show the availability information again.
On the Availability tab, in the Views group, click in the View box to select other resource availability views—for example, Assignment Work By Project, Remaining Availability, or Work.
When you are finished, on the Assignments tab, in the Navigate group, click the Resource Center button.
The Resource Center appears again.

With a resource plan, project managers and resource managers can estimate potential resource requirements associated with proposals or new projects. You can review resource plans if you want to see how resources are being used for other nonproject activities.
To see a resource plan, follow these steps:
On the Quick Launch, under Projects, click Project Center.
In the table, select the name of the project or proposal whose resource plan you want to review. Do not click the project name; click in any other cell or the row heading for the project.
On the Projects tab, in the Navigate group, click Resource Plan.
The resource plan for the selected project appears.
When you are finished, on the Plan tab, in the Plan group, click Close.
The Project Center appears again.