YOUR project files are the heart of your project management efforts. As the project manager, these are the files you find yourself “living in” the most. Because of this, it’s essential that your project files are properly saved, that you can easily find and open them, and that they’re properly safeguarded with the necessary backups and security.
Sometimes you need to save all or part of a project file in another format—such as PDF or XLSX—to make it easier for others to read your project information or so you can manipulate or present project information in a different way. Likewise, sometimes you need to open a file created in another type of application—for example, a Microsoft Access database or an XML file—to import information from that source for use as part of your project plan.
Now built in to Microsoft Project 2010—rather than being a separate add-in—is the ability to compare two project files side by side and see their differences.
These issues and features are all part of basic project file management, which is covered in this chapter.
Saving a project file ensures that it’s stored on a hard disk for future access. The hard disk might be on your own computer or on your organization’s network. It can be your project server as an enterprise project. Saving files to consistent locations makes finding your files logical and as quick as you need it to be.
Note
If you’re running Microsoft Project Professional 2010, you can also open an enterprise project file stored in the Microsoft Project Server 2010 database. For more information about saving, publishing, and checking project files in to your organization’s project server, see Creating an Enterprise Project by Using Project Professional and Managing Your Files on the Project Server.
Saving a project file is the same in Project 2010 as in any other Microsoft Office application. To save a new project file to a drive on your local computer or to a network drive, follow these steps:
On the File tab, click Save As.
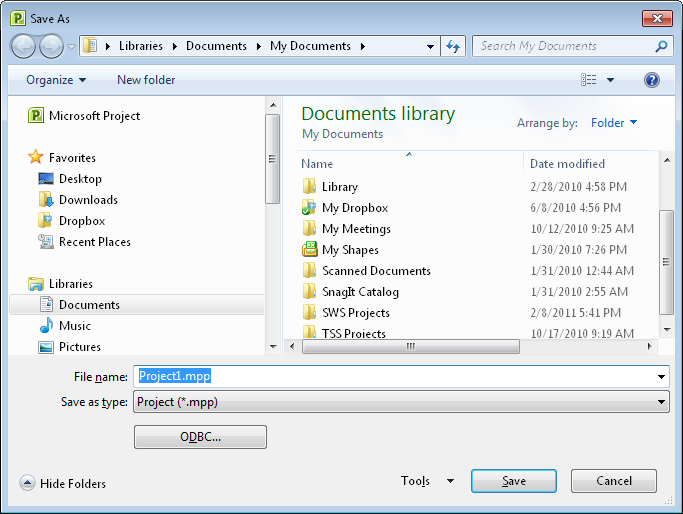
The Save As dialog box appears, showing the contents of the most recently used folder or your default file location, as shown in Figure 32-1. Unless you explicitly change it, this default file location typically is your Documents folder.
In the dialog box, double-click the drive or folder where you want to save the new project file. Continue double-clicking folders until you get to the location where you want to save the file.
In the File Name box, type the name of the file.
Click Save.
After saving a file with a name and in a specific location, be sure to save frequently during your work session. A good rule of thumb is to save about every five minutes or whenever you make significant changes that you wouldn’t want to lose in the event of a system failure or power outage. On the Quick Access Toolbar, click Save. You can also press Ctrl+S.
Although it’s not so difficult to remember to click the Save button every few minutes while working, sometimes all your powers of concentration are devoted to an activity such as adjusting the project schedule to achieve a changed project finish date. It’s only after the power outage that you realize that you haven’t saved your file for more than an hour, and anguish ensues.
Save Options
Depending on what you’re trying to do, there are different ways to save your project file:
Save. When you click File, Save for a new, unsaved project, the Save As dialog box appears. You can select the file’s storage location and name the file. For projects that are already saved, clicking the Save command quickly saves your changes to the existing file without opening the Save As dialog box.
Save As. When you click File, Save As in any project file, the Save As dialog box appears. You can select the file’s storage location and name the file. Use this dialog box to save new project files or create an alternate or backup copy of your project. You can also use this dialog box to save the project as a different file type.
Save Workspace. You can save multiple project files as a workspace that saves and opens the identified project files as a unit. The project files are still individual files that can be opened singly. However, when the workspace file is opened, all project files associated with that workspace are opened at the same time.
Note
For more information about saving a workspace, see Opening Multiple Project Files as a Set.
To provide that extra assistance that everyone needs from time to time, you can have Project 2010 remember to save the file automatically every few minutes. To do this, follow these steps:
On the File tab, click Options, and then click Save in the left pane.
Under Save Projects, select the Auto Save Every check box.
In the Auto Save Every box, enter the number of minutes after which you want Project 2010 to automatically save your file, as shown in Figure 32-2.
Under When Automatically Saving, specify which project files should be automatically saved.
To have Project 2010 automatically save only the active project, select the Save Active Project Only option, which is the default.
To have Project 2010 automatically save the active project along with any other open projects, select the Save All Open Projects option.
Select or clear the Prompt Before Saving check box according to your preference.

If you have a drive or folder dedicated to your project management files, you might want to make that your default save location instead of using the typical Documents folder. This default location is the folder presented first whenever you open or save a project file. To set the default folder, follow these steps:
On the File tab, click Options, and then click Save in the left pane.
In the Default File Location, click the Browse button.
In the Modify Location dialog box, browse to the drive and folder you want to see first when you are saving or opening project files. Click OK.
In the Project Options dialog box, click OK.
Note
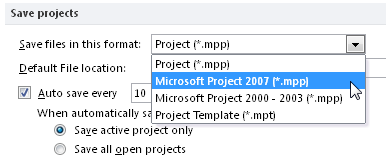
If you regularly save your project files as something other than an MPP file (for example, a Microsoft Project 2007 file), you can change the default file format. On the File tab, click Options, and then click Save in the left pane. Click in the box labeled Save Files In This Format, and then click the file format you want to use as the default.