
Until now, we were avoiding the discussion of physics, but our game has been using the Unity physics engine ever since we added a character to the scene. The Unity physics engine comes in two parts: one for 2D, and the more complex 3D. A physics engine is what brings life to a game and makes the game environment more natural. Developers can then leverage this engine to quickly and easily add new objects to the world that automatically react naturally. Since we already have a good working example of a game object using the physics engine, we will take a look at that:
- In Unity, make sure that the Map scene is loaded.
- In the Hierarchy window, expand the
MapSceneobject. Then, select thePlayerobject. Double-click on thePlayerobject to frame it in the Scene window. - Take a look at the Scene window and at the green capsule wrapped around your iClone character. In the Inspector window, check the Rigidbody and Capsule Collider components; the following is a screenshot of both windows:
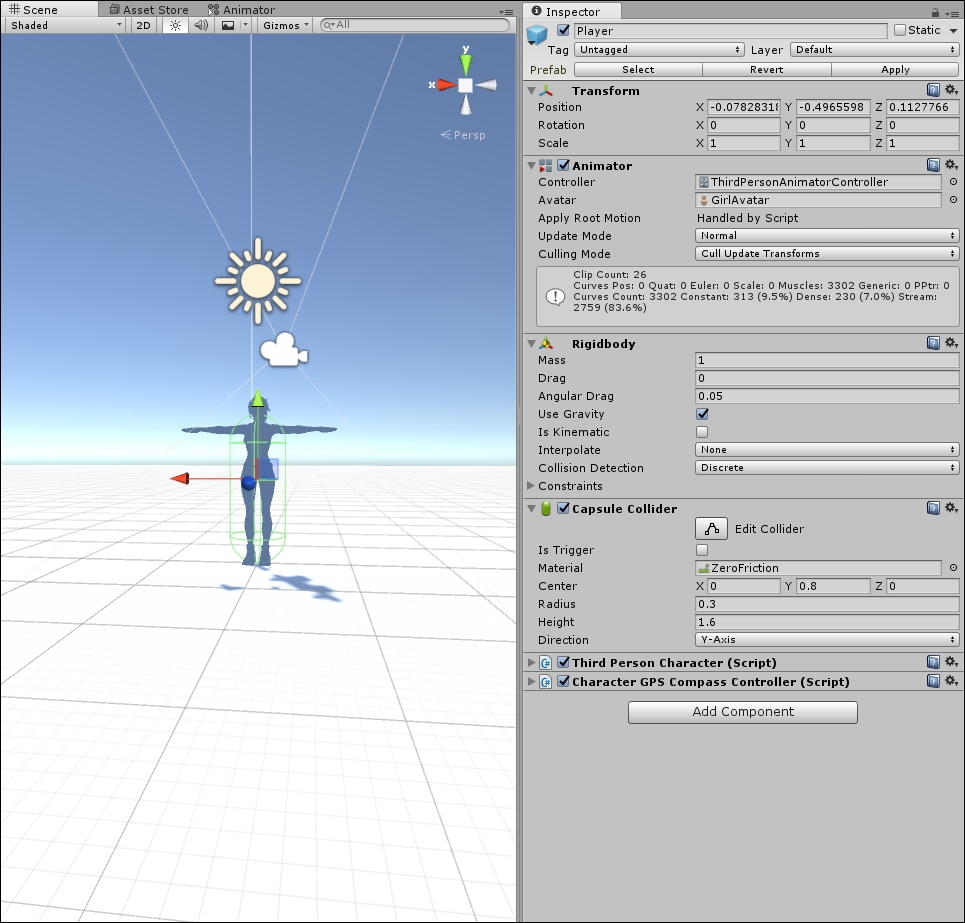
The Scene and the Inspector window showing physics properties of player
- The rigidbody and collider components are essential to determine the physics of an object; the following is a quick summary of what each of the components does and how they can be interrelated:
- Rigidbody: Think of a rigidbody as something that defines the mass properties of an object, whether the object reacts to gravity, for instance, or what its mass is, how easily it rotates, and so on.
- Collider: This is generally a simplified geometry that defines the object boundaries. A simplified geometry is used, such as a box, sphere, or capsule because collision detection can be performed very quickly. Using a more complex mesh, or even trying to use the actual character mesh, would drag the physics engine to a halt every time a collision was tested. Every frame, the physics engine will test to check whether objects collide with each other. If the objects do collide with each other, the physics engine will then use Newton's laws of motion to determine the effect of the collision. Suffice it to say, if you want to learn further about physics, there are plenty of resources available via your friend Google. In more advanced games, several capsule colliders may be used to wrap the torso and limbs. Thus, it allows for collision detection on individual body parts. For our purposes, a capsule collider will fit our needs.
With the physics definitions out of the way, let's get back to our monsters. We will add those physics components to the monster prefab by performing the following instructions:
- Open the
Assets/FoodyGo/Prefabsfolder in the Project window, and drag and drop theMonsterprefab into the Hierarchy window. - Double-click on the monster prefab to focus it in the Scene and Inspector windows.
- Add a capsule collider by selecting menu item Component | Physics | Capsule Collider.
- Add a rigidbody by selecting menu item Component | Physics | Rigidbody.
- If you look closely in the Scene window now, you will see the capsule collider is not wrapping the monster. Try adjusting the Capsule Collider component properties by yourself, or use the settings, as shown in the following dialog:

Capsule collider settings for monster
- With the monster highlighted in the Inspector window, click on the Apply button at the top of the window under the Prefab actions. This will apply the changes to prefab. Leave the
Monsterobject in the Hierarchy window. - Press Play in the editor to run the game. As you watch the game run, you will hopefully notice that the character now lands on top of the monster and then jumps off. The poor monster unfortunately falls over and then just rolls around. If you don't see this the first time, try running the game a couple of times until you do see this.
- We won't add functionality to get the monster back on his feet. What we will do, though, is not allow the
Playerto interact with the Monster objects. The best real-world analogy to this is our game where we are making the monsters ghosts; they can be seen and heard but cannot be touched. - Select the
Monsterobject. In the Inspector window, select the Layers dropdown and then choose Add Layer... - The Tags and Layers panel will open. Add two new layers called
MonsterandPlayerin the list, as shown in the following screenshot: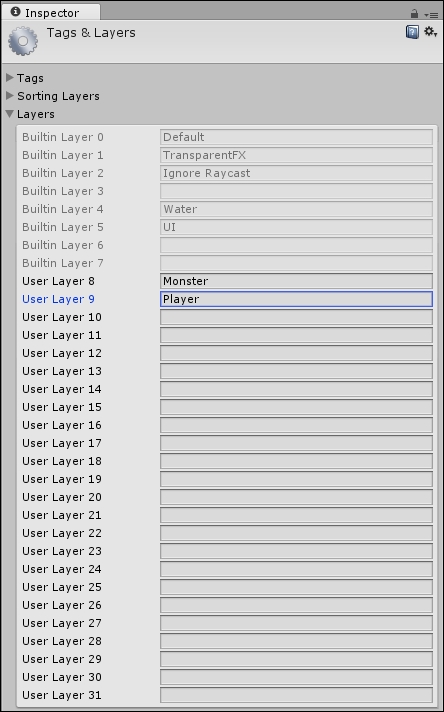
Adding a new Monster layer
- Select the
Monsterobject in the Hierarchy window again. TheMonsterwill now be on the Monster layer shown in the Layer dropdown. - Select the
Playerobject in the Hierarchy window. Select the Layer dropdown in the Inspector window and change the layer to Player. You will be prompted to also change the children; click on Yes, change children, as follows: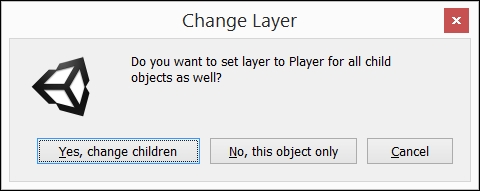
Prompting to change layer on children objects as well
- Putting the monsters on a new layer will not only allow us to control physics interactions, but also to optimize collision testing. If you recall, the
Physics.Raycastmethod took a layer mask parameter. Now that our monsters are on a layer called Monster, we can optimize the ray collision test to just the Monster layer. - Select the menu item Edit | Project Settings | Physics. This will open the PhysicsManager panel in the Inspector window.
- Uncheck the Monster-Player and Monster-Monster checkboxes in the Layer Collison Matrix:
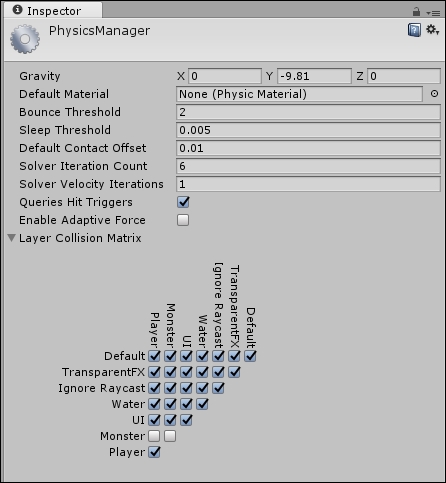
Editing the Layer Collision Matrix in the PhysicsManager
- By editing the Layer Collision Matrix to not allow the monsters to collide with players or other monsters, we avoid potential issues.
- Run the game again in the editor by pressing Play. Sure enough, our player no longer wipes out the monster, and everything is good in the world again.
So, now our monsters have colliders, which means our touch ray should be able to collide with them. Follow these instructions to configure the touch selection and test out selecting monsters by touch:
- Select the
Monsterobject in the Hierarchy window. Click on the Apply button on the Prefab settings in the Inspector window to make sure that all the changes are saved. - Delete the Monster prefab from the scene by selecting it in the Hierarchy window and pressing delete.
- Save the Map scene. Then, open the Game scene from the
Assetsfolder in the Project window. - Select
_GameManagerin the Hierarchy window. In the Inspector window, make sure that the Monster Layer Name is calledMonster. - Run the game by pressing Play in the editor. Click on the monsters. You should see a message in the Console window that the monster was hit.
- Build and deploy the game to your mobile device. Ensure that you also attach the CUDLR console window after the game is running on the device. Tap on the monsters and note the log messages that get output to the CUDLR console.
The player is now able to initiate catching a monster by tapping on them. Normally, we would also want to control the distance at which a player needs to be from a monster in order to catch it. For now though, we will just assume that any monster that can be seen, may be caught. This will make testing our game easier, especially in the GPS simulation mode. Later, when we start adding other objects and places on the map, we will get into setting an interaction distance.