
We will use the Google Places API to populate the virtual world around the player with references to real-world locations or places. Since we already used the Google Static Maps API, adding another service should be straightforward. However, unlike the maps API, the places API is far more restrictive on usage. This means that we will need to undertake additional set-up steps and modify the way we access the service. Not to mention, there will be a direct impact on our business model when we ship.
Note
Another direct competitor to the Google Places API is Foursquare. Foursquare has far fewer restrictive usage limits, but does require additional authentication mechanisms. We will revisit this topic again when we will start Chapter 9, Finishing the Game.
In order to start using the Google Places API, we will need to register and create new API key. This key will allow your app/game to make 1000 queries a day, which isn't very many, when spread over multiple players. Fortunately, if you register for billing with Google, they will bump up your limit to 150,000 requests per day. The code we use in this chapter will attempt to optimize the fewest number of requests so as not to exceed that 1000 request limit in testing.
Open your favorite web browser, and perform the following instructions to generate a Google Places API key:
- Click on: https://developers.google.com/places/web-service/get-api-key or copy it to your browser.
- Click on the blue button labeled with GET A KEY roughly in the middle of the page, as shown in the following screenshot:
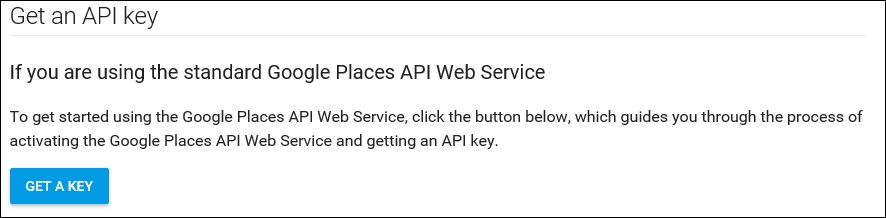
Getting a Google developer key
- Sign in to your Google account or create if you don't have one.
- After you sign in, a dialog will prompt you to select or create a new project. Choose create a new project and name it Foody GO or whatever else you find appropriate, as shown in the following dialog:
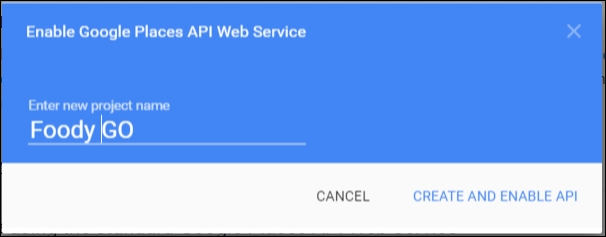
Creating a new Google Places API project
- Click on the CREATE AND ENABLE API link. This will open a dialog showing you your API key and links to starting materials. Ensure that you copy the key as it is shown in the following screenshot:

Example key, intentionally obscured
Now that you have your API key, let's test out the REST service that is the Google Places API. This exercise will not only show us what information comes back in a search, but will also help us understand the API. Follow the exercise instructions here:
- Click on or copy the given URL: https://www.hurl.it/ to your browser. Hurl.it allows you to test REST API calls quickly and easily within your browser window.
- At the top of the form, enter the Google Places API base URL in the
yourapihere.comtext field, as follows: https://maps.googleapis.com/maps/api/place/nearbysearch/json. - Next, click on the Add Parameter link and fill in the name as
typeand value asfood. The following is the table defines the parameters and the values that should be used in this exercise:Name
Value
Description
typefoodThe type of place you want to search for. Of course, we will use the term food.
location-33.8670,151.1957The latitude and longitude coordinates, separated by a comma.
radius500This is the radius, in meters, of the area to search from the center location.
keyYOUR KEYUse the API key that you generated in the above step.
- Complete the parameters as they are referenced in the table and make sure that they match the following screenshot:
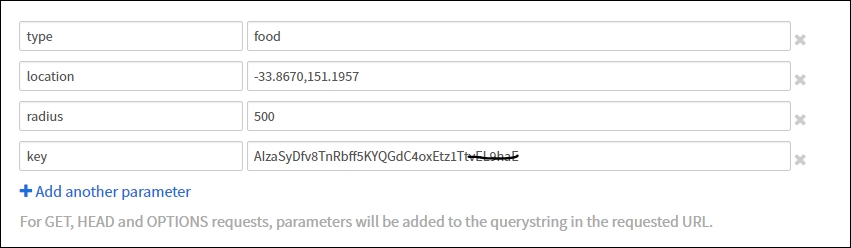
Adding parameters for the nearby search
- After you are done adding the parameters, confirm that you are not a robot by clicking on the checkbox and then click on Launch Request.
- Assuming you entered the parameters correctly, you should now see a change to: response message below the form. The message will be quite long and may look rather foreign, depending on your previous experience with JSON.
Leave your browser open and on the results page. We will come back to explore the output in the next section.