Choosing What Information You Want to Make Public
Google+ is geared toward helping you determine what information you want to make public. Google+’s approach to sharing information using Circles is, in itself, a means to ensuring that the information you share is kept to a limited audience. Be sure to keep an eye on your Circles and make sure you are sharing the right information with the right group of people.
If you’re sharing a private piece of information with a limited Circle, take time to lock the post (as shown in Figure 15-6). This prevents people in your Circles from resharing the post with other people. Chapter 5 has more information on setting up Circles.
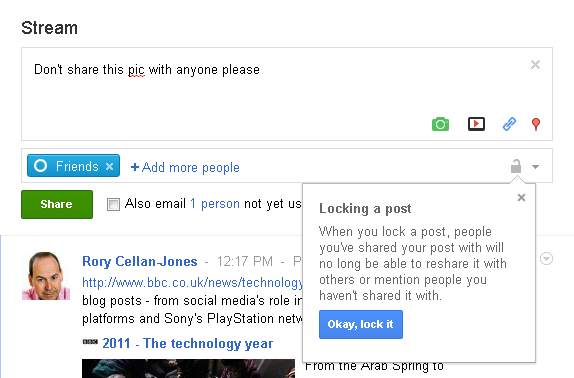
FIGURE 15-6 Locking a post.
How Careful Should I Be About Sharing Private Information? Google+ is great at offering you control over who you share information with, but I still subscribe to the point of view that if you really don’t want people to know something, don’t write about it online.
Using the Google+ profile and privacy settings
Beyond using Circles to manage what content you share online, Google+ also has a group of settings and features that you can use to check and manage your privacy.
Click the account icon on the Google+ bar and choose Privacy to open the privacy settings (as shown in Figure 15-7). You can use the settings here to check on your Google profile and how it appears when you are searched for online. You can also access your Circles and Profile settings, where you can edit what information is available to other people.
Chapter 12 has more information on using profile and privacy settings.
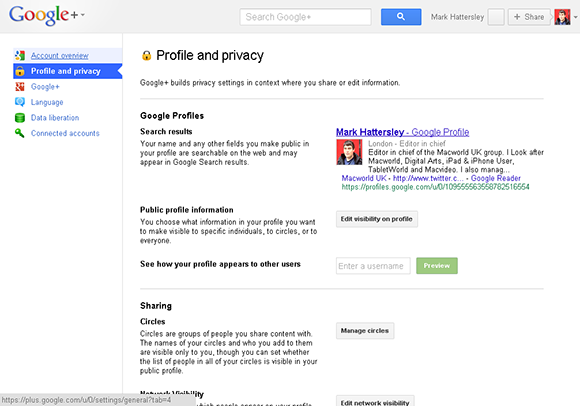
FIGURE 15-7 Profile and privacy settings.
Editing your profile visibility
Your Google+ profile (accessed by clicking the account icon) represents the information on you that both you and other people can see. Chapter 2 has more information on setting up your Google+ profile, but you might have overlooked that you can control who in your Circles can view what types of information about you.
You can granularly control it by editing your profile. Follow these steps to determine what information is visible to whom in your profile:
1. Click your account icon in the Google+ bar and choose Profile.
2. Click Edit Profile.
3. Click Introduction to reveal the edit mode for that area (as shown in Figure 15-8).
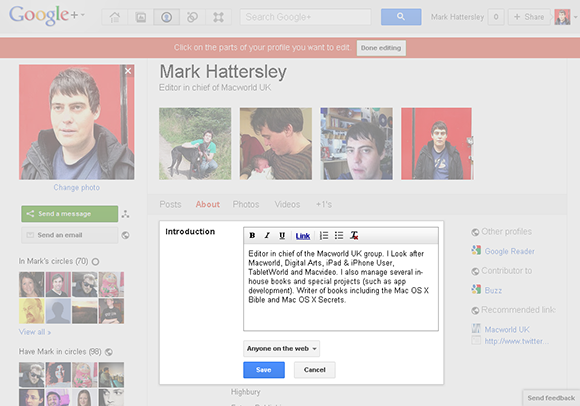
FIGURE 15-8 Determining who can see elements of your profile.
4. Click the Who can see this? drop-down list and choose from the following options:
+ Anyone on the web
+ Extended circles
+ Your circles
+ Only you
+ Custom
5. Click Save.
6. Click Done editing.
You can repeat this process for all the different elements on the About page, determining exactly who can see what parts of your profile.
You can also edit privacy settings for other elements on the profile. When you click Edit Profile on the Photos page of your profile (as shown in Figure 15-9), the following settings are available:
+ Show this tab on your profile. This option (selected by default) enables people to see your photos when viewing your profile.
+ Allow viewers to download my photos. This option (selected by default) enables people to copy the image files to their computer.
+ Find my face in photos and prompt people I know to tag me. With this default option on, people are notified when Google thinks you appear in a photo. The person uploading the photo is prompted to confirm your name and tag you in the photo. This uses Google’s face-recognition technology.

FIGURE 15-9 Editing photo privacy settings in Google+.
+ People whose tags of you are automatically approved to link to your profile. This option enables you to determine which people can tag you in a photo. The default setting is Friends.
+ Show photo geo location information in newly uploaded albums and photos. This option (unselected by default) shows any photo geo location, which is usually added when you use a smartphone camera or a camera with location-service technology, such as GPS. So people can see not just your pictures but also a map of where they were taken.
What settings you enable or disable is very much a personal choice. I show my photos on my profile and allow viewers to download my photos, but I’m wary of allowing tagging. I am happy for my photos to show geo location information, however.
Both the Videos and +1’s pages of the profile also contain the Show this tab on your profile check box, enabling you to hide videos and +1’s alongside photos from public viewing. However, you cannot assign your photos, videos, and +1’s to Circles — it’s an all or nothing situation.
Determining who can send you messages and emails
You can also use the edit mode on the profile page to determine who can send you messages. By default, anybody in your Extended Circles can send a message to you (that’s anybody who is one degree away from you; that is, in a Circle of a person who is in your Circles) and anybody can send you an email.
Follow these steps to change this setting:
1. Click Profile and then click Edit Profile.
2. Click Send a message to view the settings (as shown in Figure 15-10).
3. Select the Who can send you a message? check box to enable people to message you using the link on your profile.
4. Click the Who can see this? drop-down list and choose from the following:
+ Anyone on the web
+ Extended circles
+ Your circles
+ Only you
+ Custom
5. Click Save.
You can repeat this process for the Send an email settings.
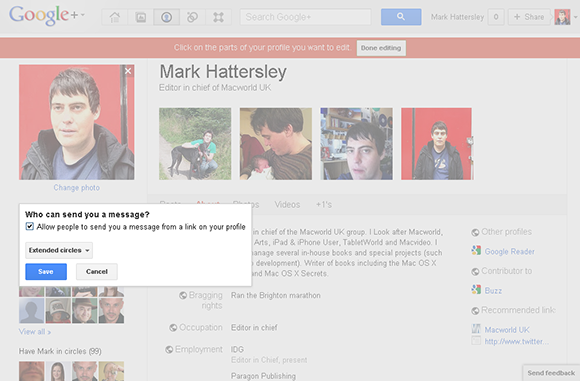
FIGURE 15-10 Determining who can send you messages.
Determining who can see your Circles
In the left-hand column of your profile are two areas that relate to your Circles: In YourName’s circles and Have YourName in circles. These display photos of eight people from your Circles plus links to view everyone in your Circles.
You can use the Edit Profile feature to control the visibility of this information:
1. Click Profile and then click Edit Profile.
2. Click the Circles box in the left-hand column. This reveals the following options (as shown in Figure 15-11):
+ Show people in. Deselect this check box to hide the people in your Circles completely.
+ All circles. Use this drop-down list to choose people from specific Circles to appear in your profile.
+ Who can see this? Two options are available: Anyone on the web and Your circles.
+ Show people who have added you to circles.
3. Click Save and then click Done editing.
You can use the View profile as text box to check how your profile appears to other people. Choose a person from your Circles or click on Anyone on the web.
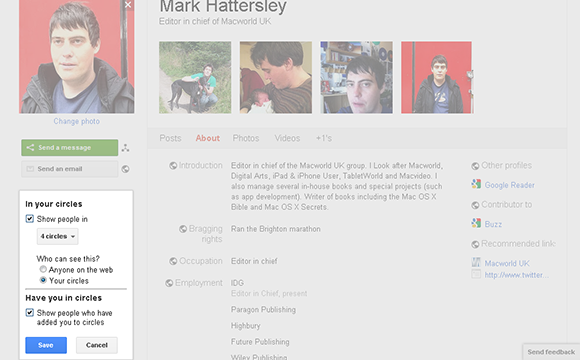
FIGURE 15-11 Managing Circle visibility.
Can People See Which Circle They Are In? Your Circles are always private. Although people can see whether they are in your Circles (and vice versa), there is no information about which Circle they are in.