
In the previous section, we discussed the management agents used by FIM. The agents' actions are activated using a series of operations to import, synchronize, and export information from the data sources (our Directory Services) to the metaverse and vice versa. In the previous steps, our FIM deployment has been configured to support Lync in a resource forest configuration, so now we have to enable the agents and the operations. Import the lcscentralforestma.xml file and click on OK.
Note
The Fabrikam.com and NWTraders.com partitions are the default partition names used when we import the FIM management agents. We are going to keep the names as they are, configuring Fabrikam.com with the information of the resource forest, and NWTraders.com with the information regarding the user forest.
- We will start with the management agent for the resource forest (
wonderland.lab). We have to go to the Management Agents screen, select Actions and Import Management Agent, and then select thelcscentralforestma xmlfile, as shown in the following screenshot: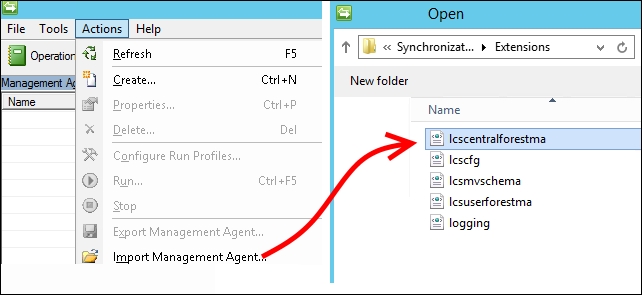
- The first page of the management agent configuration will contain the name that we have inserted in the
lcscfg.xmlfile during the previous section. Select Next. - Insert the account information in order to connect to the resource forest and then click on Next.
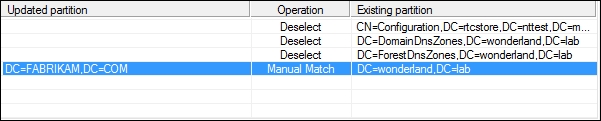
- Click on Match, and select DC=FABRIKAM,DC=COM and DC=wonderland,DC=lab. Click on Deselect for all the remaining existing partitions, as shown in the following screenshot:
- Click on OK.
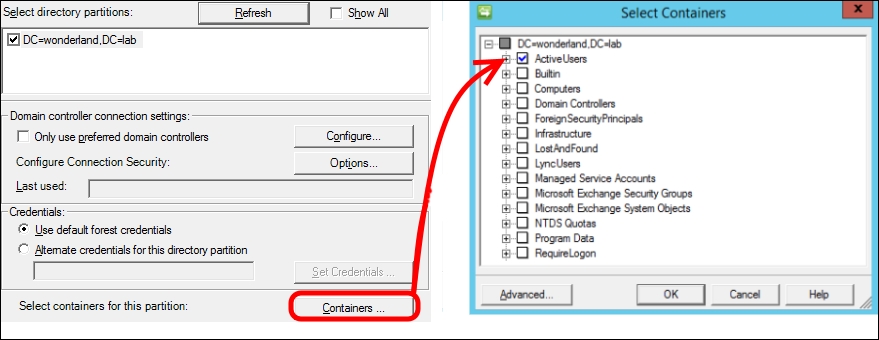
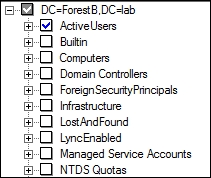
- The next screen, Configure Directory Partitions, offers options to select a preferred domain controller, to modify the connection security, and to define the OU that we will use to import the users (as we are talking about the resource forest, the flow of account information should be inbound only). In our scenario, the OU is called ActiveUsers. Flag it as shown in the following screenshot and click on OK. Then, select Next:
- The remaining options are already correctly configured based on the configuration we have imported. For example, by looking at the Select Attributes screen, you will notice that we have selected all the AD attributes that are relevant for Lync. Also, the Configure Extensions options are automatically set to point to the
lcssync.dllfile, which we have previously imported, as shown in the following screenshot:
- Click on Finish to complete the definition of the management agent.
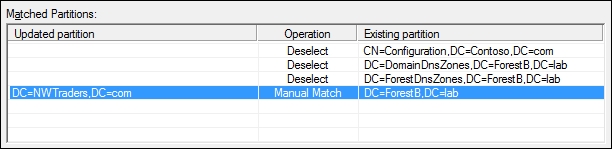
- A similar process is required to define the management agent for the user forest (ForestB). We have to go to the Management Agents screen, select Actions and Import Management Agent and then select the
lcsuserforestmaXML file. - The name of the management agent will be ForestB. As we have seen before, once again insert the account information to access the user forest with the agent. This time, the partition matching rules will be the ones shown in the following screenshot (which match the default partition NWTraders.com):
- The OU that we will use to synchronize is called ActiveUsers.
- We will move all of the users that we plan to Lync-enable from the user forest to the OU that we previously selected.
- By right-clicking on the management agents, we are able to run various operations to import or sync data between forests. For instance, the order required to synchronize a resource forest is as follows:
- Perform a full import on the resource forest management agent
- Perform a full import on the user forest management agent
- Perform a full sync on the resource forest management agent
- Perform a full sync on the user forest management agent
- Export the resource forest management agent
During the configuration of the management agent for the user forest, we might encounter the following error: msExchUserHoldPolicies of inetOrgPerson is no longer available.
It is a nonexistent attribute, so we have to remove it from the Metaverse Attributes list as shown in the following screenshot (it is inside Object Type: inetOrgPerson):
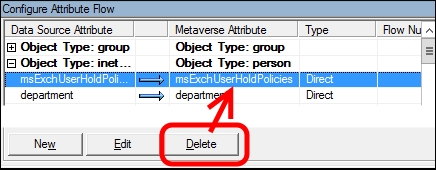
A second similar error will be generated for the user data source. Again, expand the user and delete msExchUserHoldPolicies. See the following screenshot: