
The topology is the heart of the Lync installation. In the topology, there is information about sites, pools, servers, file stores, different databases, domains, services, and roles.
Without this piece of information, we will not be able to restore anything, and we will have to recreate the entire installation from scratch.
Creating a backup of your topology is an easy and quick task.
There are two ways to back up or restore your topology. The supported way according to Microsoft is to do it through the Topology Builder.
The Topology builder is installed together with the Lync administrative tools and must be run by a user with administrative privileges on the system, typically a member of the CSAdministrator group.
The following are five easy steps to back up the Topology:
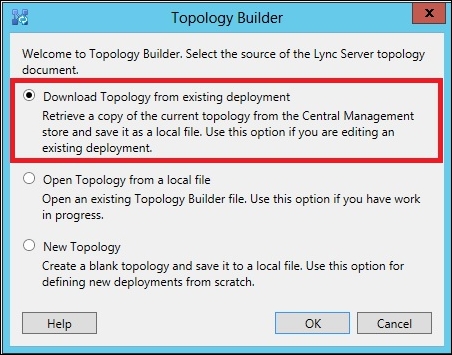
The file will be a .tbxml file type, and we must use Topology Builder to restore the installation.
- Close down Topology Builder.
- Move the file to a safe location.
Tip
When editing a topology by adding, removing, or changing objects, we can make a copy of this file before we start editing the topology. This way, we will have a short way to restore the system (or compare before and after changes) if any of the changes broke something.
If possible, it could be wise to map a drive to a central file server and adjust the commands in this chapter to store files in a fileshare covered by a regular file backup plan.
The following are the steps to restore the topology:
- Open Topology Builder.
- Once it launches, select the Open Topology from a local file option and then click on OK, as shown in the following screenshot:
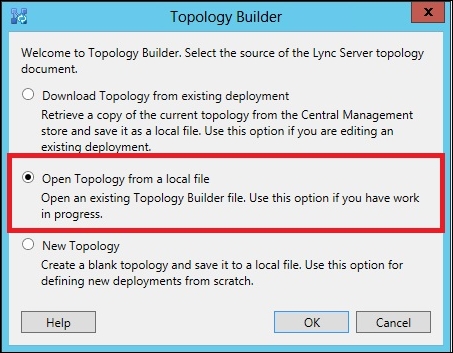
- When we click on OK, we have to then browse to the file location and select the file.
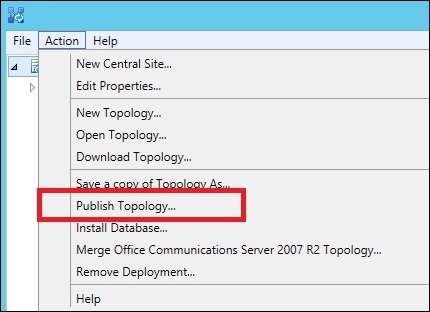
- Go through the entire deployment and verify everything before thinking of publishing it further.
- When we're satisfied with how everything looks, we can go ahead and publish the topology, as shown in the following screenshot. Before we do so, all SQL server databases and instances must be configured and ready to receive data. The same goes for the file server (we will get a warning message about this when we publish from the file; read it and make sure that all the bullet points are checked).
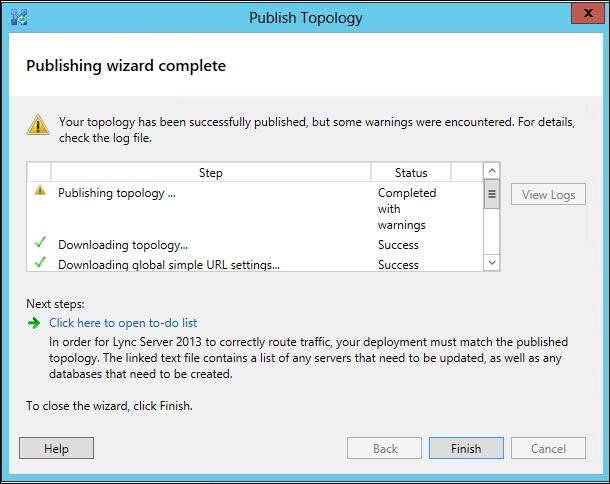
- If all is right, we should now have a successful restore of the Lync Topology.
- Wait for the Lync replication to complete.
- Run bootstrapper on any server where changes require such an action. Open the Click here to open to-do list option on the result page of Publish topology wizard, as shown in the following screenshot:
The file should look something like the following screenshot:
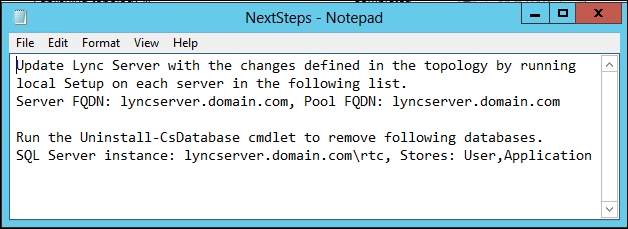
- Depending on what we are restoring, run the suggested steps under Install or Update Lync Server System in Lync Server 2013 – Deployment Wizard.
The preceding method is just one way to create a backup and restore it. It is fairly simple and quite safe. However, it is a manual process, and in my experience, it tends to be forgotten every now and then.
If we want to automate this procedure (taking a backup), we can easily do so with theGet-CsTopology command in a PowerShell script and have this script run as a scheduled task. The trick about this command is that it usually just returns the information in the PowerShell window, and this is no good for us. We need to transform the information into an XML file like the following one:
(Get-CsTopology -AsXml).ToString() > C:BackupTopology-backup.xml
As this file cannot be imported into the Topology Builder due to changes made in Lync 2013, we will also have to rely on PowerShell for the restore procedure:
Publish-CsTopology -FileName "C:BackupTopology-backup.xml"
Remember that all SQL databases, filestores, and machine accounts must be deployed and operative before we do this; otherwise, the publication will fail.
To finalize the restoration, we will have to run one more command:
Enable-CsTopology
- Read about
Get-cstopologyat http://technet.microsoft.com/en-us/library/gg412824.aspx - Read about
Publish-cstopologyat http://technet.microsoft.com/en-us/library/gg398953.aspx - Read about
Enable-cstopologyat http://technet.microsoft.com/en-us/library/gg398398.aspx