
Content types allow you to package and reuse specific settings within lists and libraries. These settings include metadata columns, workflow, information management policies (e.g., when a document expires), and a document template (e.g., a form). One big advantage is that you can define these settings one time and use them on multiple libraries. If the settings need to change, you can change them on the content type once and immediately propagate the changes to all documents based on this content type. In this way, you can better organize content in a consistent way.
For example, a manufacturing company might want to capture consistent metadata such as Product ID, Revision Number, and Author for all of its product designs. These designs might be stored as different file types in hundreds of team sites. One content type can be created to encapsulate these columns and then be applied to the necessary libraries.
Content types are optional, but using them carefully can save a lot of time. They also facilitate other SharePoint features such as Records Management (covered in Chapter 12, “Configuring Records Management”) and the Content Organizer (covered later in this chapter), which depends on content types for automated routing and storage of documents.
A content type can be created within any website in a site collection. The scope or reach of the content type is the site in which it is created and all of its subsites. Thus, if a content type is created in the top-level website, it can be used throughout the site collection.
NOTE Using content type syndication, a feature that is part of the Managed Metadata Service, content types from a designated site collection can be published to other site collections in the farm and other trusted farms. For more information, see Chapter 11, “Configuring the Managed Metadata Service.”
After a content type has been created, it must be added to one or more libraries to be used. A library can also have multiple content types associated with it.
Here are the steps to create a content type:
1. Connect to the website where the content type is to be created.
2. Go to Site Actions ⇒ Site Settings.
3. Under Galleries, click Site Content Types. The list of built-in content types is displayed, categorized by groups.
4. Click Create. The New Content Type screen is shown in Figure 10.10.
Figure 10.10: Creating a content type
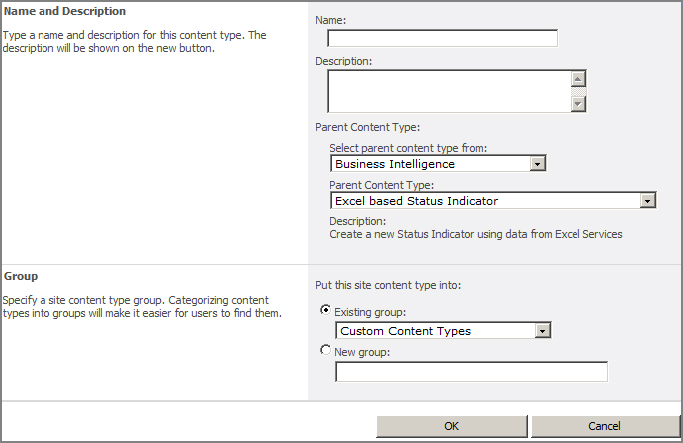
5. For Name, provide an intuitive and friendly name for the content type.
6. Optionally, for Description, describe the content type.
7. For Parent Content Type, choose the underlying content type that is to be used. All content types must derive (or inherit) from an existing built-in or custom content type. For libraries, the most common underlying content type selected is Documents.
8. For Group, specify which existing group this content type belongs to, or create a new group for this content type. Groups are only used to categorize content types and don’t affect how the content type is used.
9. Click OK to create the content type.
Once the content type is created, it is ready to be configured. You are automatically taken to a new screen where all the shared settings can be defined. This includes adding columns, associating a workflow, creating information management policies, or providing a document template to be used.
After you create and configure a content type, you need to add it to a library. When the content type is added to a library, all of its settings become available on that library. For example, columns are added and workflow is associated. Here is how to add a content type to an existing library:
1. Access the library.
2. Just above the ribbon, click the Library tab (underneath Library Tools).
3. In the ribbon, click Library Settings.
4. In the General Settings section, click Advanced Settings.
5. For the first question, select Yes to Allow Management Of Content Types.
6. Click OK. This configures the library to allow you to add content types. You are returned to the previous screen.
7. In the Content Types section, click Add From Existing Site Content Types.
8. On the left, select one or more content types to be added to this library. You can filter them by selecting a group.
9. Click the Add button.
10. Click OK to save your changes.