
SharePoint 2010 uses the SharePoint 2010 Timer service (owstimer.exe) to execute all scheduled operations on all servers in the farm. Timer jobs are automatically created when SharePoint services are installed and configured. Developers can create custom timer jobs for specialized purposes.
Viewing Timer Jobs
To view existing timer jobs, perform the following steps:
1. From SharePoint 2010 Central Administration, click Monitoring.
2. In the Timer Jobs section, click Review Job Definitions.
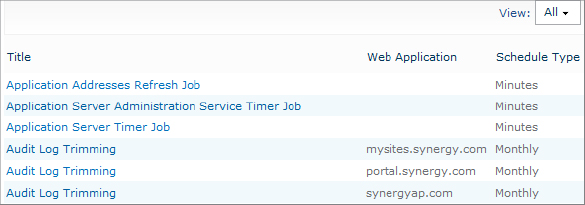
On the Job Definitions page, shown partially in Figure 15.17, you can view the alphabetical list of timer jobs and the web application they are associated with, along with the interval of scheduling.
Figure 15.17: Job Definitions page
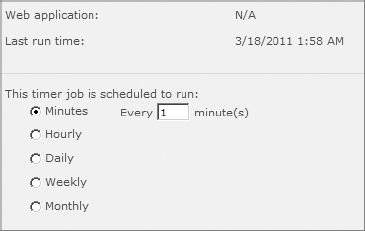
3. To view details about any job, click the link for the job name. The Edit Timer Job page will appear, shown partially in Figure 15.18.
Figure 15.18: Edit Timer Job page
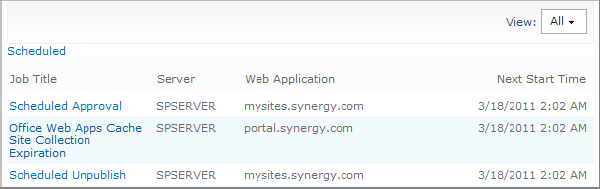
To view the current status of any timer job, from the Monitoring page, in the Timer Jobs Section, click Check Job Status. The Timer Job Status page, shown partially in Figure 15.19, displays the server that the timer job runs on, the web application it is associated with, and the next time the job will run.
Figure 15.19: Timer Job Status page
Running a Timer Job
SharePoint 2010 provides users with the ability to trigger jobs to run on demand. To do so, go to the Edit Timer Job page, shown in Figure 15.18, and click the Run Now button at the bottom of the page. Bear in mind, the job may take a few seconds or minutes to start running. SharePoint queues the job for execution and may not be able to execute the job immediately if the server is very busy. It is always a good idea to reopen the Edit Timer Job page after a minute or so and check to ensure that the job ran as expected.
Managing Timer Job Schedules
When timer jobs are created, SharePoint configures them with a default schedule that is designed to meet the needs of the majority of cases. These schedules can be edited and, if your needs require it, adjusted to a different frequency. For example, the Expiration policy timer job reviews documents that are subject to a retention policy and determines if they have expired. The default interval for this policy is once per week. This is effective for most noncritical records management scenarios, but may not meet more stringent requirements. To modify the retention policy so that it is checked on a daily basis, open the Edit Timer Job page, shown in Figure 15.18 earlier in this chapter, change the schedule to Daily, and set a start and end time for the job. Bear in mind that setting schedules to run more frequently will add overhead to the server, so these changes should always be monitored afterward to gauge the impact on performance.