
Configure User Profile Synchronization
The process of profile synchronization allows SharePoint 2010 to both import data from external sources and export data to those same sources. Not all data can be both imported and exported since restrictions exist based on the type of data and the data source itself. SharePoint 2010 can synchronize over one or more connections, and each connection can communicate with a different data source. SharePoint 2010 supports connections to Active Directory domains; Business Data Connectivity (BDC), which is also now referred to as Business Connectivity Services (BCS) in SharePoint 2010; IBM Tivoli Directory Server (ITDS); Novell eDirectory; or Sun Java System Directory Server. Through the BDC connection, SharePoint can import data from any Open Database Connectivity (ODBC) database or web service, allowing SharePoint profiles to include data from most legacy human resources systems.
There are two steps to synchronization:
1. Creating a synchronization connection
2. Performing a profile data import
The following sections describe how to perform these steps.
Creating a Synchronization Connection
Before you start a profile data import, you need to create at least one synchronization connection. To create a connection, perform the following steps:
1. From SharePoint 2010 Central Administration, under Application Management, click Manage Service Applications.
2. On the Manage Service Applications page, click the User Profile Service Application link.
3. On the Manage Profile Service page, under the Synchronization section, click Configure Synchronization Connections. The Synchronization Connections page, shown partially in Figure 7.9, is displayed.
Figure 7.9: Synchronization Connections page
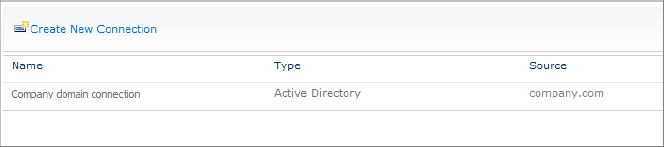
4. Click Create New Connection. The Add New Synchronization Connection page, shown in Figure 7.10, is displayed.
Figure 7.10: Add New Synchronization Connection page
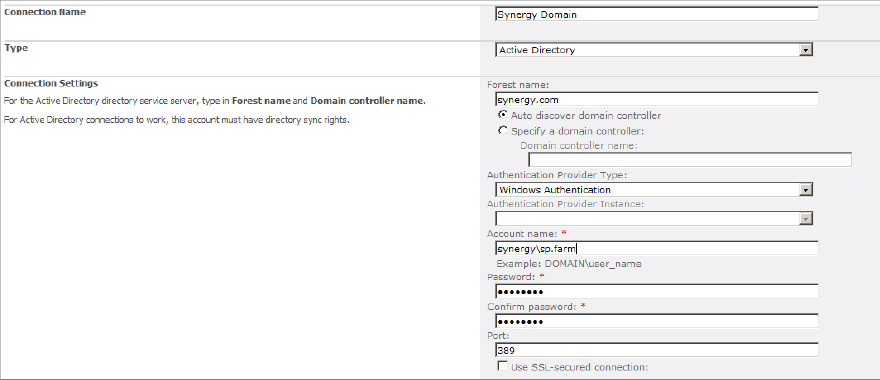
5. In the Connection Name box, enter a descriptive name for this connection.
6. From the Type drop-down list, select the type of data source you want to connect to.
7. In the Connection Settings section, enter the reference to the source of the data. In the case of an Active Directory connection, enter the full name of the forest. In the case of a BDC connection, enter or browse for the external content type. For all other connections, enter the name of the server.
8. In most cases it is preferable to allow SharePoint to autodiscover the domain controller. However, if this fails you can enter the name of a specific domain controller to synchronize with.
9. For Authentication Provider Type, specify the type of authentication for this connection: Active Directory, Forms Authentication, or Trusted Claims Provider Authentication.
10. In the Account Name box, enter the domain account name of the user profile synchronization account that was previously granted permissions on Active Directory. Enter the password and then confirm it.
11. In most cases, the default port of 389 is appropriate as most of the connections will be LDAP queries and the default port for the LDAP protocol is 389. If you need to specify a different port, do so.
12. If this connection needs to be secured, then select the Use SSL-Secured Connection check box. (Checking this box will require additional steps on the data source side to configure the digital certificate. These steps are outside the scope of this book.)
13. Click the Populate Containers button. This step will execute a query against the data source using the credentials provided. If the query is successful, the box will display all the organizational units (OUs) in the Active Directory domain, as shown in Figure 7.11.
Figure 7.11: Populate Containers list
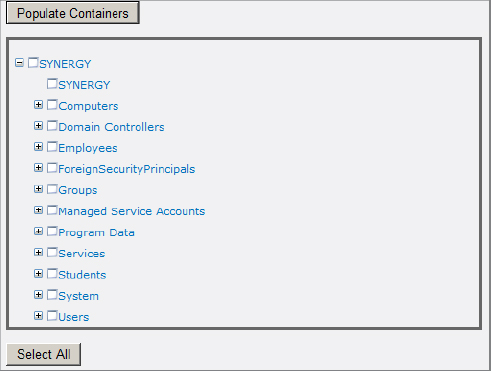
14. Check the boxes next to the OUs that contain accounts that should be imported, and click OK.
NOTE If the synchronization connection appears to save correctly but does not display in the list on the Synchronization Connections page, then run the IISRESET command on the synchronization server (open a command prompt and type IISRESET) and refresh the page to make it display.
15. Once the connection is created, perform a full synchronization. (For instructions, see the next section, “Performing Synchronization.”)
Performing Synchronization
Profile synchronization is required to import accounts from a data source into user profiles. Either a full or an incremental synchronization can be performed manually. You can schedule an incremental synchronization to import profiles on a regular basis.
Synchronizing Manually
A full synchronization imports all content from the data source and overwrites the current profiles. An incremental synchronization only imports changes to the existing profile data.
To manually start profile synchronization:
1. From SharePoint 2010 Central Administration, under Application Management, click Manage Service Applications.
2. On the Manage Service Applications page, click the User Profile Service Application link.
3. On the Manage Profile Service page, under the Synchronization section, click Start Profile Synchronization.
4. Select the option Start Incremental Synchronization or Start Full Synchronization.
5. Click OK.
On the Manage Profile Service page, the Profile Synchronization Status will change to Synchronizing and will show a Stop link to cancel the current synchronization.
Setting Up a Synchronization Schedule
Incremental synchronization can be scheduled to import profiles on a regular basis. The frequency with which you perform an import will depend on the type of data source, the number of accounts being imported, and how frequently changes to the data occur. As a general rule, at least a once-daily profile import is recommended and is configured by default in the timer job setting.
To change the frequency of incremental synchronization:
1. From SharePoint 2010 Central Administration, under Application Management, click Manage Service Applications.
2. On the Manage Service Applications page, click the User Profile Service Application link.
3. On the Manage Profile Service page, under the Synchronization section, click Configure Synchronization Timer Job.
4. Select the option for the import to recur at an interval of Minutes, Hourly, Daily, Weekly, or Monthly and set the appropriate interval value. For the Daily, Weekly, and Monthly intervals you can set a specific start time. For the others, you set a number of minutes or minutes past the hour to start.
5. Click OK.
Configuring Synchronization Settings
There are a number of general settings that affect the synchronization process. You can:
- Synchronize either users only, or both users and groups
- Choose whether to import existing BCS connections
- Set up an external identity manager
To configure synchronization settings, perform the following steps:
1. From SharePoint 2010 Central Administration, under Application Management, click Manage Service Applications.
2. On the Manage Service Applications page, click the User Profile Service Application link.
3. On the Manage Profile Service page, under the Synchronization section, click Configure Synchronization Settings.
4. In the Synchronization Entities section, shown in Figure 7.12, choose what you want to synchronize. Users And Groups synchronizes all objects; Users Only minimizes the number of accounts imported.
Figure 7.12: Configuring synchronization settings
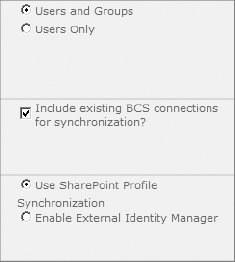
5. In the Synchronize BCS Connections section, the box labeled “Include existing BCS connections for synchronization?” is checked by default. To avoid importing BCS data during synchronization, uncheck the box.
6. The External Identity Manager section allows you to elect to replace the built-in SharePoint FIM services with a separate component to perform the synchronization with data sources. The most commonly used external identity manager is Microsoft Forefront Identity Manager 2010, available as a separate product. To use this approach, click the option Enable External Identity Manager.
7. Click OK.
Editing Connection Filters
Connection filters allow you to restrict the number of users or groups retrieved from a data source by applying excluding criteria to the query. For example, the default setting in SharePoint 2010 will import all user and group accounts from Active Directory, including accounts that are marked as Disabled. This may not be appropriate if the disabled accounts represent users who have left the company or been fired. Adding a filter will allow these accounts to be excluded. To edit the filters for an existing connection, perform the following steps:
1. From SharePoint 2010 Central Administration, under Application Management, click Manage Service Applications.
2. On the Manage Service Applications page, click the User Profile Service Application link.
3. On the Manage Profile Service page, under the Synchronization section, click Configure Synchronization Connections.
4. On the Synchronization Connections page, click the context menu for the connection to edit and select Edit Connection Filters.
5. In the Exclusion Filters For Users section (shown in Figure 7.13) or in the Exclusion Filters For Groups section, click the Attribute drop-down list and select the property you want to apply a filter on.
Figure 7.13: Exclusion Filters For Users settings
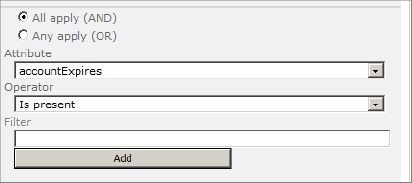
6. Select the correct operator. Depending on which operator you pick, you might need to enter a criteria value in the Filter box.
7. Click the Add button.