
In the previous recipe, you performed a simple count of the number of successful sales transactions. In this recipe, we will get an insight into these sales by exploring where in the world sales requests are coming from. To do this, you will leverage the built-in geolocational abilities of Splunk. Firstly, you will amend the Application data model to bring in geolocational object attributes. Then you will pivot this data to map purchases by location.
To step through this recipe, you will need a running Splunk Enterprise server, with the sample data loaded from Chapter 1, Play Time – Getting Data In, and the completed recipes from earlier in this chapter. You should be familiar with navigating the Splunk user interface.
Follow these steps in this recipe to pivot purchases by geographic region:
- Log in to your Splunk server.
- Select the Operational Intelligence application.
- Select the Settings menu item at the top-right corner of the screen, and then select Data Models.
- The two data models we created in the first two recipes will be displayed. Click on the Application data model and the Application Data Model Editor will be displayed.
- As the data model is accelerated, you will see an error message stating that it cannot be edited. Click on the Edit button and then on Edit Acceleration. Uncheck the Accelerate checkbox in the pop-up box that is displayed, and then click on Save.

- Ensure the All Application object is selected on the left. Then locate ipAddress from the list of Object Attributes and click on Edit.

- On the Edit Attribute screen that is displayed, change the type to IPV4 and then click on Save.

- Back on the main Data Model Editor screen, click on Add Attribute and select Geo IP from the drop-down list.
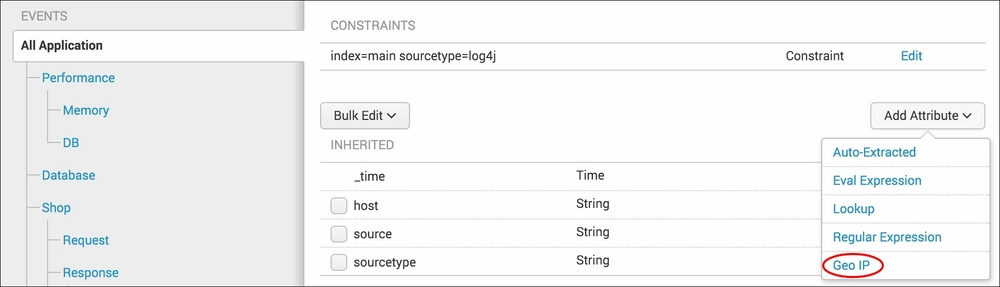
- The Add Geo Attributes with an IP Lookup screen will load. You will note a list of additional attributes that are to be added to the data model. Enter
lon,lat,City,Region, andCountryin the Display Name field for lon, lat, City, Region, and Country respectively. Then click on Preview to preview the data, followed by Save if everything looks good.
- Back on the main Data Model Editor screen, these new attributes will be displayed as Calculated attributes at the bottom of the attribute listing. You will note that they are all marked as Required, which is not needed. Select all these new attributes by checking their associated checkboxes.

- At the top of the attribute list, click on Bulk Edit and select Optional. Once this has been done, the word Required will be removed from the attribute list.

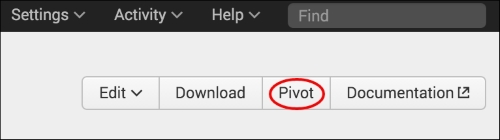
- Now click on the Pivot button at the top-right corner of the screen.
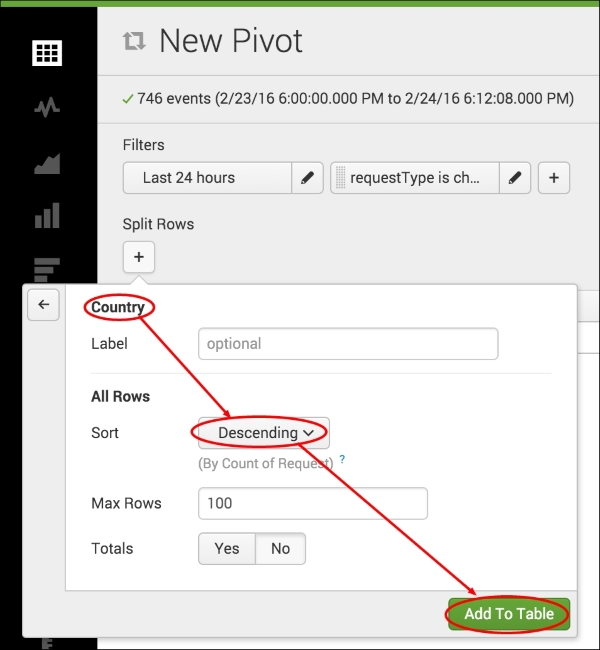
- Select the Request object (a child of the
Shopobject) from the list of objects that are displayed. - Configure the Pivot with a time range of Last 24 hours and
requestType is checkout. - Next, select Country in Split Rows. A pop-up box will be displayed. Select Descending in the Sort field and then click on Add To Table.
- The count of checkout requests will be calculated and displayed in a table by country. To turn this into a pie chart visualization, select the Pie Chart icon on the left-hand side of the screen. You should now see the data represented as a pie chart with different country segments.
- As with the previous recipe, click on Save As and select Dashboard Panel.
- Select Existing in the Dashboard field and ensure Product Monitoring is selected. Enter Sales Countries in the Panel Title field and click on Save.
- The pie chart is added to the dashboard and this recipe is complete.
Splunk has a built-in external IP address lookup, which was leveraged in this recipe. Firstly, you specified which object attribute was an IP address. Following this, you configured a number of Geo IP object attributes for longitude, latitude, city, region, and country. Behind the scenes, Splunk passes the specified external IP address attribute into an internal lookup database that returns the values of these additional Geo IP object attributes. We chose not to make these required attributes (as is default) because not every event mapped by our Application data model contains an IP address field. As you defined these fields at the root event object level in the data model hierarchy, the attributes are available to other child objects in the hierarchy. Following this, you pivoted off the checkout requests which contain an IP address, and these IPs were then mapped to countries and reported on in the Pivot tool.