
In this recipe, you will install and leverage DB Connect to search an external database's product inventory table. You will then pull this data back into Splunk and turn it into a local lookup that harvests the data once per day. This product inventory table will be used in the next chapter.
Note
DB Connect has a dedicated Splunk manual that can be found at http://docs.splunk.com/Documentation/DBX/latest/DeployDBX.
To step through this recipe, you will need a running Splunk Enterprise server, with the sample data loaded from Chapter 1, Play Time – Getting Data In. You should be familiar with navigating the Splunk user interface.
Additionally, it is recommended that you have one of the following supported databases installed:
- DB2
- Informix
- MemSQL
- MS SQL
- MySQL
- Oracle
- PostgreSQL
- SAP SQL
- Sybase
- Teradata
DB Connect might work with other JDBC-compatible databases and data stores, but this is not guaranteed. DB Connect 2 has several prerequisites detailed in the installation manual. Before attempting this recipe, ensure that you have installed Java Platform, Standard Edition Development Kit (JDK) 8 (update 31 or later) from Oracle. Additionally, you will also need to download the database drivers for your particular database.
Assuming JDK 8 is installed and your needed database drivers are downloaded, follow the steps in this recipe to generate a local Splunk lookup using data from an external database and DB Connect:
- In your database application, create a new database called
productdb, and within the database, create a new table calledproductInventory. Insert the contents of the providedproductInventory.csvfile into the new database table. The new table will resemble the following screenshot: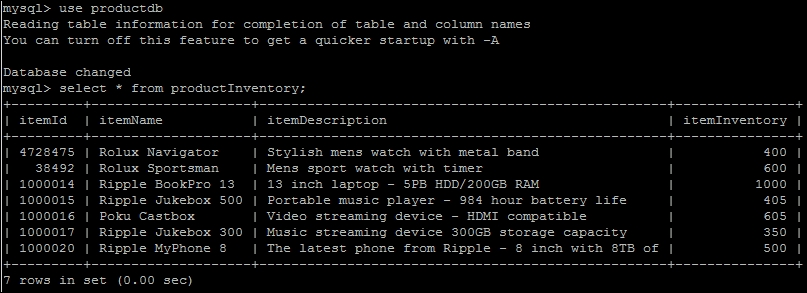
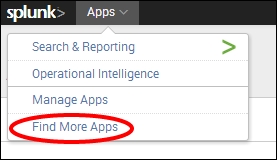
- Once the DB table is built, you need to install the DB Connect application in order to connect to it. From the drop-down application menu, select Find More Apps.
- Search for the
Splunk DB Connect 2application and then select it to install it. You will have to enter your http://www.splunk.com/ account credentials after hitting the Install button. When prompted, select to Restart Splunk.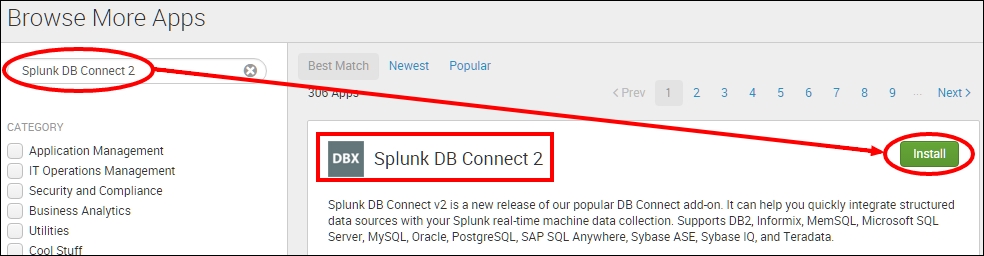
Tip
If your environment has no Internet access, you can download the DB Connect 2 application from the Splunk app store at https://splunkbase.splunk.com/app/2686. Once it is downloaded, you can upload and install the application to your Splunk environment by selecting Manage Apps from step 2.
- After logging back in, select Splunk DB Connect v2 from the drop down application menu. You will see a welcome notice initially. Click on the green Setup button to continue.
- The next screen will display JRE Status. If it is not green then you will need to enter the correct JRE Installation Path. The rest of the settings we will leave as is for now. If you are connecting to a large amount of data, the heap size under JVM Options might need to be increased to more than
1024m, as this will allocate more memory and result in faster performance. Click Save and ensure JRE Status is green. Then click the Next button.
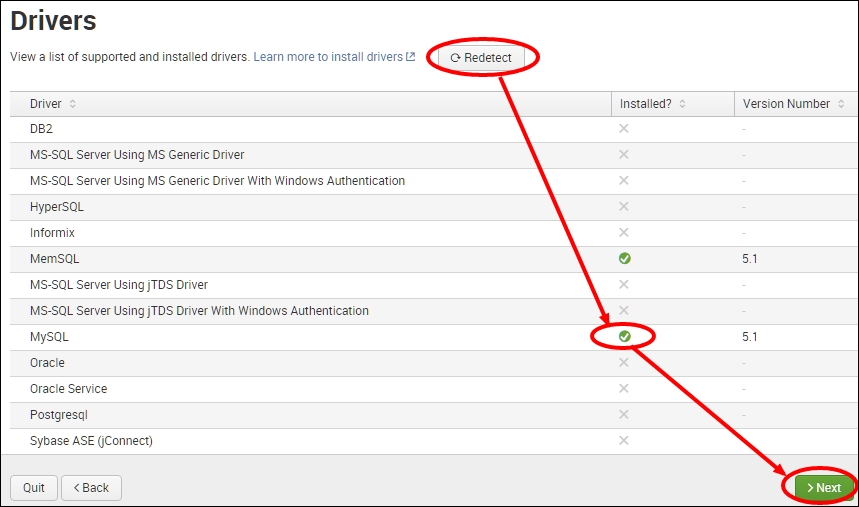
- On the next screen, you will see a list of supported databases and whether any drivers are correctly installed. At this point you must copy the database driver for your database over to DB Connect. Follow the instructions in the DB Connect installation manual to do this. Then click the Redetect button to ensure the driver is now installed. Once you see a green checkmark next to the database you are looking to use, click Next and then Done to complete the setup.
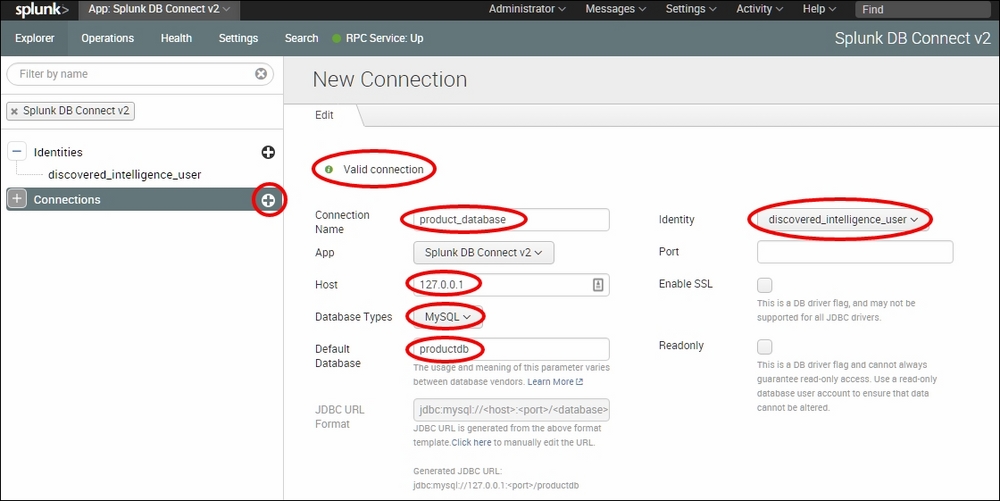
- On the left side, select the + symbol next to Identities, to add a new database identity and enter Username and Password for the user that will be connecting to the database. Then click Save to create the identity.

- On the left side, now select the + symbol next to Connections, to add a new database connection and enter the required database connection details. You will need to enter Host, Database Type, and Default Database, and then select the newly created identity from the Identity drop-down box. Click the Validate button to validate the connection and ensure Valid connection is displayed at the top. Then select Save.
- Now let's test the connection with a real query. Select the Query tab that is now displayed. Then select to use Advanced Query Mode and use some simple SQL to search the
productInventorytable in your database. The search should return the tabulated results.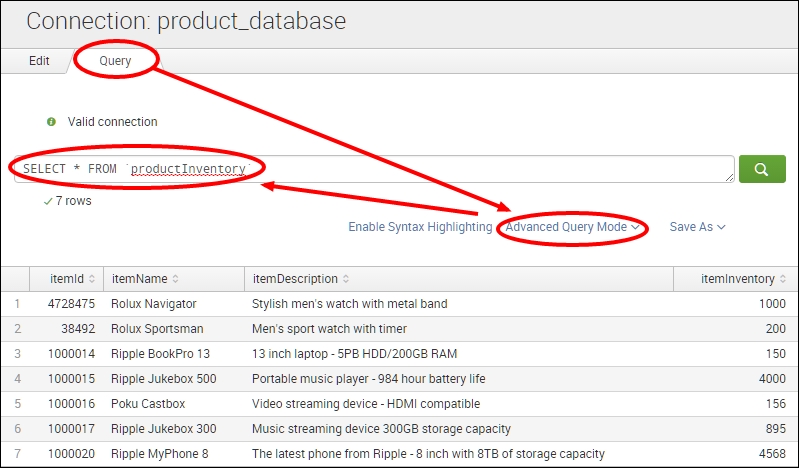
- Return to the Operational Intelligence application from the application dropdown, and enter the following search in the search bar:
| dbxquery connection=product_database query="SELECT%20*%20FROM%20productInventory" shortnames=true| fields - _raw, _time | table *
- Note how we modified the SQL query in the search syntax to be a URL encoded format. The contents of the
productInventorytable should now be displayed inside Splunk.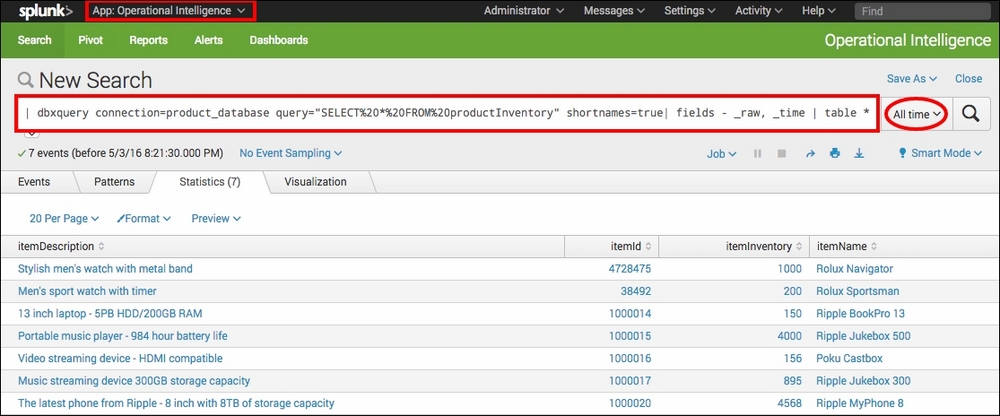
- Amend the search as follows in order to save the database data as a local lookup inside Splunk:
| dbxquery connection=product_database query="SELECT%20*%20FROM%20productInventory" shortnames=true| fields - _raw, _time | table *| outputlookup productInventory.csv
- Run this new search to create the lookup. Then save it as a report and name it
generate_productInventory_dblookup.
- Click on the Save button, and on the next screen, select the Schedule link and set Schedule to Run every day.

- Click on the Next button, and then, on the next screen, hit the Save button to save the report. This search will now pull the inventory data back from our product database once per day and turn it into a local lookup for use in Splunk.
DB Connect enables real-time integration between Splunk and traditional relational databases. In this recipe, you installed the DB Connect application and configured it to talk to a product inventory table in your external productdb database. When installed, DB Connect sets up something called a Java Bridge Server, which is essentially a Java Virtual Machine (JVM) that constantly runs in the background. The Java Bridge Server helps speed up connectivity to external databases by allocating memory and caching a lot of the metadata associated with the database tables. Once the productdb database was configured through DB Connect, you were able to execute standard SQL inside a Splunk search and return the contents of the productInventory table to Splunk. Once the data is in Splunk, it is treated the same as any other data inside of Splunk, and you were able to very easily turn the data into a local lookup using the outputlookup command.
Tip
The approach used in this recipe leverages the dbxquery command, which is limited by default to returning 100,000 rows. For larger datasets, a DB Input can be set up in the DB Connect application to index the data in bulk on a schedule, such as once per day. This indexed data can then be converted to a lookup using the outputlookup command. Alternatively, the DB Lookup functionality of DB Connect can be leveraged and this is explained next.
In this recipe, we chose to pull the data out of the database and create a lookup locally in Splunk. However, rather than creating the lookup locally, DB Connect also allows you to look up data in the database directly and cache it, using the DB Lookups functionality. In addition, DB Connect is able to monitor external database tables and index content into Splunk either in bulk or in a polling capacity using the DB Inputs functionality.
Rather than creating the lookup locally inside Splunk, as we did with this recipe, Splunk DB Connect allows you to create a lookup table that uses an external database table as its source. This lookup can be cached so that the database is not continually searched by Splunk users.
- From within the DB Connect application, select the Operations menu item and click the + symbol next to the DB Lookups item. This will display the New DB Lookup screen (1 of 6). Enter
productInventory_dblookupinto the Name field and select product_database in the Connection field.
- Click Continue to be taken to the next screen (2 of 6) and ensure you can display a sample of the table. Then click Continue again.
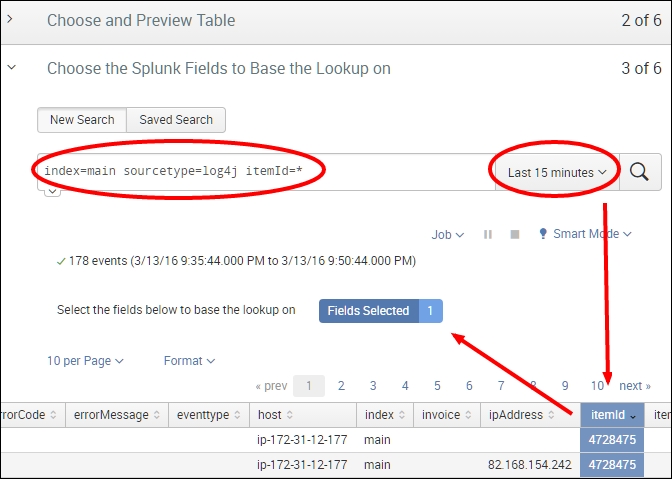
- On the next screen (3 of 6), you must select the fields that the lookup will be based on. In this case, the field will be
itemId. Run the following search over Last 15 minutes and select theitemIdcolumn in the results. This will then show 1 in the Fields Selected box.index=main sourcetype=log4j itemId=*
- Click Continue to be taken to the next screen (4 of 6). In the first box, map the itemId field under Fields to the itemId database column under Columns. In the second box, add output Columns for itemName, itemInventory, and itemDescription.
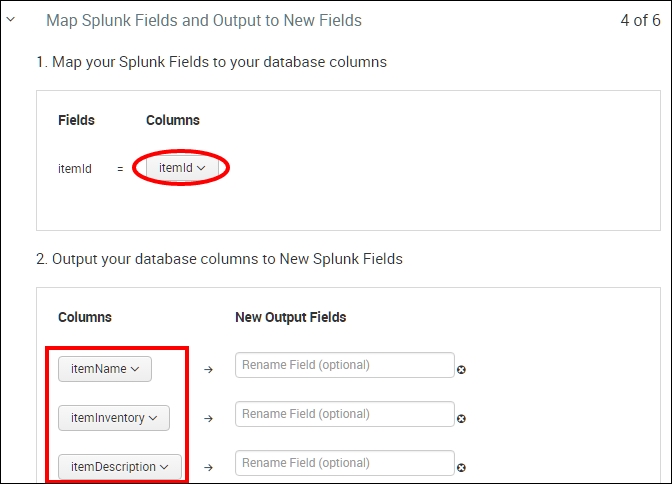
- Click Continue to be taken to the next screen (5 of 6). Here you can preview the lookup and verify that you can now see itemName, itemInventory, and itemDescription in the table of results.
- Click Continue to be taken to the next screen (6 of 6) to finalize the database lookup. Here you can select how often the data is cached. In this case, we will select to Reload the lookup data into the cache every 24 hours, as we want to cache the lookup once per day. Additionally, we do not want to run this lookup automatically, so we will simply run it Manually.
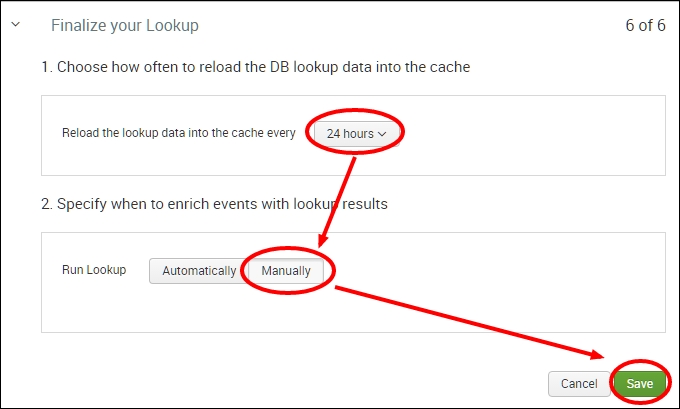
- Click Save to save the lookup. Return to the Operational Intelligence search bar and execute the following search to test the new lookup and verify that the item fields in the lookup are returned successfully:
index=main sourcetype=log4j itemId=*| lookup local=1 db_connect_productInventory_dblookup itemId AS itemId
- In this search, we look for events that contain itemId and then use the direct database lookup to return itemName, itemInventory, and itemDescription for itemId in the event. You should note that these additional fields are now present after using the lookup. Also note that we used
local=1in the search. This is because DB Connect database lookups are constrained only to the search head where DB Connect is installed.