
To better understand the events occurring within a web application environment, you need to start building relationships between the pieces of data within the events. By leveraging these relationships, efforts can become more targeted on the events requiring attention and a more proactive stance on issue identification can be taken. Imagine being able to say with confidence that when a certain page is requested, it will have a status of 404, or when a specific product is added to the cart, the service becomes unresponsive. Having this type of relationship capability added into your Operational Intelligence application opens up a vast array of possibilities when performing event analysis.
In this recipe, you will write a Splunk search to analyze the relationship of web requests between the status of the request and the pages where the request originated from, over a given period of time. You will then add this table as a panel to a dashboard.
To step through this recipe, you will need a running Splunk Enterprise server, with the sample data loaded from Chapter 1, Play Time – Getting Data In. You should have also completed the earlier recipes in this chapter and be familiar with navigating the Splunk user interface.
Follow the steps in this recipe to analyze the relationship of web requests over time:
- Log in to your Splunk server.
- Select the Operational Intelligence application.
- Ensure the time range picker is set to Last 24 hours and type the following search into the Splunk search bar. Then, click on the search button or hit Enter.
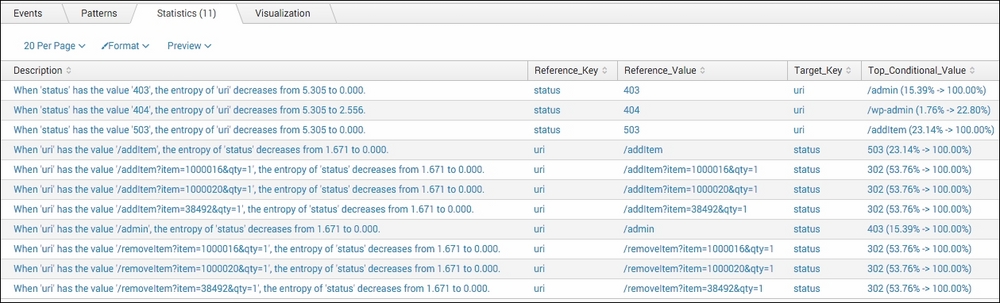
index=main sourcetype=access_combined NOT status=200 | associate uri status supcnt=50 | table Description Reference_Key Reference_Value Target_Key Top_Conditional_Value
- Splunk will return the results in a tabular format similar to the following example:
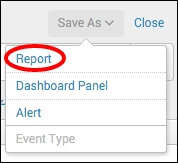
- Let's save this search as a report. Click on Save As and choose Report from the drop-down menu.
- In the pop-up box that appears, enter
cp06_status_uri_relationshipsin the Title field and click on Save.
- You will receive a confirmation that your report has been created. Now, let's add this report to the Session Monitoring dashboard we created earlier in this chapter. In the next window, click on Add to Dashboard.

- In the Save As Dashboard Panel pop-up box, click on the Existing button beside the Dashboard label. From the drop-down menu that appears, select Session Monitoring. Enter
Status and URI Relationshipsin the Panel Title field, ensure the panel is powered by Report, and then click on Save.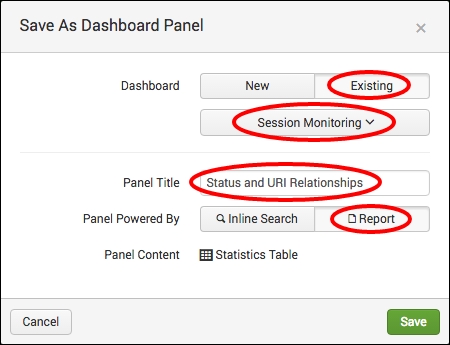
- You can now click on View Dashboard to see the panel that has been added to the Session Monitoring dashboard.
In this recipe, you used the associate command to find relationships between the status and uri fields in the web access events. The associate command works by calculating a change in entropy based upon field-pair values. It is able to provide a prediction of a field value based upon another field value.
Let's break down the search piece by piece:
|
Search fragment |
Description |
|---|---|
|
|
You should be familiar with this search from the earlier recipes in this chapter. However, we added search criteria to not return any event where the status field is equal to |
|
|
The |
|
|
The |
Examining the tabulated results in more detail, we selected to display the Description, Reference_Key, Reference_Value, Target_Key, and Top_Conditional_Value fields. The Description field provides a textual description in the following format:
"When the 'Reference_Key' has the value 'Reference_Value', the entropy of 'Target_Key' decreases from Unconditional_Entropy to Conditional_Entropy."
Taking a row from the results table, when the Reference_Key field is equal to the Reference_Value field, then the Target_Key field is most likely to be the Top_Conditional_Value field. For example, a status code of X might most likely have a uri value of Y.
Note
It is highly recommended that you review the documentation for the associate command as there is quite a bit to it and some of the concepts are fairly complex. The documentation is available at http://docs.splunk.com/Documentation/Splunk/latest/Searchreference/Associate.
The associate command does not require that you explicitly pass field names to it, so when starting out with your event data, it is best to just call the command without any parameters and explore the results that are returned. At times, this can prove to be most useful, as you will likely identify relationships that you might previously not have thought of.
The
associate command is most useful to analyze events related to system resource utilization. It can be leveraged to understand if there is any relationship between the type of DB action being executed by the web application and the current memory utilization. The following search will group events together into transactions based on their given threadId, and then compile relationships between the dbAction and mem_user fields using the associate command:
index=main sourcetype=log4j | transaction threadId | associate supcnt=50 dbAction mem_used
This can be most beneficial when trying to understand how the function calls have an impact on resource utilization by drawing out direct relationships of the values.