
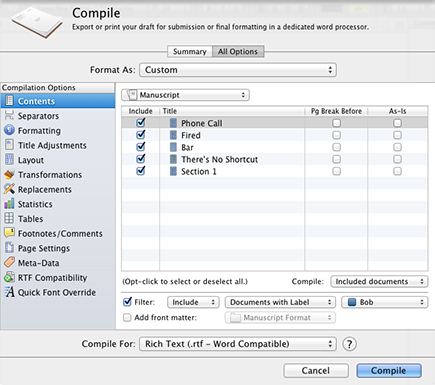
Figure 12-3: Using a filter to select compile items.
Choosing which Documents to Export
Are you exporting your entire project or just the first three chapters? Or maybe only your essays from last March. Whatever you want in the final output, content selection is handled on the Contents tab of the Compile window.
You have several options for choosing which documents to include in the compilation. I outline each one in the following sections.
Choosing contents by individual selection
In the Contents tab of the Compile window, select the Include check box for each item that you want to include in the final output.
If you select a container, such as Chapter One, the items in that container aren’t included automatically, so you must also select each document within if you want the entirety of Chapter One.
 To select or deselect all items in the Contents pane, Option-click (Alt-click in Windows) one of the boxes. To toggle only a portion of the list, select the items, and then Option-click (or Alt-click in Windows) one of the check boxes within the selection.
Choosing contents by predetermined selection
Click the drop-down list at the top of the Content tab — which shows the Manuscript (Draft) folder by default — to select from high-level containers, saved searches (covered in Chapter 17), collections (see Chapter 18), and the current selection in the Binder.
Choosing something other than the root folder narrows down the items available for selection. For example, if you add a filter (which I talk about in the following section), it applies only to those items within the selection you make in this list.
Narrowing contents with a filter
A filter lets you narrow your list of files to those that match the criteria you select. For example, you might limit your output to only those scenes written from a specific point of view, essays written about the same topic, or scenes that take place in a particular setting.
 The filter applies only to the list of items already selected.
To apply a filter, follow these steps:
1. Select the Filter check box.
2. Select Include or Exclude from the first drop-down list to specify whether you want to filter by including files or excluding them.
3. Select which criteria you want to filter by from the middle drop-down list.
You can choose Documents with Label, Documents with Status, Documents in Collection, or Current Selection.
When you filter by a collection, only those collection items located in the Manuscript (Draft) folder are available for compile. Files in the collection that are located outside the Manuscript (Draft) folder aren’t included.
4. If you picked one of the first three criteria in Step 3, select the desired value from the last drop-down list.
The list in the Contents pane changes based on your selections.
As an example, the filter settings shown in Figure 12-3 compile all documents with the Label value of Bob. The Contents list reflects the choices made in the filter section so that you can check your results before compiling.
Overriding the contents list selections
The Compile Override drop-down list (refer to Figure 12-2) changes how the Contents list is handled, depending on which option you choose:
![]() Included Documents: Outputs items with a check mark. This is the default setting.
Included Documents: Outputs items with a check mark. This is the default setting.
![]() Excluded Documents: Outputs only those items not checked.
Excluded Documents: Outputs only those items not checked.
![]() All: Compiles all items on the list, regardless of their Include status.
All: Compiles all items on the list, regardless of their Include status.
Adding front matter to the compilation
You can include front matter items (a title page, table of contents, dedication, acknowledgements, and so on) by selecting the Add Front Matter check box in the Contents pane.
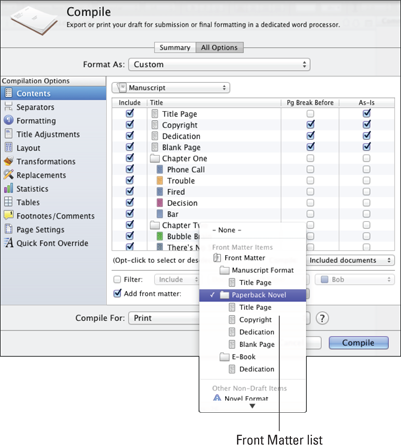
The Add Front Matter drop-down list lets you choose from items outside the Draft folder, as shown in Figure 12-4. Some project templates (such as the Novel template used for this example) come with predesigned front matter items, but you can also create your own.
You can organize different types of front matter into folders, and then select the folder appropriate for the type of output you’re creating. For example, a submission to an agent needs a title page complete with contact information, but you probably don’t want to include the same in an e-book for public distribution. After you make a selection, the front matter items are added to the Contents list.
If you choose a subgroup of the draft from the Predetermined Contents drop-down list, you must select Treat Compile Group as Entire Draft from the Compile Group Options drop-down list that appears; otherwise, the Add Front Matter option is unavailable. The same is true if you choose Current Selection for your contents.
Selecting Treat Compile Group as Entire Draft forces Scrivener to renumber the chapters like they’re the only ones in the manuscript. Leaving the option unchecked is useful if you want to print only a portion of the manuscript but use the correct chapter numbering.
Figure 12-4: Adding front matter.
..................Content has been hidden....................
You can't read the all page of ebook, please click here login for view all page.