
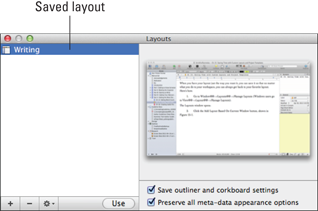
Figure 15-1: A saved layout.
Customizing Your Workspace with Layouts
One of my favorite things about Scrivener is the easily overlooked — but imminently helpful — way that every time you open a project, it takes you to the exact position where you left off.
Scrivener also remembers each project’s layout: the position and status of each element of the workspace. For example, the layout might have the Binder visible, Editor split horizontally, and Inspector closed.
Beyond that, you can save layouts for different stages of your writing process or for different types of writing, and switch to them quickly, saving time when you want to rearrange your workspace.
You could have one layout for writing your novel, one for revisions, one for storyboarding, and one for writing blog posts. When you save a layout, it’s available to all projects, thus saving you even more time.
I like to think of saved layouts like a magic Rearrange button. A couple of clicks, and your workspace is just the way you want it; a couple more, and it’s changed again.
Here’s a sample of elements that get saved in a layout (for a complete list, check the Scrivener User Manual):
![]() Visible or hidden status:
Visible or hidden status:
• Binder
• Collection tab interface
• Inspector
• Header and Footer bars
• Ruler and Format bar
• Toolbar
![]() Split type (horizontal, vertical, or none)
Split type (horizontal, vertical, or none)
![]() Window size and position
Window size and position
![]() Toolbar view mode (such as icon size and text)
Toolbar view mode (such as icon size and text)
![]() Corkboard, Outliner, or Scrivenings mode for each split
Corkboard, Outliner, or Scrivenings mode for each split
![]() Page View or standard Draft view for each split
Page View or standard Draft view for each split
![]() Mac Full Screen status (Mac OS X 10.7 Lion only)
Mac Full Screen status (Mac OS X 10.7 Lion only)
To open the Layouts window, choose Window⇒Layouts⇒Manage Layouts. (Windows users, choose View⇒Layout⇒Manage Layouts.) The following sections explain what you can do in this window. (To close the window when you’re done, just click the red X button.)
Saving the current layout
When you have your layout just the way you want it, you can save it so that no matter what you do to your workspace, you can always get back to your favorite layout. Not only that, you can use your saved layout in future projects. Follow these steps to save your layout:
1. Click the plus sign (+) button at the bottom-left of the Layouts window to add a layout based on your current Scrivener setup.
A text box appears with the words New Layout ready to be overwritten, and a snapshot of the current layout appears in the right half of the Layouts window.
2. Type the name of the new layout, and then press Return.
In Figure 15-1, I created a new layout called Writing. The snapshot in the right pane provides a visual preview of the saved layout.
3. (Optional) Select the two checkboxes at the bottom of the Snapshot pane.
These options provide additional control over how much is saved in the layout:
• Save Outliner and Corkboard Settings: Ensures that settings such as index card size and Outliner columns are saved
• Preserve All Meta-Data Appearance Options: Saves settings such as tinted Binder icons (covered in Chapter 4) and keyword chip visibility (find more in Chapter 8)
Creating a new layout
Anytime you want to create a new layout, just make your adjustments to the project you’re working on, and then save the layout, as outlined in the preceding section.
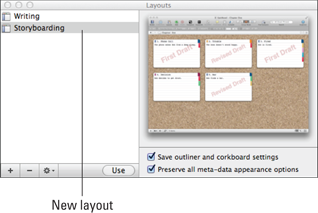
For example, if you want to save the layout that you like to use for brainstorming and storyboarding, you might hide the Inspector, select a container and switch to Corkboard view, adjust the Corkboard settings (which I talk about in Chapter 8), and hide the Binder. Then, save it as something brilliant, such as Storyboarding, as I did in the example in Figure 15-2.
Notice how the layout preview shows the Corkboard view so that you can easily tell what the layout looks like.
Figure 15-2: A new saved layout called Story-boarding.
Applying a layout to your workspace
Okay, so creating layouts is cool and all, but how do you apply a layout to your workspace? Just follow these steps, and Scrivener will make all the changes for you:
1. Select the layout that you want to use from the list in the Layouts window.
2. Click the Use button (refer to Figure 15-1).
The workspace switches to the chosen layout. Pretty nifty, huh?
 To apply a layout without opening the Layouts window, choose Window⇒Layouts⇒Manage Layouts (Windows users, choose View⇒Layout⇒All Layouts), and then choose the desired layout from the submenu that appears.
Mac users also have a Layouts button on the standard toolbar, which you can click to access the Layouts window. Click and hold the Layouts button for a list of layouts.
Windows users can add the Layouts button to the toolbar by following these steps:
1. Choose Tools⇒Customize Toolbars.
2. In the window that opens, select Main Toolbar from the list at the top-right.
3. Select the Manage Layouts button from the list along the left side, and then click the right-arrow button.
The Layouts button is added to the toolbar.
4. Click OK to close the Customize Toolbars window.
Modifying a layout
Okay, so you have your layouts all set up, but while working on your project, you realize the layout needs some tweaking. No problem. Just follow these steps:
1. Make the desired changes to your Scrivener setup.
2. In the Layouts window, select the layout that you want to modify.
3. Click the gear button at the bottom of the window.
4. From the pop-up menu that appears, select Update Selected Layout.
The layout preview updates to reflect the changes you made.
Deleting a layout
If you’ve created a layout that you never use, it’s simple to delete it by following these steps:
1. In the Layouts window, select the layout that you want to remove.
2. Click the minus sign (–) button.
On the Mac only, a message appears, reminding you that the action can’t be undone.
3. If you don’t want the message to warn you anymore, select the Do Not Show This Message Again check box.
4. If you’re sure you want to delete the layout, click OK.
The selected layout is removed from the list.
Exporting a layout
Want to share a layout with a friend or add it to another computer where you use Scrivener? Exporting is the answer. Note: Layouts aren’t compatible between Mac and Windows.
Follow these steps to export a layout:
1. In the Layouts window, select the layout you want to export.
2. Click the gear button, and then select Export Selected Layout from the pop-up menu that appears.
3. Choose a location from the file list, type a name for the exported layout in the Save As text box, and then click Save.
The file saves as a .scrlayout (Mac) or .scrivlayout (Windows) file.
Importing a layout
If you have a layout to import, the file must be accessible from your computer before you can import it. When you have the file ready, follow these steps:
1. In the Layout window, click the gear button, and then select Import Layout from the pop-up menu that appears.
The Import window opens.
2. Select the desired file.
The file will have a .scrlayout (Mac) or .scrivlayout (Windows) extension.
3. Click Open.
The imported layout appears in the Layouts window.
..................Content has been hidden....................
You can't read the all page of ebook, please click here login for view all page.