
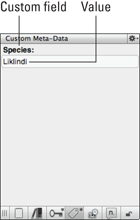
Figure 5-16: A value added to a custom metadata field.
Creating Custom Metadata
Custom metadata provides a way to tag items with a piece of information. But how is it different from the Label and Status fields (Chapter 4), or keywords (see the section “Assigning Keywords,” earlier in this chapter)? Custom metadata works best when the field value might be different for every document but corresponds to a theme.
Here are some example uses of metadata:
![]() Say you want to keep track of the setting for each scene in your manuscript, but you want to be more specific than London, France, or Ladies’ Underpants, and every scene takes place somewhere new. With custom metadata, you can create a Setting field and populate it with values such as John’s Living Room Floor or Front Seat of Kerry’s Car.
Say you want to keep track of the setting for each scene in your manuscript, but you want to be more specific than London, France, or Ladies’ Underpants, and every scene takes place somewhere new. With custom metadata, you can create a Setting field and populate it with values such as John’s Living Room Floor or Front Seat of Kerry’s Car.
![]() An anthology editor might find value in tracking the author for each section via custom metadata, thus freeing up Label and Status for other things.
An anthology editor might find value in tracking the author for each section via custom metadata, thus freeing up Label and Status for other things.
![]() Depending on how specific you want to be, a timeline can also fit nicely into custom metadata. For every scene or section, you mark it with something as high-level as the year or as detailed as the minute of the day.
Depending on how specific you want to be, a timeline can also fit nicely into custom metadata. For every scene or section, you mark it with something as high-level as the year or as detailed as the minute of the day.
![]() If you’re writing book reviews, you can attach custom metadata for the ISBN, price, or even the Dewey Decimal number of the book to each document.
If you’re writing book reviews, you can attach custom metadata for the ISBN, price, or even the Dewey Decimal number of the book to each document.
Here are a few of the pros of custom metadata:
![]() After you create them, you can add custom metadata values to any item in the project.
After you create them, you can add custom metadata values to any item in the project.
![]() You can sort documents by a custom metadata field in the Outliner.
You can sort documents by a custom metadata field in the Outliner.
![]() Like with other types of metadata, you can use custom metadata fields to create a collection (see Chapter 18), with which you can filter items during the compile (export) process outlined in Part IV of this book.
Like with other types of metadata, you can use custom metadata fields to create a collection (see Chapter 18), with which you can filter items during the compile (export) process outlined in Part IV of this book.
And now for the cons:
![]() Custom metadata fields are the least visible of all metadata. You can see them only in the Inspector pane and the Outliner.
Custom metadata fields are the least visible of all metadata. You can see them only in the Inspector pane and the Outliner.
![]() You can’t create a drop-down list of values, so you have to enter the values manually, which can lead to data entry errors.
You can’t create a drop-down list of values, so you have to enter the values manually, which can lead to data entry errors.
 Click the Custom Meta-Data button in the Inspector (refer to Figure 5-1) to open the Custom Meta-Data pane. If you haven’t added any fields before, the pane displays No Meta-Data Fields Defined and includes the Define Meta-Data Fields button.
Adding a custom metadata field
When you create a custom metadata field, it is available to every item in the project. Follow these steps to add a metadata field:
1. Click the gear button (shown in Figure 5-16) in the Custom Meta-Data header to open a submenu.
2. Select Edit Custom Meta-Data Settings.
The Meta-Data Settings window appears, with the Custom Meta-Data button already selected.
You can also access the Meta-Data Settings window by choosing Project⇒Meta-Data Settings or by clicking the Define Meta-Data Fields button in the Custom Meta-Data pane (only available when you haven’t yet defined any custom fields).
3. Click the Add New Meta-Data Field button.
A blank text box appears in the Custom Meta-Data Fields list.
4. Type the name of the field, and then press Enter.
The new field name appears in the list.
Don’t type the values in this text box. Think of this as the heading under which values are added.
5. (Optional) Select Wrap Text to force the value to wrap, instead of showing just the first line.
6. (Optional) Select Colored Text to apply the selected color to the values when you view them in the Outliner and the field name when you view it in the Custom Meta-Data pane in the Inspector.
To choose a color, select the metadata field in the list, click the color picker box at the bottom of the Meta-Data Settings window, and select a color from the Colors window that appears.
7. Click OK to close the Meta-Data Settings window.
The new field appears in the Custom Meta-Data pane in the Inspector.
Adding a value
You can add values to a custom metadata field, either in the Inspector pane or directly within the Outliner row. I detail working with values in the Outliner in Chapter 9. To add a value in the Inspector, follow these steps:
1. Select the desired item in the Binder, Corkboard, or Outliner.
2. In the Custom Meta-Data pane in the Inspector, click in the text box below the field to which you want to add a value.
The text box outline turns blue, and your cursor blinks within the text box.
3. Type the desired value, and then press Return.
The new value appears in the field text box, as shown in Figure 5-16.
 Although the field is added to the whole project, the value you just entered is applied only to the current document. If you select a different item, the value may be either empty or different, depending on whether you already added a value to it.
Modifying a value
You can edit the value of a custom metadata field in either the Inspector pane or Outliner row. (Modifying values in the Outliner is detailed in Chapter 9.) To change a value in the Inspector, follow these steps:
1. Select the desired item in the Binder, Corkboard, or Outliner.
2. Select the existing value in the text box below the appropriate field in the Custom Meta-Data pane in the Inspector.
3. Type the desired value.
Alternatively, you can delete the text to remove that value.
4. Press Return.
The new value appears in the Inspector pane. If you deleted the value, the custom field’s text box is blank.
Deleting a custom metadata field
Did you create a custom metadata field only to find you don’t use it? Or maybe it’s served its purpose and you no longer want to retain the data. Follow these steps to delete your custom field:
1. Click the gear button in the Custom Meta-Data header to display a submenu.
2. Select Edit Custom Meta-Data Settings from the submenu.
The Meta-Data Settings window appears, with the Custom Meta-Data button already selected.
3. In the Custom Meta-Data Fields list, select the field(s) that you want to delete.
4. Click the minus sign (–) button, and then click OK.
The selected fields no longer appear in the Custom Meta-Data Fields list or in the Inspector pane. The values are removed from any items to which they were applied.
..................Content has been hidden....................
You can't read the all page of ebook, please click here login for view all page.