
Figure 13-8: An enumerated outline.
Exporting Special Types of Output
In addition to exporting your project file as a compilation of your writing, you can create outlines, a Synopsis list, or a collection of document notes in the Compile window (which you can open by choosing File⇒Compile).
Follow these steps:
1. From the Format As drop-down list, select the appropriate option.
Here are your choices:
• Enumerated Outline: A numbered list of documents in hierarchy fashion; see Figure 13-8
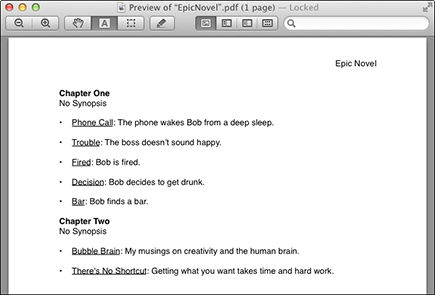
• Synopses and Titles: A list of Binder items and their Synopses, shown in Figure 13-9
• Synopsis Outline: Similar to Synopses and Titles, but the outline doesn’t include the underlined document titles
2. In the Contents tab, choose the items that you want to include in the numbered list.
See Chapter 12 for more on selecting items to include in compiled output.
3. From the Compile For drop-down list, select the desired output type.
4. Click Compile.
 You can change how the outline appears in the Formatting tab (covered in Chapter 12).

Figure 13-9: A list of Synopses by title.
All of these presets are creating by changing the selections in the Formatting tab. You can modify them or create your own. See the following sections and Chapter 12 for more information about the Formatting options.
Creating an outline without numbering
You can modify the Synopsis Outline format (discussed in the preceding section) to create a list of chapters, with each subdocument in a bulleted list appearing below the chapter in which it falls. Follow these steps:
1. Click the Formatting tab.
2. In the Synopsis column, deselect all the check boxes.
This step excludes the Synopses from the list.
Option-click (Alt-click in Windows) any check box in a column to select or deselect that column for all rows.
3. Make sure Title column check boxes are selected for all levels and items.
By default, the text document Levels 2 through 5+ are unchecked in the Synopsis Outline preset.
4. (Optional) Remove the Title underline to help declutter the outline.
If you want to neaten up your outline, follow these steps:
a. Select Level 2, as shown in Figure 13-10.
b. Click Title in the Formatting Editor to activate the Format bar.
Windows users, click the Modify button to access the Editor first.
c. Click the Underline button in the Format bar to remove the underline.
d. Repeat Steps b and c for Levels 3 through 5+.
5. From the Compile For drop-down list, select the desired output type.
6. Click Compile.
The final output should look similar to the one in Figure 13-11.
Compiling a list of document notes
Want to capture all your document notes — those notes you entered in the Document Notes pane of the Inspector — in one place?
Follow these steps to modify the Synopsis and Titles format (discussed in the section “Exporting Special Types of Output,” earlier in this chapter) to create a Notes outline, instead:
1. Select the Formatting tab.
2. In the Synopsis column, deselect all the check boxes.
This step excludes the Synopses from the list.
Option-click (Alt-click in Windows) any check box in a column to select or deselect that column for all rows.
3. In the Notes column, select the check box for each item level.
4. From the Compile For drop-down list, select the desired output type.
5. Click Compile.
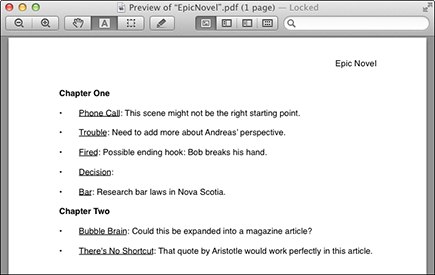
Your output should look similar to Figure 13-12. Notice that even if a document has no notes, the title still appears in the outline.
Figure 13-10: Text document Level 2 selected.
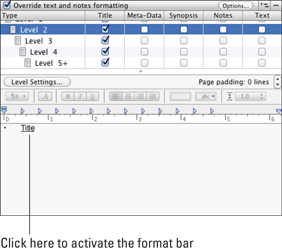
Figure 13-11: A simple outline without numbering.
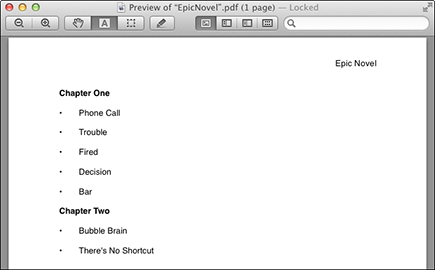
Figure 13-12: A list of document notes.
..................Content has been hidden....................
You can't read the all page of ebook, please click here login for view all page.