To get started with a build definition, follow these simple steps:
- Open the Pipelines menu.
- From this menu, click on Builds. Here, you will be presented with a button to create a new build. After clicking on this button, a new view for creating a build will open, as in the following screenshot:
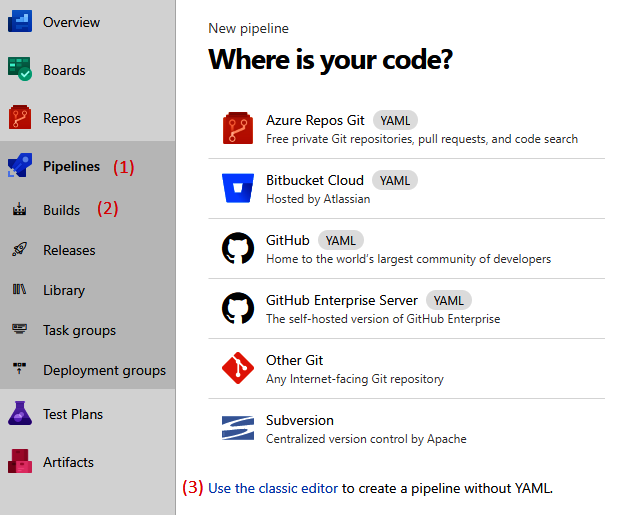
- You will then be guided to the new YAML experience, but you can still opt to go back by choosing the classic editor.
After choosing the classic editor, you can configure how to connect to the source control. The classical editor is the editor that is visible in all of the screenshots in the following sections.
Many source control systems are supported. If you are working with a hosted Git repository, pick your specific product, if available, and only choose Other Git if your product is not available; currently, GitHub, GitHub Enterprise Server, and BitBucket Cloud are supported. The reason for this is that continuous integration using Other Git works by using a polling model, where all the specific products use their known integration webhooks. The following example works with a Git repository that is in the same Azure DevOps instance.
When you select the Pipeline header, you can set the name of the build definition and select an agent pool that the phases will run on by default. Agents take care of the actual execution of your tasks and will be looked at in more detail in the Agents and agent queues section of this chapter.
Below the Pipeline header, you can see the chronological layout of your build definition. First up is downloading sources. Here, you can once again choose to connect to a source control system. You can also specify more advanced settings that relate to the way sources are fetched, such as whether to clean the build directory first, select a branch, or add tags.