Adding an agent is done in two steps:
- Download and extract the agent runtime. You can find the agent runtime by going to the section with the overview of the agent pools and opening the details of any private agent pool. After the details of the pool are opened, click on New agent in the top-right corner:
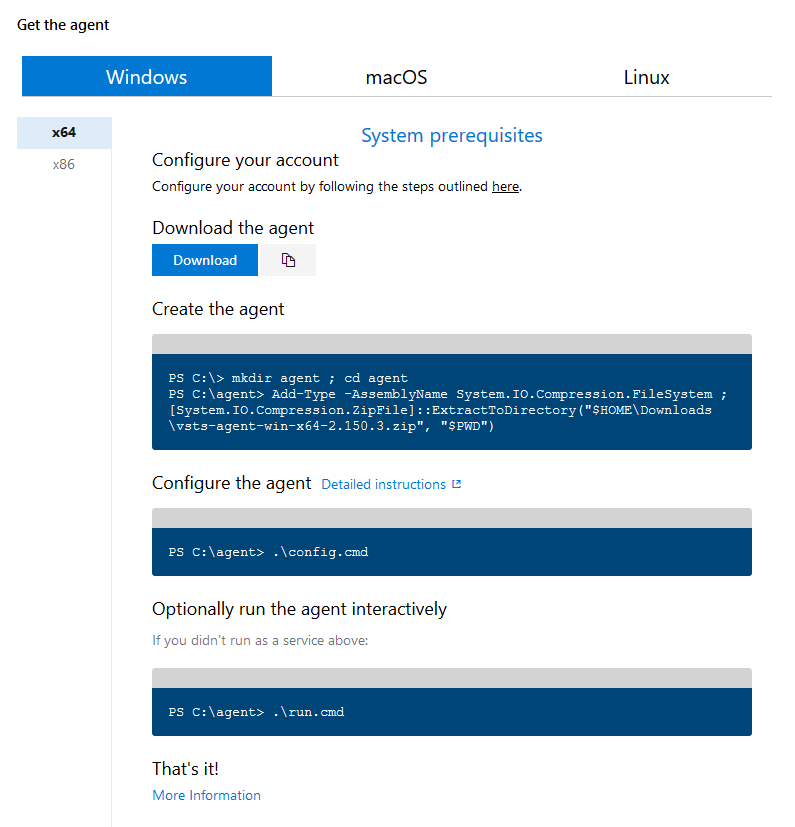
- In the dialog that opens, you can download a ZIP file with the agent and instructions for extracting and installing the agent.
During the configuration phase, you will be prompted to authenticate with your Azure DevOps organization and to provide the name of the agent pool you want to install the agent in. While there are x86 and x64 agents available, it is recommended that you work with the x64 agent unless you have a specific reason not to.
To remove agents from the pool, you can use one of two methods:
- You can return to the PowerShell command line, just as you did for the installation, and use the following command:
.
emove.cmd
- As an alternative, you can also remove agents from the agent pool overview using the Agents tab. Go to Project Settings | Agent pools (see label 1 in the following screenshot) | Agents (see label 2 in the following screenshot) and then select the options button (see label 3 in the following screenshot) on the agent you want to remove. Then, click Delete (see label 4 in the following screenshot):
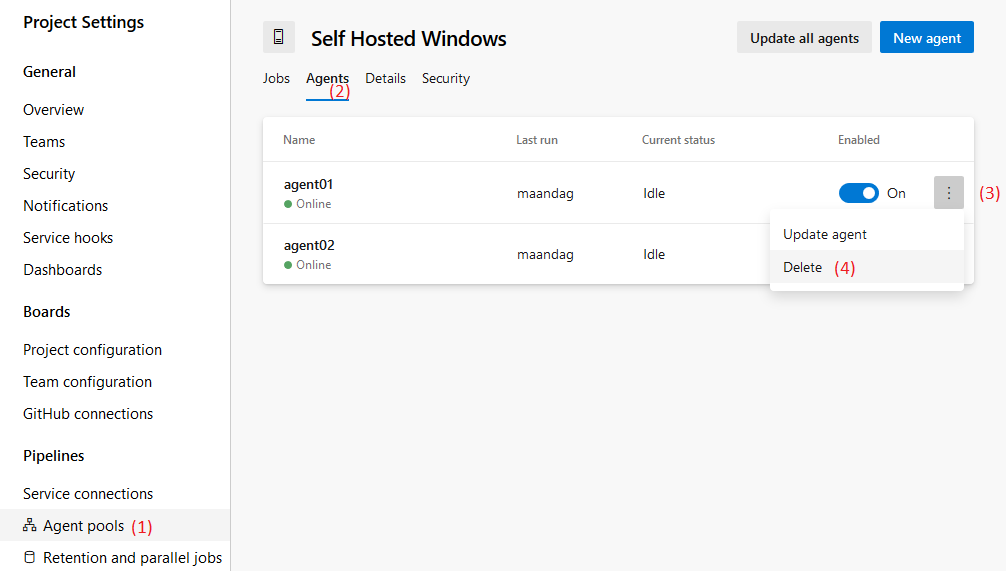
In the preceding screenshot, you can see the steps to remove an agent using the interface. Be aware that this does not clean up the binaries and any files on the host machine; however, if a machine that is hosting an agent breaks down or a VM is removed, then this is the only way to remove the agent.