Below the source's node, you can add one or more jobs that will perform the bulk of the work that you want to perform. Jobs can be added using the ellipsis on the pipeline header. There are two types of jobs available:
- Agentless jobs: Agentless jobs can be used to run tasks that need an agent.
- Agent jobs: Agent jobs are used to run tasks that require an agent to run on, which is the case for the bulk of the tasks.
Some examples of agentless tasks are as follows:
- Waiting for manual approval before continuing
- Inserting a delay before proceeding
- Calling a REST API
- Calling an Azure function
The main benefit of an agentless job is that it does not keep an agent occupied while running. This frees the agent up to do other work, meaning that you need fewer agents, which can save costs. Also, the number of agents that you can use concurrently is governed by the number of parallel pipelines that you have bought in Azure DevOps. Limiting the number of agent jobs will save money here as well.
Let's go over the process of configuring a job:
- Select any job. You will see the view shown in the following screenshot. In this view, you can change the name of the job and, for agent jobs, override the agent pool to execute this job on:
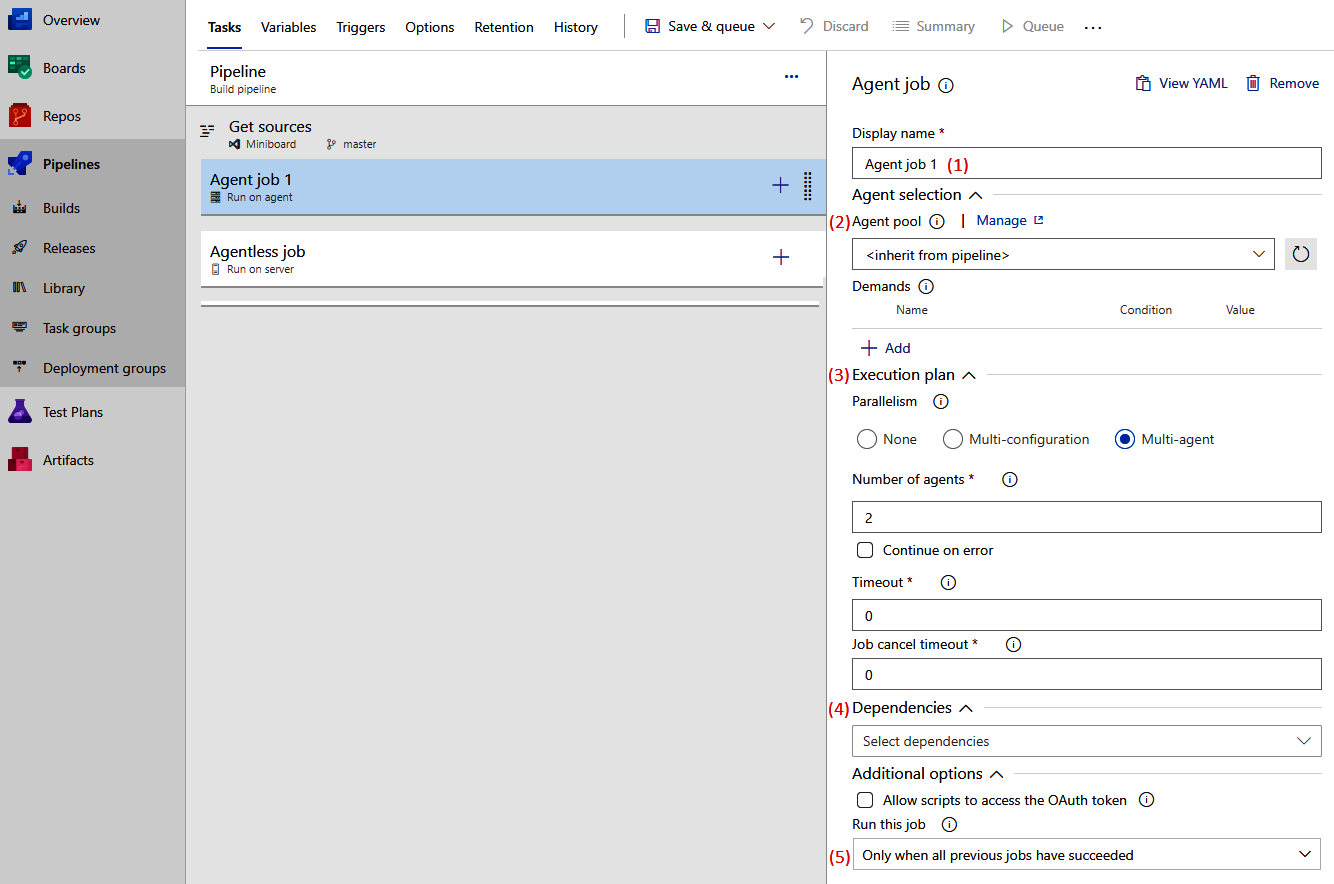
- Next, specify which agent pool to use for running the job. Here, it also specifies the demands that you have of the agent that will execute this job. Demands will be discussed in the Agents and agent queues section of this chapter.
- As part of the execution plan for an agent, you can specify Parallelism and choose one of three options:
- None: This will just execute all the tasks you add to the agent job one after another on the same agent.
- Multi-configuration: Here, you can specify a series of variables that determine the number of variations of the build to run. This is useful if you want to create, for example, x86 and x64 builds from the same code.
- Multi-agent: Here, you can specify the number of agents that will run the same tasks in parallel.
- Next, you can specify one or more dependencies. These are the other jobs that need to be completed before the selected job runs.
- Also, for any job, you can specify how to cope with errors in previous jobs by telling it to continue or stop.
As an alternative to steps 3 and 4, you can also specify a custom expression to specify whether a job should run. This expression should evaluate to a Boolean and support rudimentary operations, such as or(), and(), or eq(). The following is an example condition:
and(succeeded(), ne(variables['Build.SourceBranch'], 'refs/heads/master'))
This condition specifies that the job will only run when all previous jobs have succeeded and the build is not started from the master branch. A link to a detailed description of the conditions syntax is included at the end of this chapter.
Agentless jobs have fewer options available than agent jobs. For example, it is not possible to execute the same build for multiple variable values in parallel.