
The OVA can be deployed through vSphere using the Deploy OVF Template from the vSphere UI or using the OVF Tool from the command line. Before powering on the VM for the first time, make sure that Guest OS Customization is enabled for the host to inject the right system and network settings for each of the guest OSes.
The Guest OS Customization Wizard is shown here:

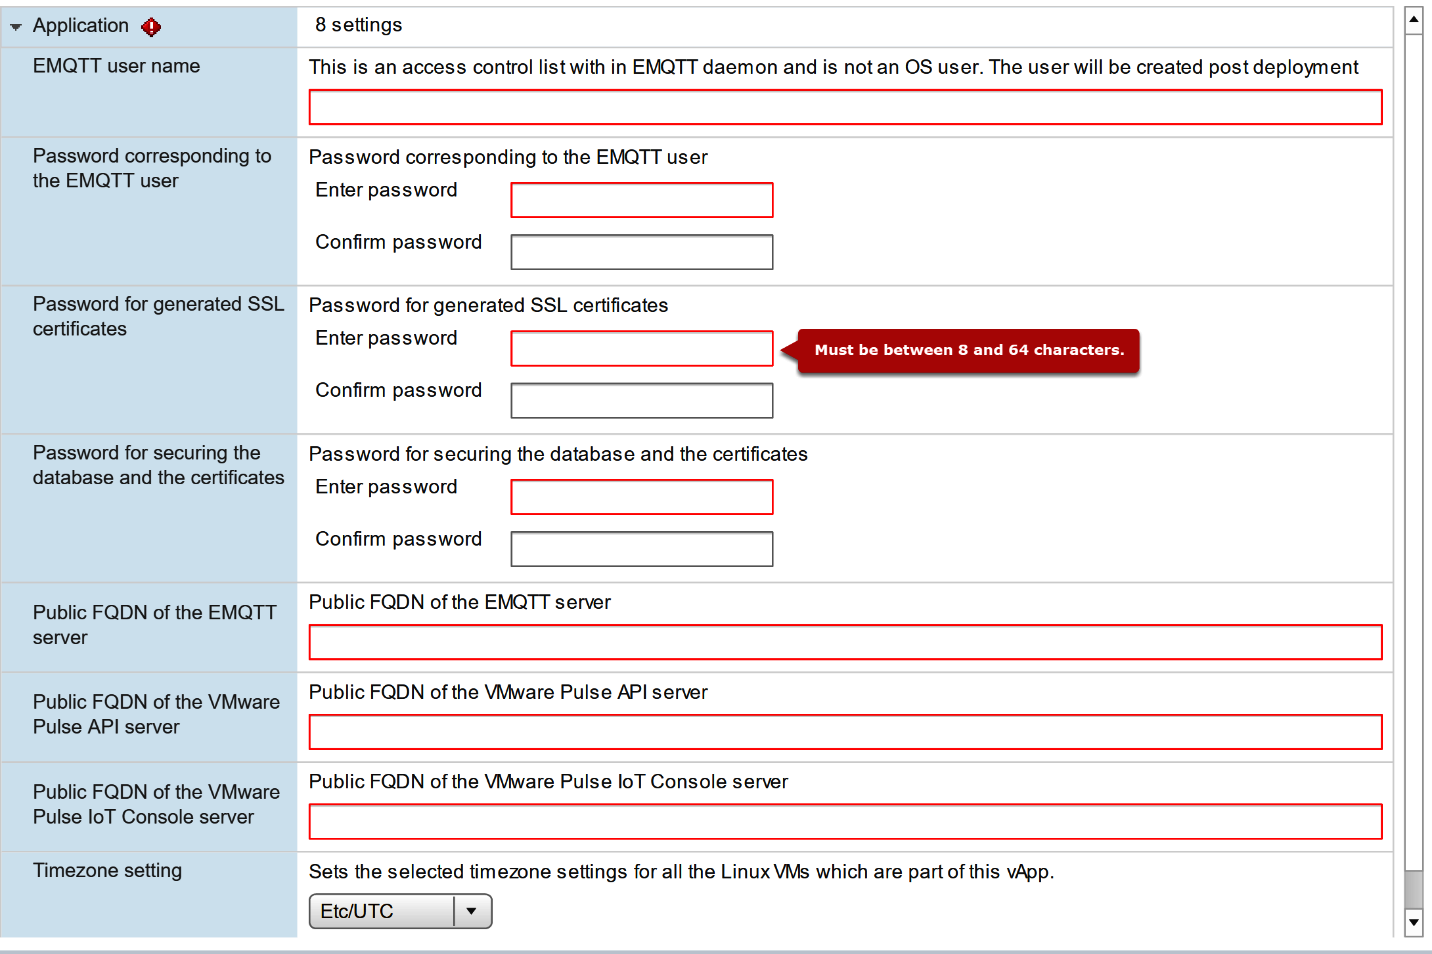
The deployment will also ask for a few properties to help the appliance configure itself to a certain extent. Add an EMQTT credential (username, password) so that the broker starts up with this pre-staged user once the VM starts up for the very first time. This is not a system user but an EMQTT user that the clients can use to connect to the broker. Only one username and password can be configured over this option. Any additional users will have to be created from the command line after logging into the mqttbroker VM. The username and password should be between 8 and 64 characters. It is advised you keep the username purely alphanumeric. This password is not used for any built-in Linux user accounts.
Similarly, the wizard asks for passwords for the IoT API and IoT Console. The password for the IoT API will be used to secure the DB and the generated certificates. The password for the IoT Console is used for the generated certificates alone. The username and password should be between 8 and 64 characters. It is advised you keep the username purely alphanumeric. This password is not used to for any built-in Linux user accounts.
We can use VMWare Pulse IoT API and Console as input to generate SSL certificates by taking the public DNS name for the MQTT broker. These values are used during certificate generation. The name goes into both the CN and SAN sections of the generated SSL certificate. Therefore, it is necessary to freeze the domain names before proceeding with the deployment in case you need to continue using the server with a self-signed certificate.
As an example, here are the features of the following deployment:
- The EMQTT user name and password are vmwareiot and vmwareiot
- The IoT API password for the DB and certificates
- The IoT Console password for the certificates
- Public FQDN of the EMQTT server: demoemqtt.vmwpulse.com
- Public FQDN of the VMware Pulse API server: demoapi.vmwpulse.com
- Public FQDN of the VMware Pulse IoT Console server: democonsole.vmwpulse.com
- The time zone settings can be left as the default
The configuration settings through the Import Wizard are shown here:
We will learn about the installation and configuration of products specific to the Pulse IoT Center. The deployment would need to be done in the following order to address dependencies:
- VMware Pulse Device Management Suite
- VROPs Suite with Helix Adapter Support
- EMQTT broker
- VMware Pulse IoT Center Console (UI)
- VMware Pulse IoT Center API server
- vIDM for Single Sign-On (SSO) support
Before the VMware Pulse IoT Center components are deployed, make sure all computing and networking resources are available in the deployment infrastructure, be it VMware OneCloud or the VMware vCenter. The OVAs do not have the firewalls or iptables rules enabled by default, and are left to the deployment team in case additional security reinforcements or hardenings are needed.